")
Chassis and Suspension
Divide and conquer
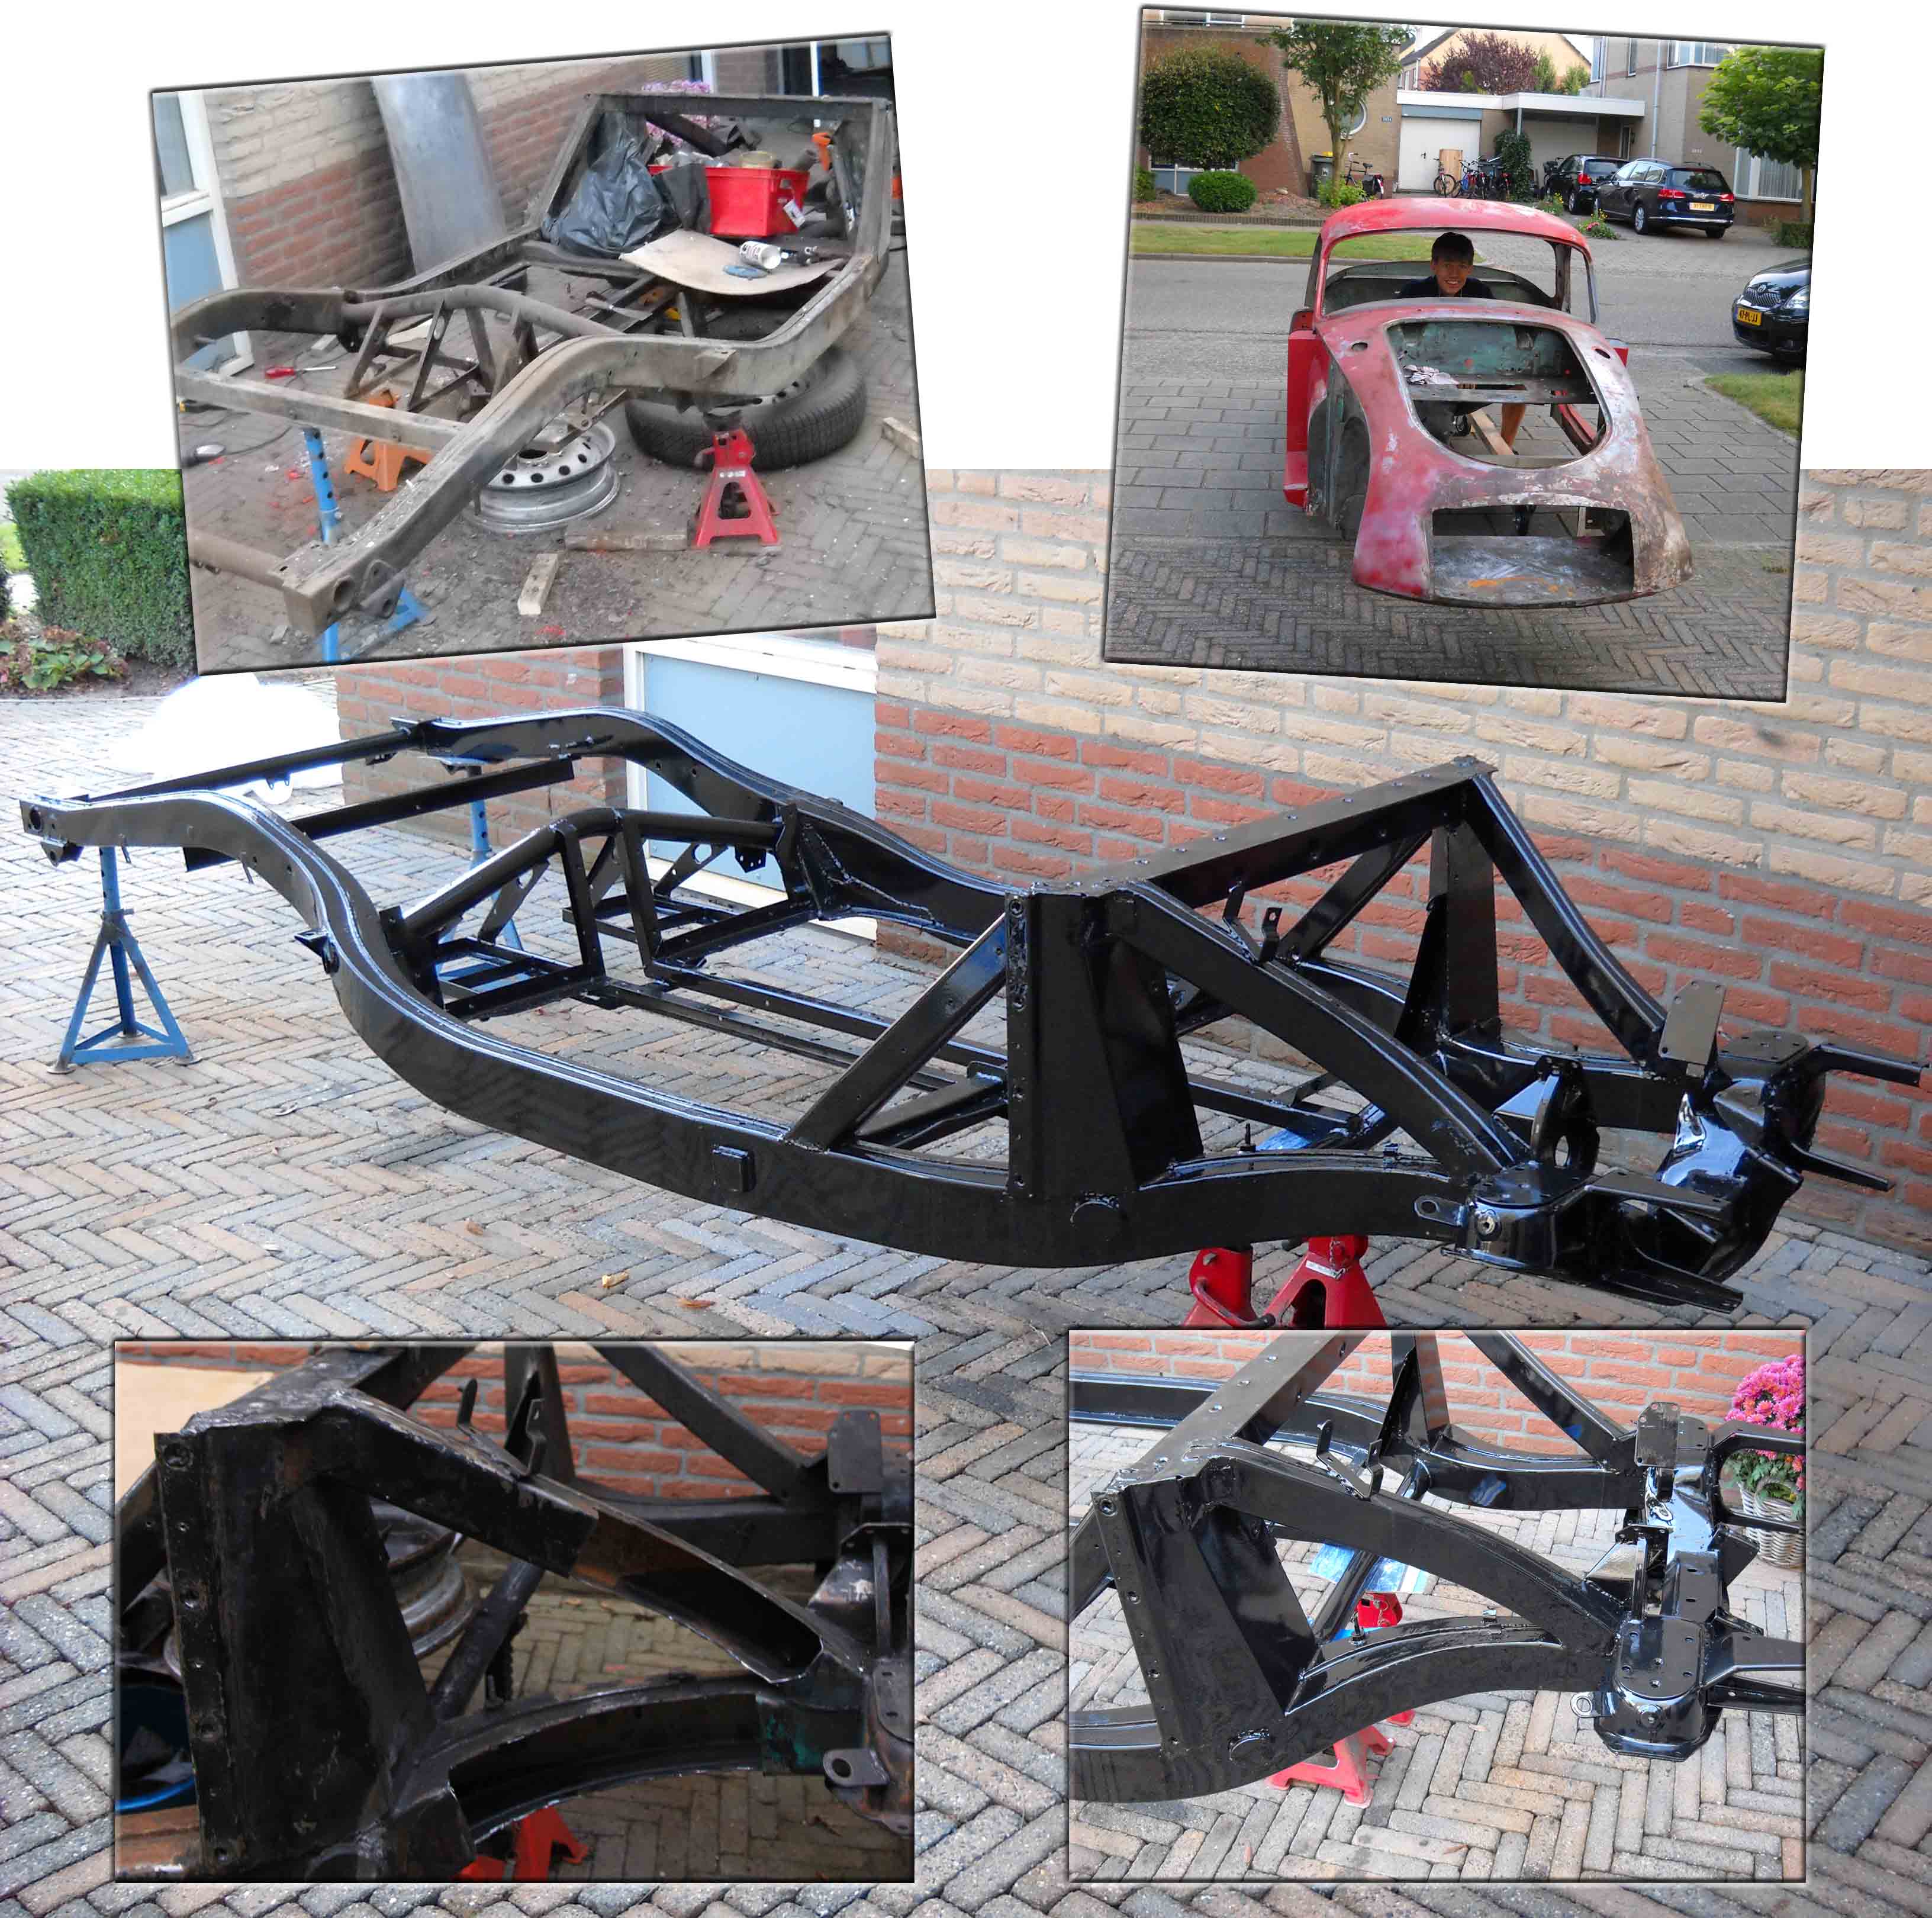 The MGA has a separate chassis and bodyshell, unlike all the modern cars you can see in the regular traffic jams. While working on the bodyshell we kept the bodyshell attached to the chassis for the latter to provide the necessary support. Now with most of the rust damage on the body repaired and replaced with new sheet metal, it is time to remove the shell from the chassis. We asked a couple of strong neighbours to assist and lift the bodyshell from the chassis and placed it on a wooden frame so it can be moved around without too much effort. After that the bodyshell is transported to an expert to blast off the paint using glass beads and coat it with an epoxy primer.
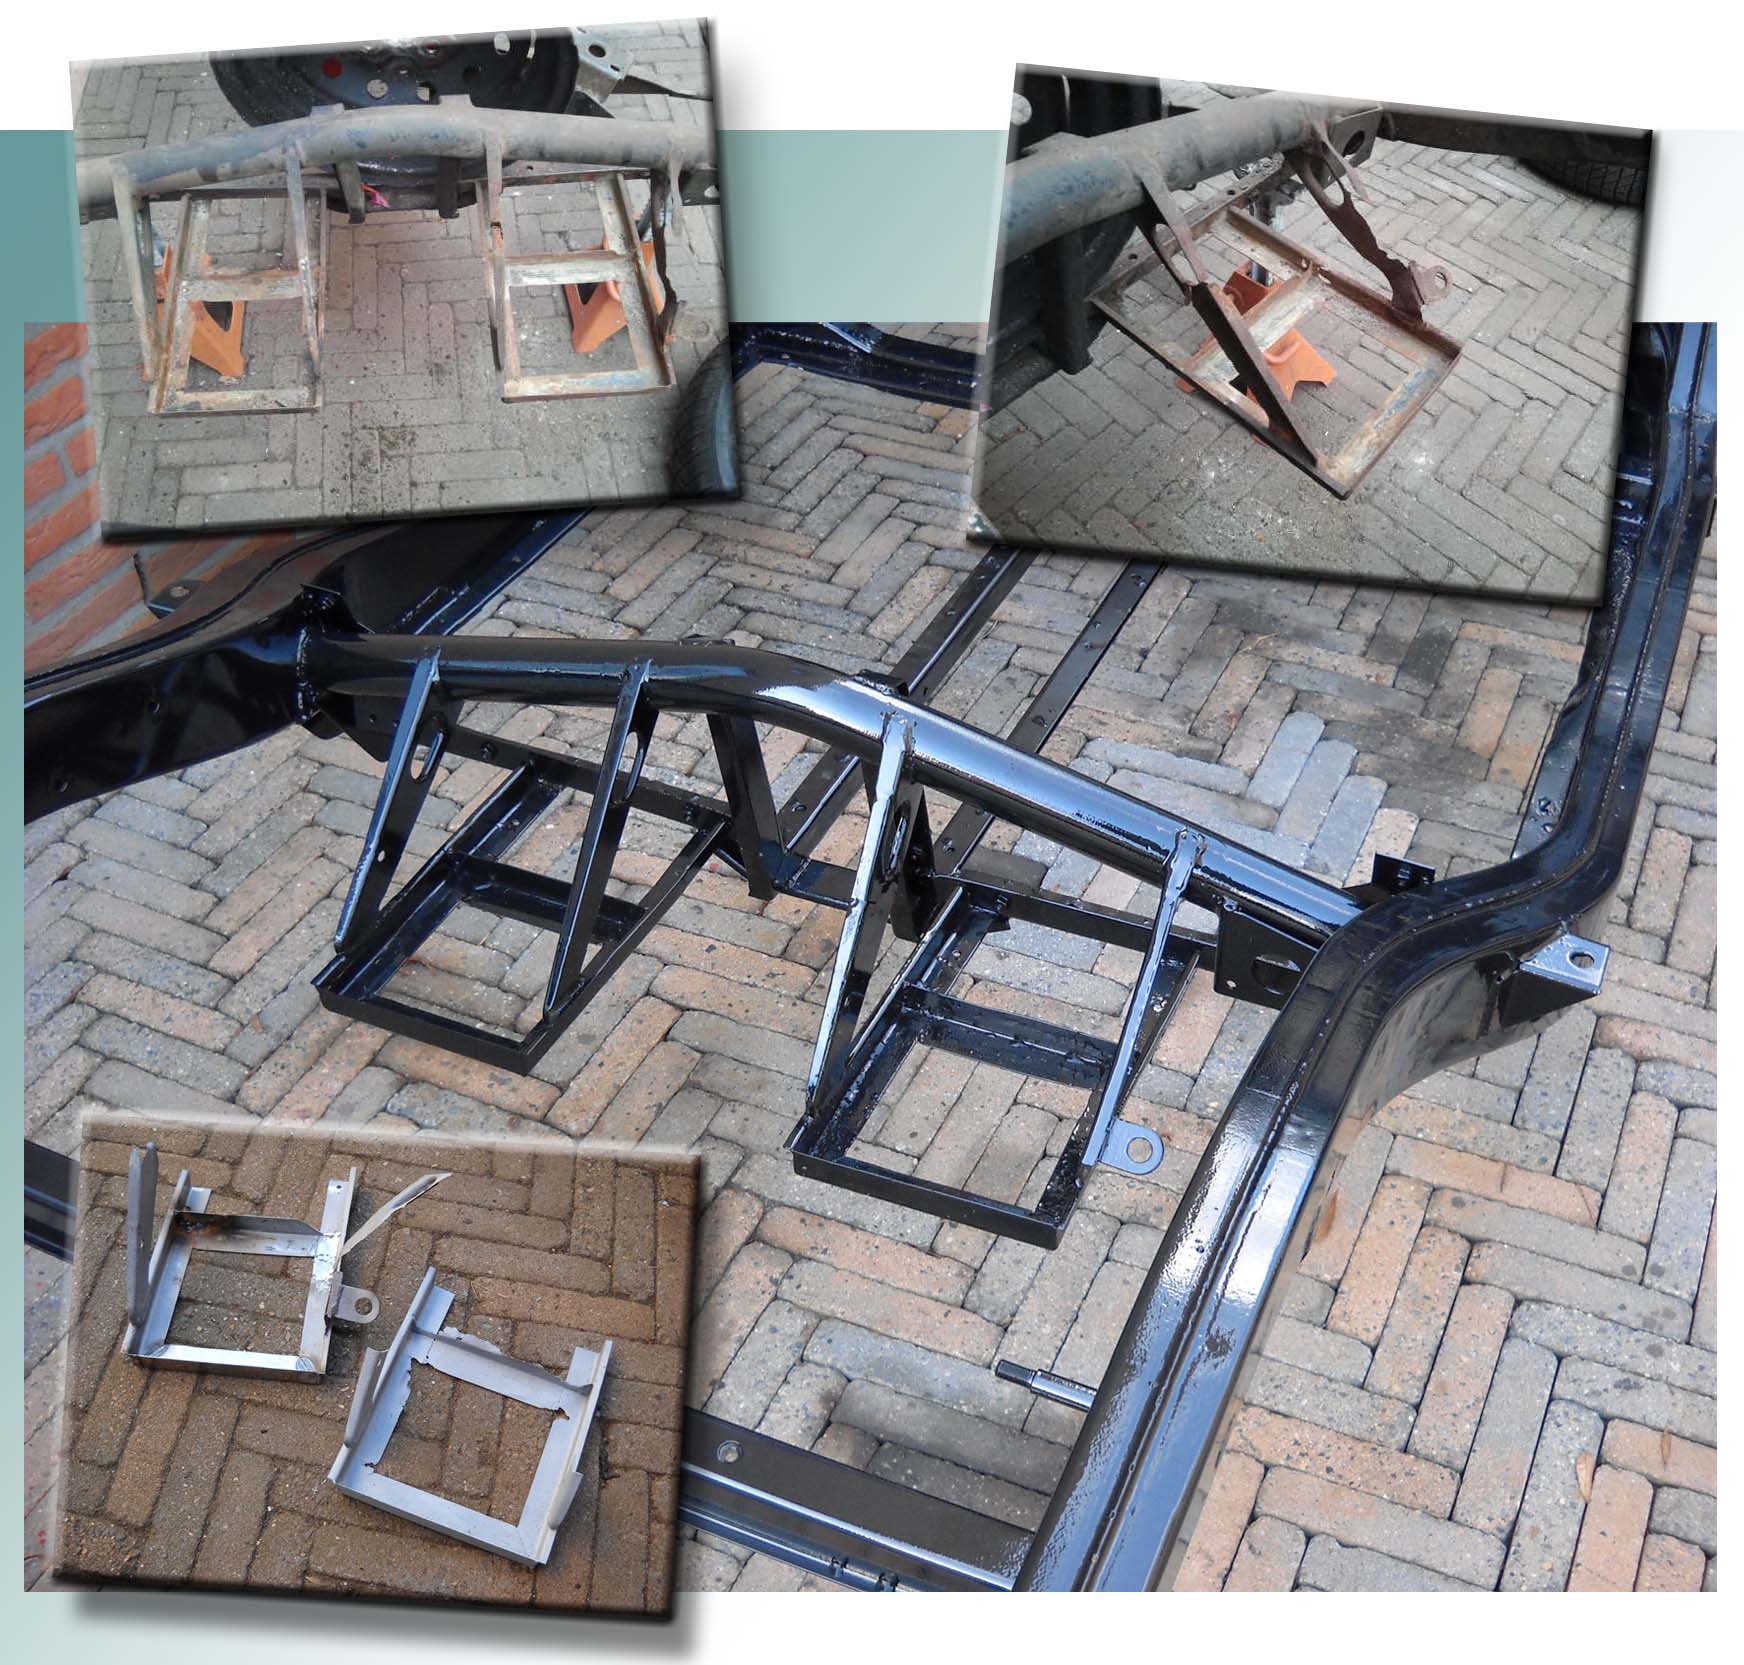 With the bodyshell removed working on the chassis becomes much easier. I cut out some dented parts in the frame to hammer it straight on the bench and weld it back in. Compared with the thin sheet metal of the bodyshell these chassis parts weld much easier. The battery tray was badly rusted. After glass bead blasting the bad parts were cut out and replicated in new sheet metal.
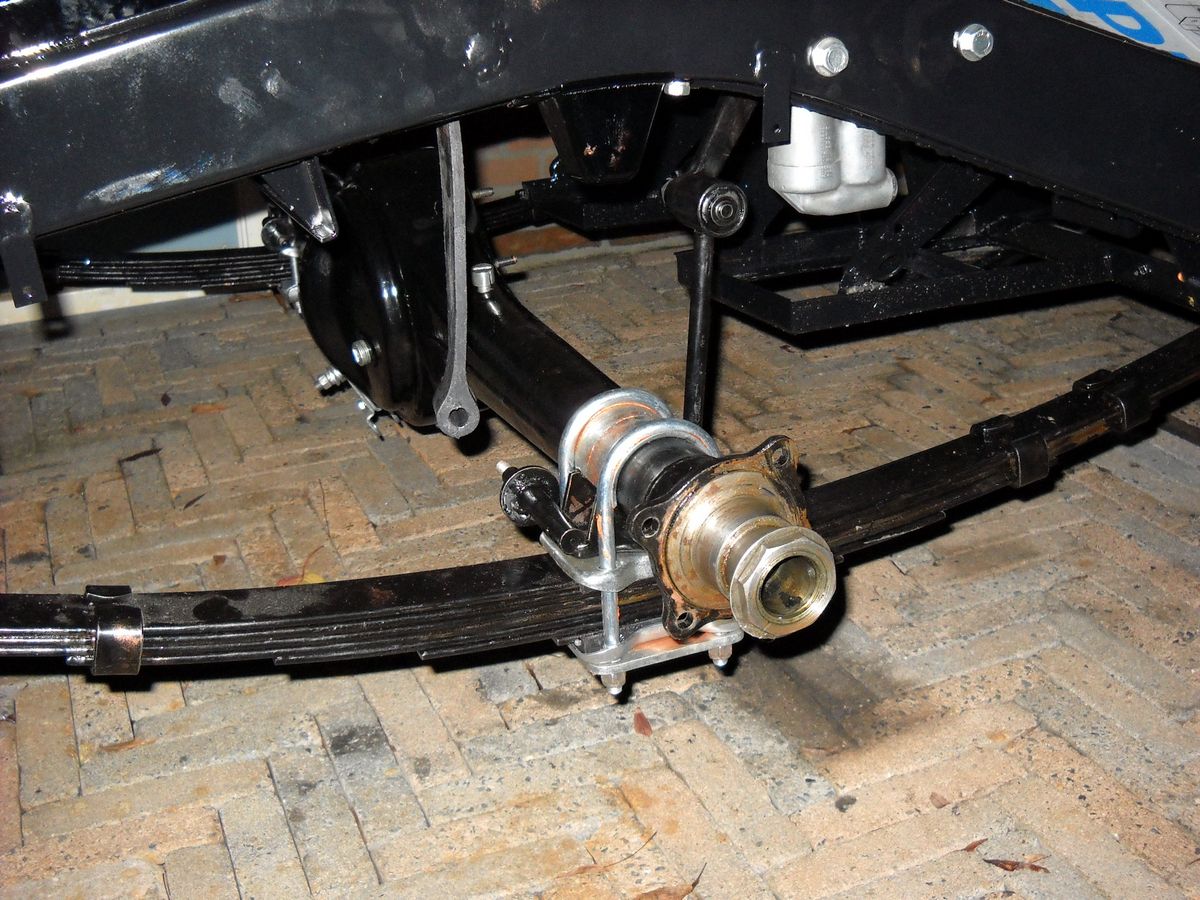
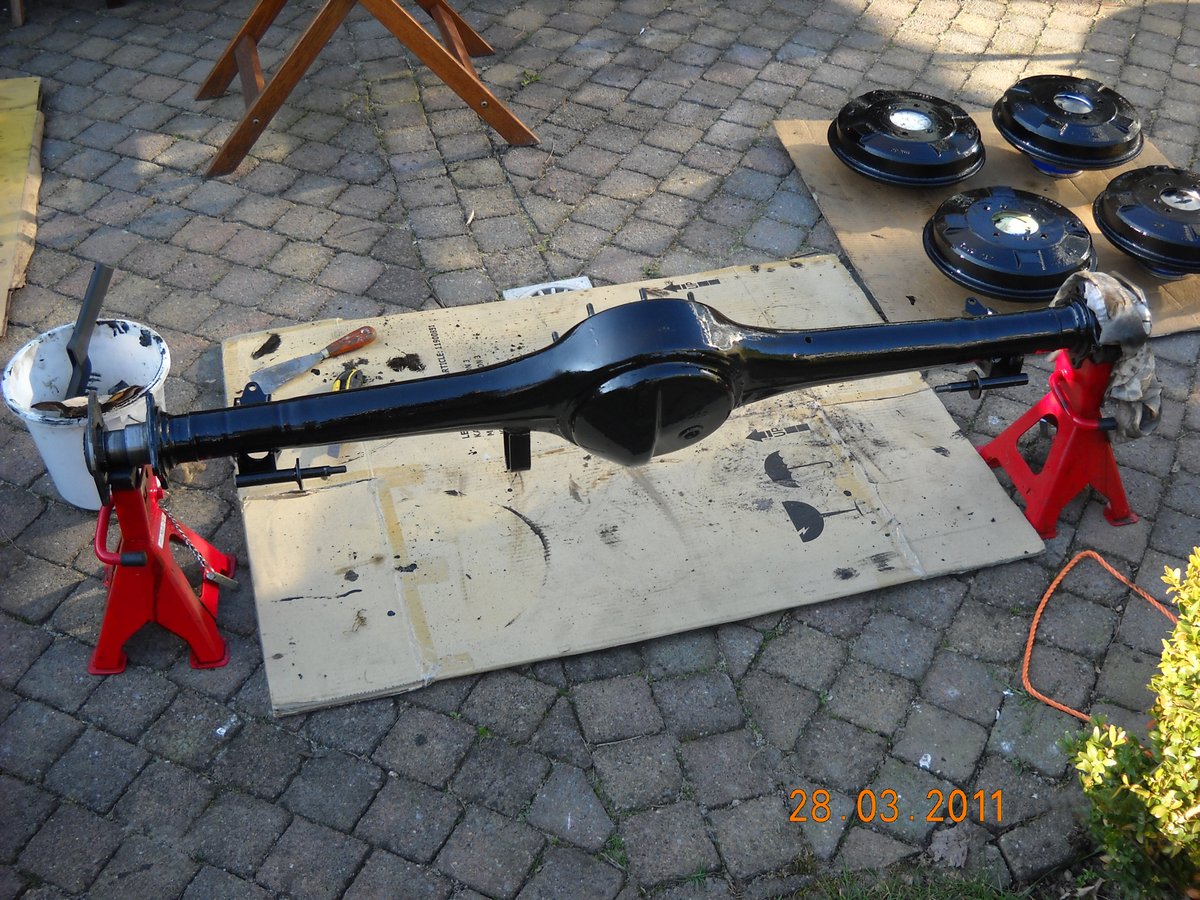
The chassis was in a much better shape as compared with the bodyshell. That is understandable given the much thicker sheet metal used in the chassis. A local paint shop blasted and painted the chassis with the fresh layer of shiny black paint. Once back we could not wait to put the first parts of the rear axle back on the chassis. Cannot wait to start the re-assembly. During cold days we collected all the bolts and nuts for a particular part to make assembly easier and faster. Just like putting together a new car with these clear and newly galvanized bolts and nuts.
Fixing the rear axle
 On a nice day in March Daan and I removed the rear suspension from the car. The gaskets has been leaking a bit and the oil that used to be in the differential housing now settled on the outside of it. Over the years is was able to different types of dust and sand from the California roads. The 30 years in storage turned this mixture into a material that will probably be very suitable to use for an average highways top layer. It took some persuasion to chip it off. The differential itself looks ok. Just new oil seals and gaskets, and of course a new layer of paint.
 We also had a first batch of parts sandblasted: Brake drums, bumper mounts, suspension arms, the metal frame of the dashboard, the fuel tank and the housing of the heater core housing. We put a rust preventive topcoat on top, and so all these parts look like new again. At the same time, all the rusty bolts and nuts have been re galvanized, while parts that were beyond repair are replaced. All bearings will be replaced any ways. Almost all of them made some sounds when turned by hand. Once mounted it is amazing how much noise old bearings van produce: just replace all of them.
Before and after
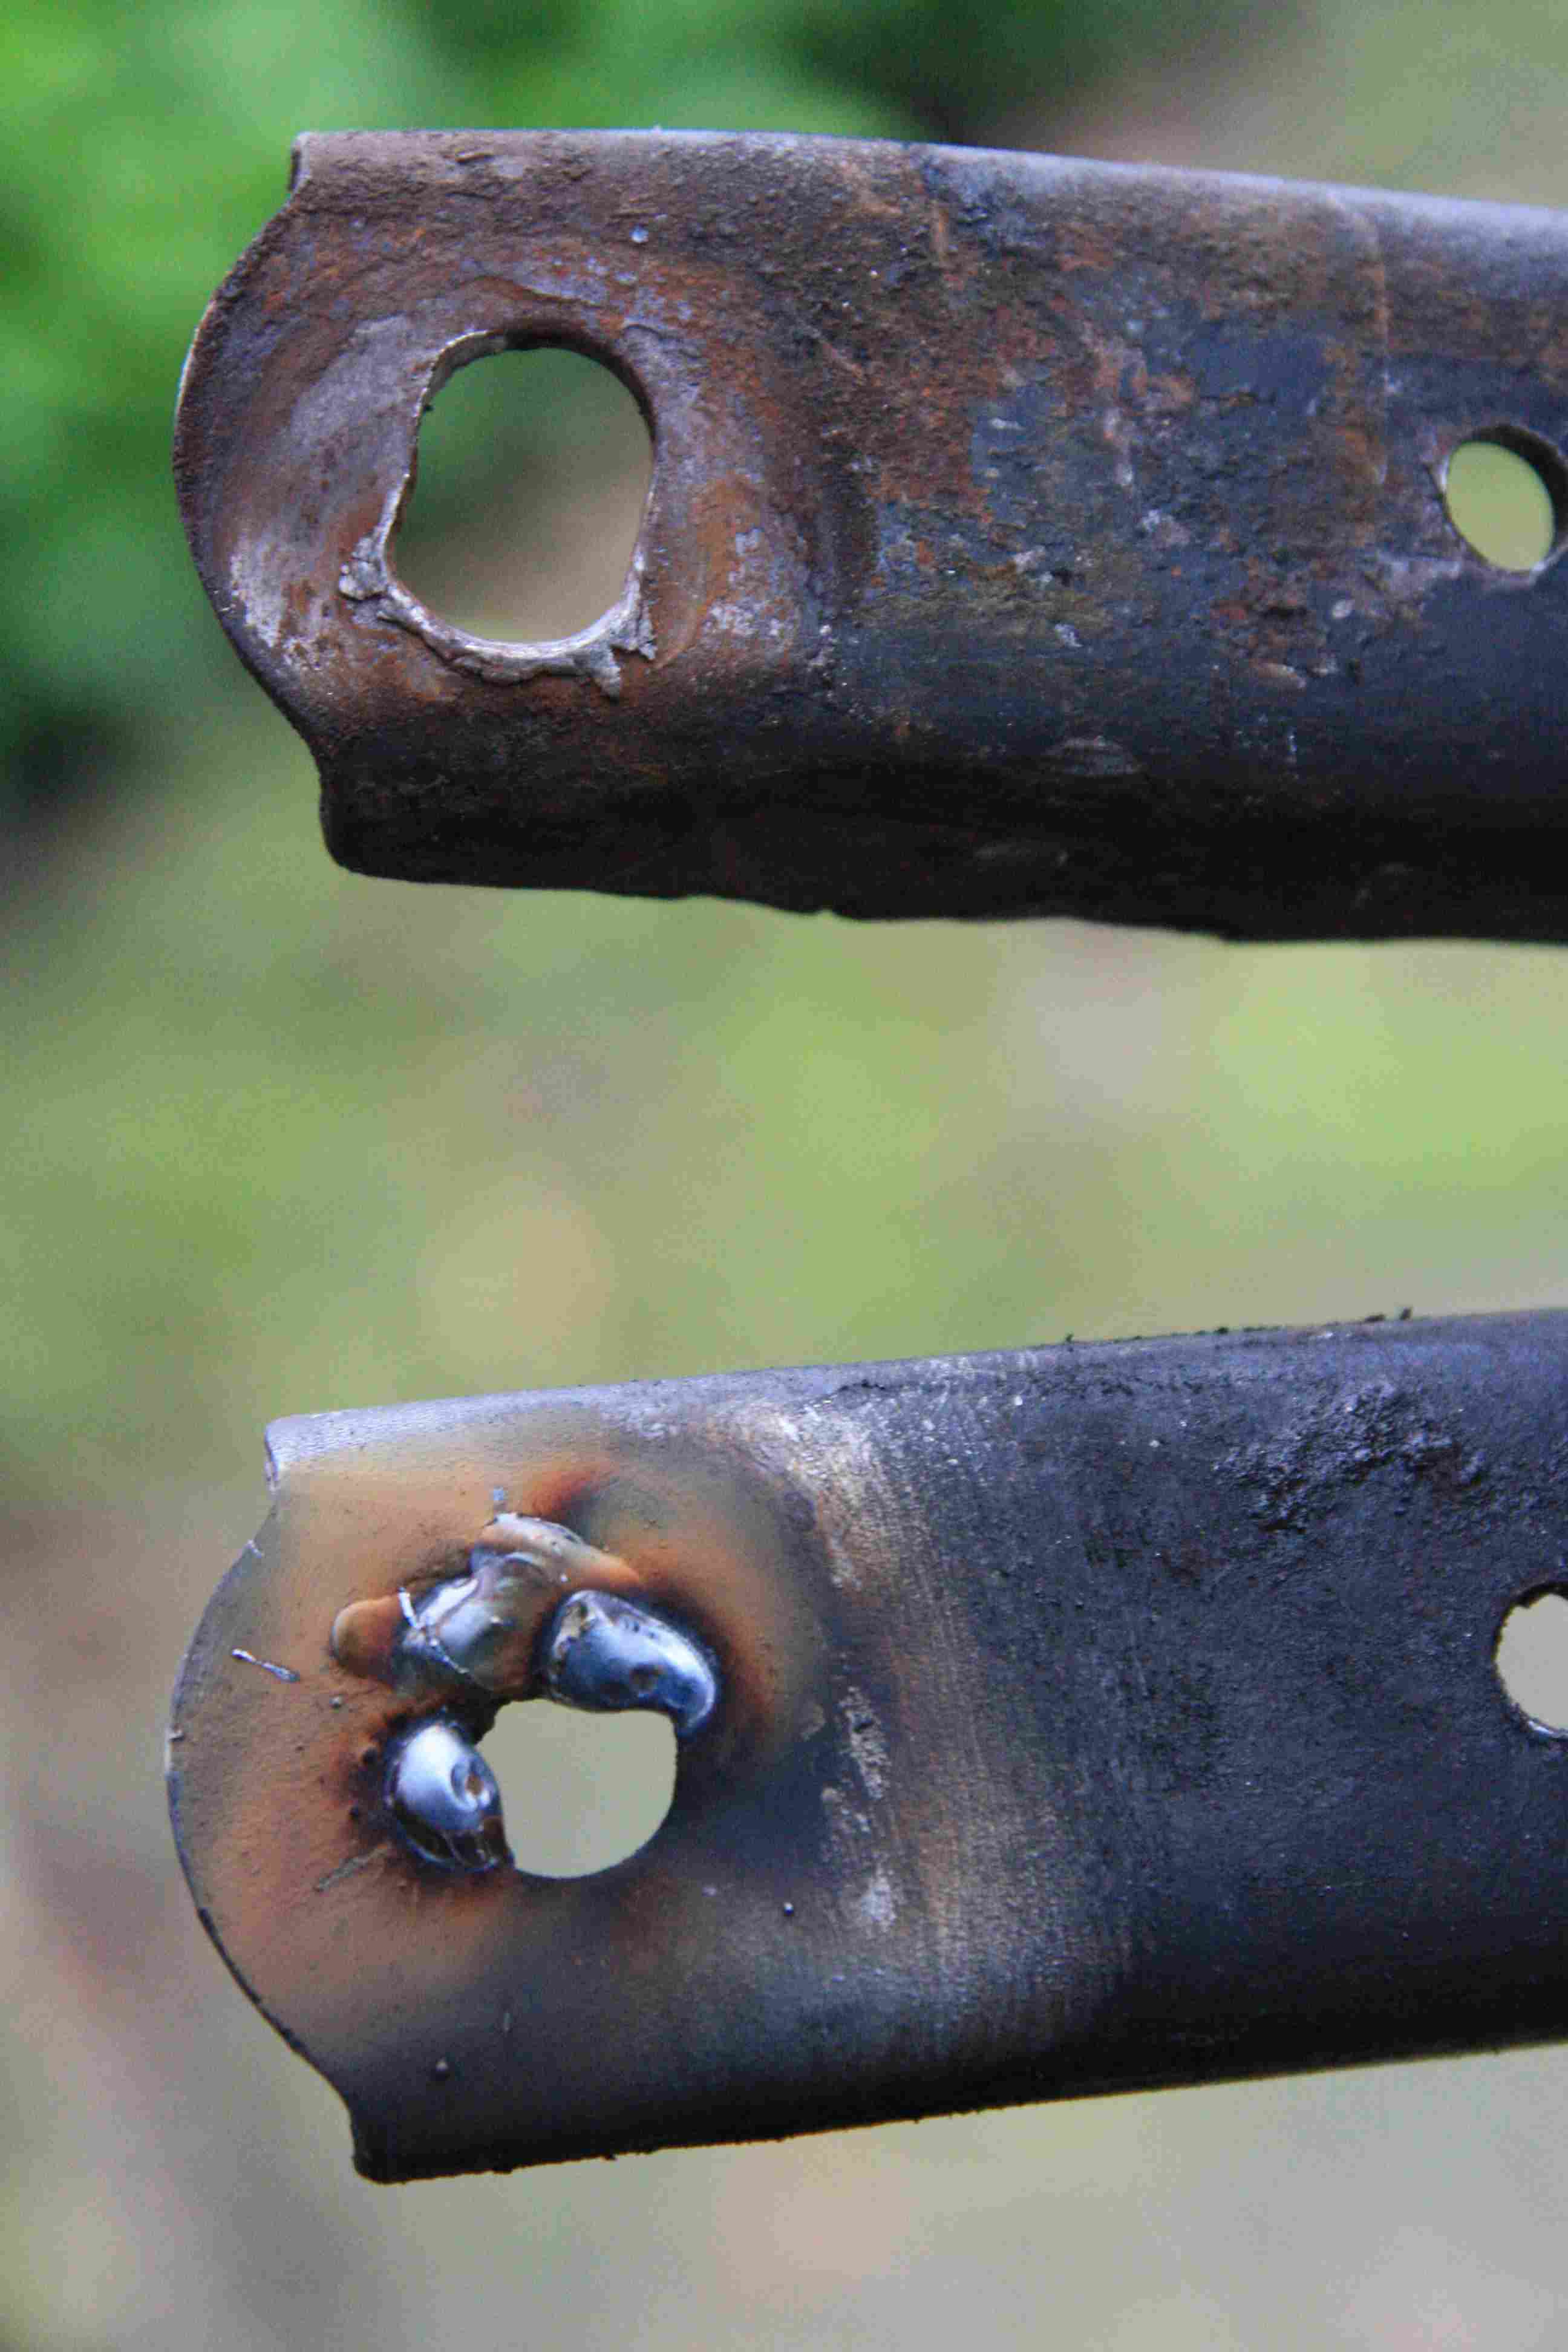
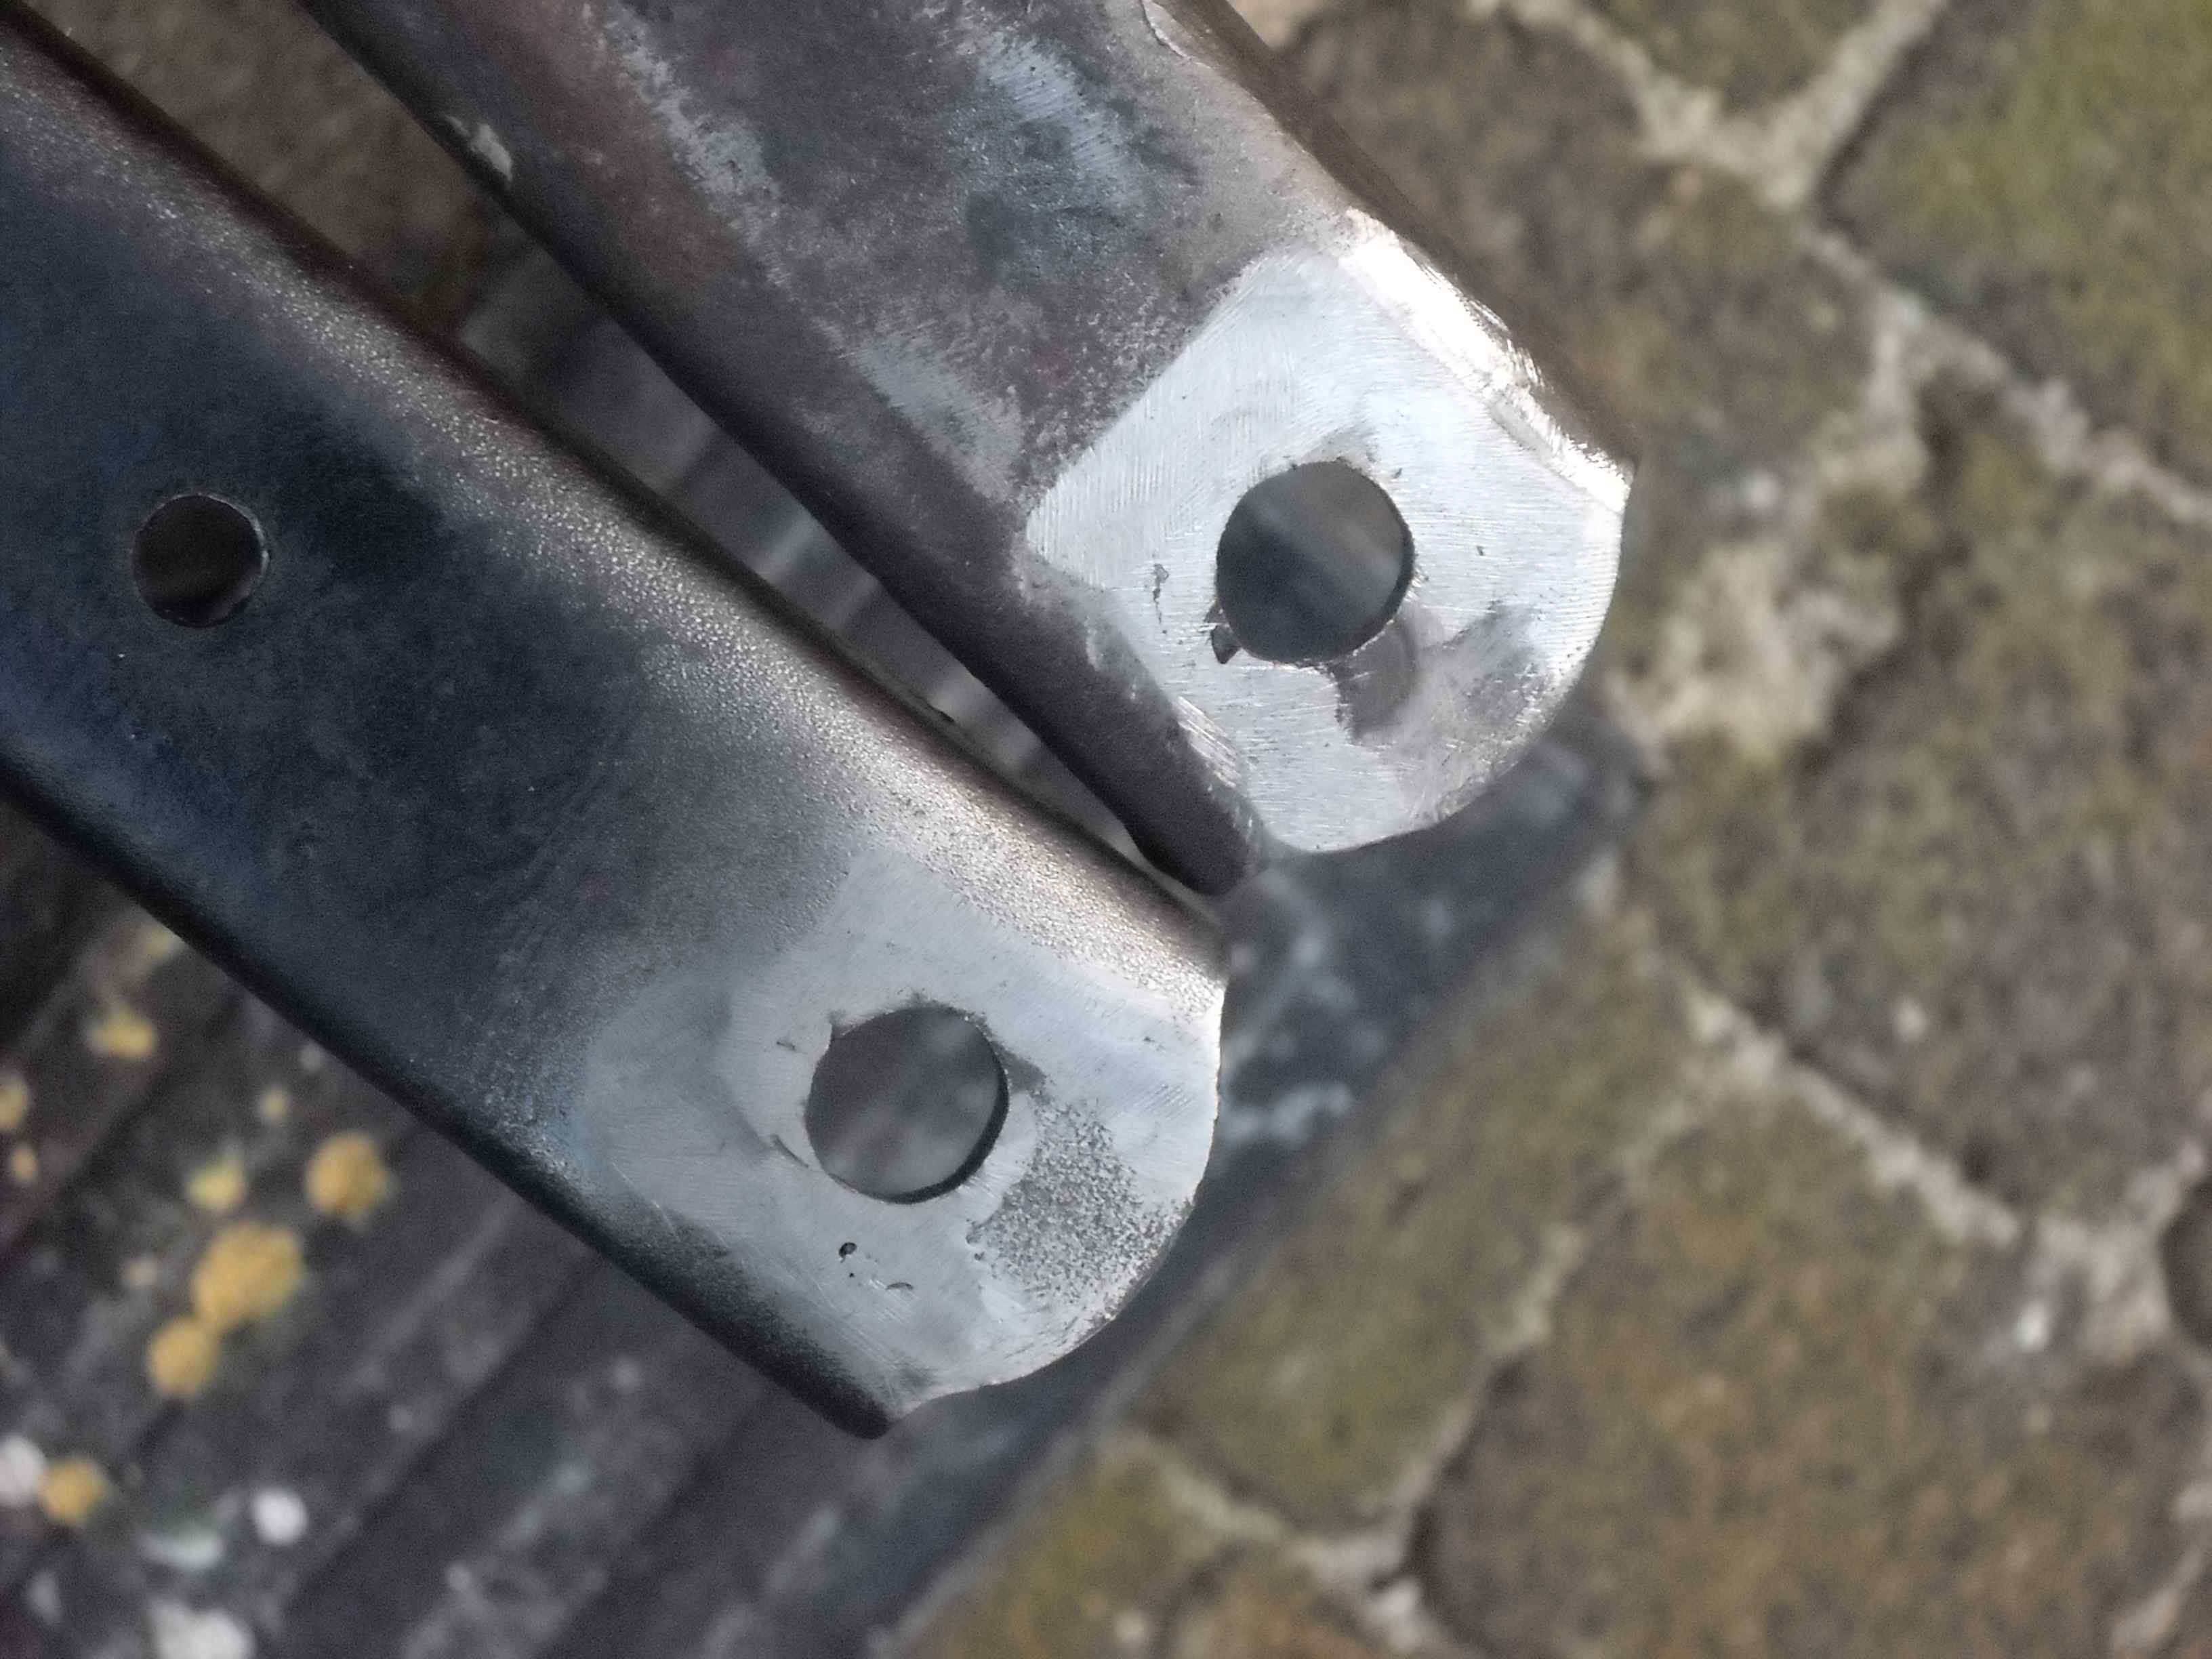 We are making some progress. Not very fast, but that was never the intention. The 'fun' is in the making and restoring. All the front suspension is now removed. Dirty hands and lot of dirty rags to clean it all up. Every piece you grab is grease with sand and dust. The front suspension of an MGA is rather strange. Where other cars have some sort of top bearing, the MG has a swivel pin with a thread. The thread has a left turn on the left-hand side and a right-turn thread on the right-hand front suspension. This car must have had some repair done to it, as the threads were identical. That would make the steering pull to one side on a smooth road. All bushes in the suspension were seized and needed a lot of persuasion to get them removed. You can see that this part requires some maintenance. It does need some grease on regular intervals. As result of the insufficient lubrication a bolt of the lower suspension arm has been worn out. It has been pivoting around the bolt rather than the bush. It would not have been long before the bolt would have been broken! Fixing the lower arm was easy with bit of welding and grinding.
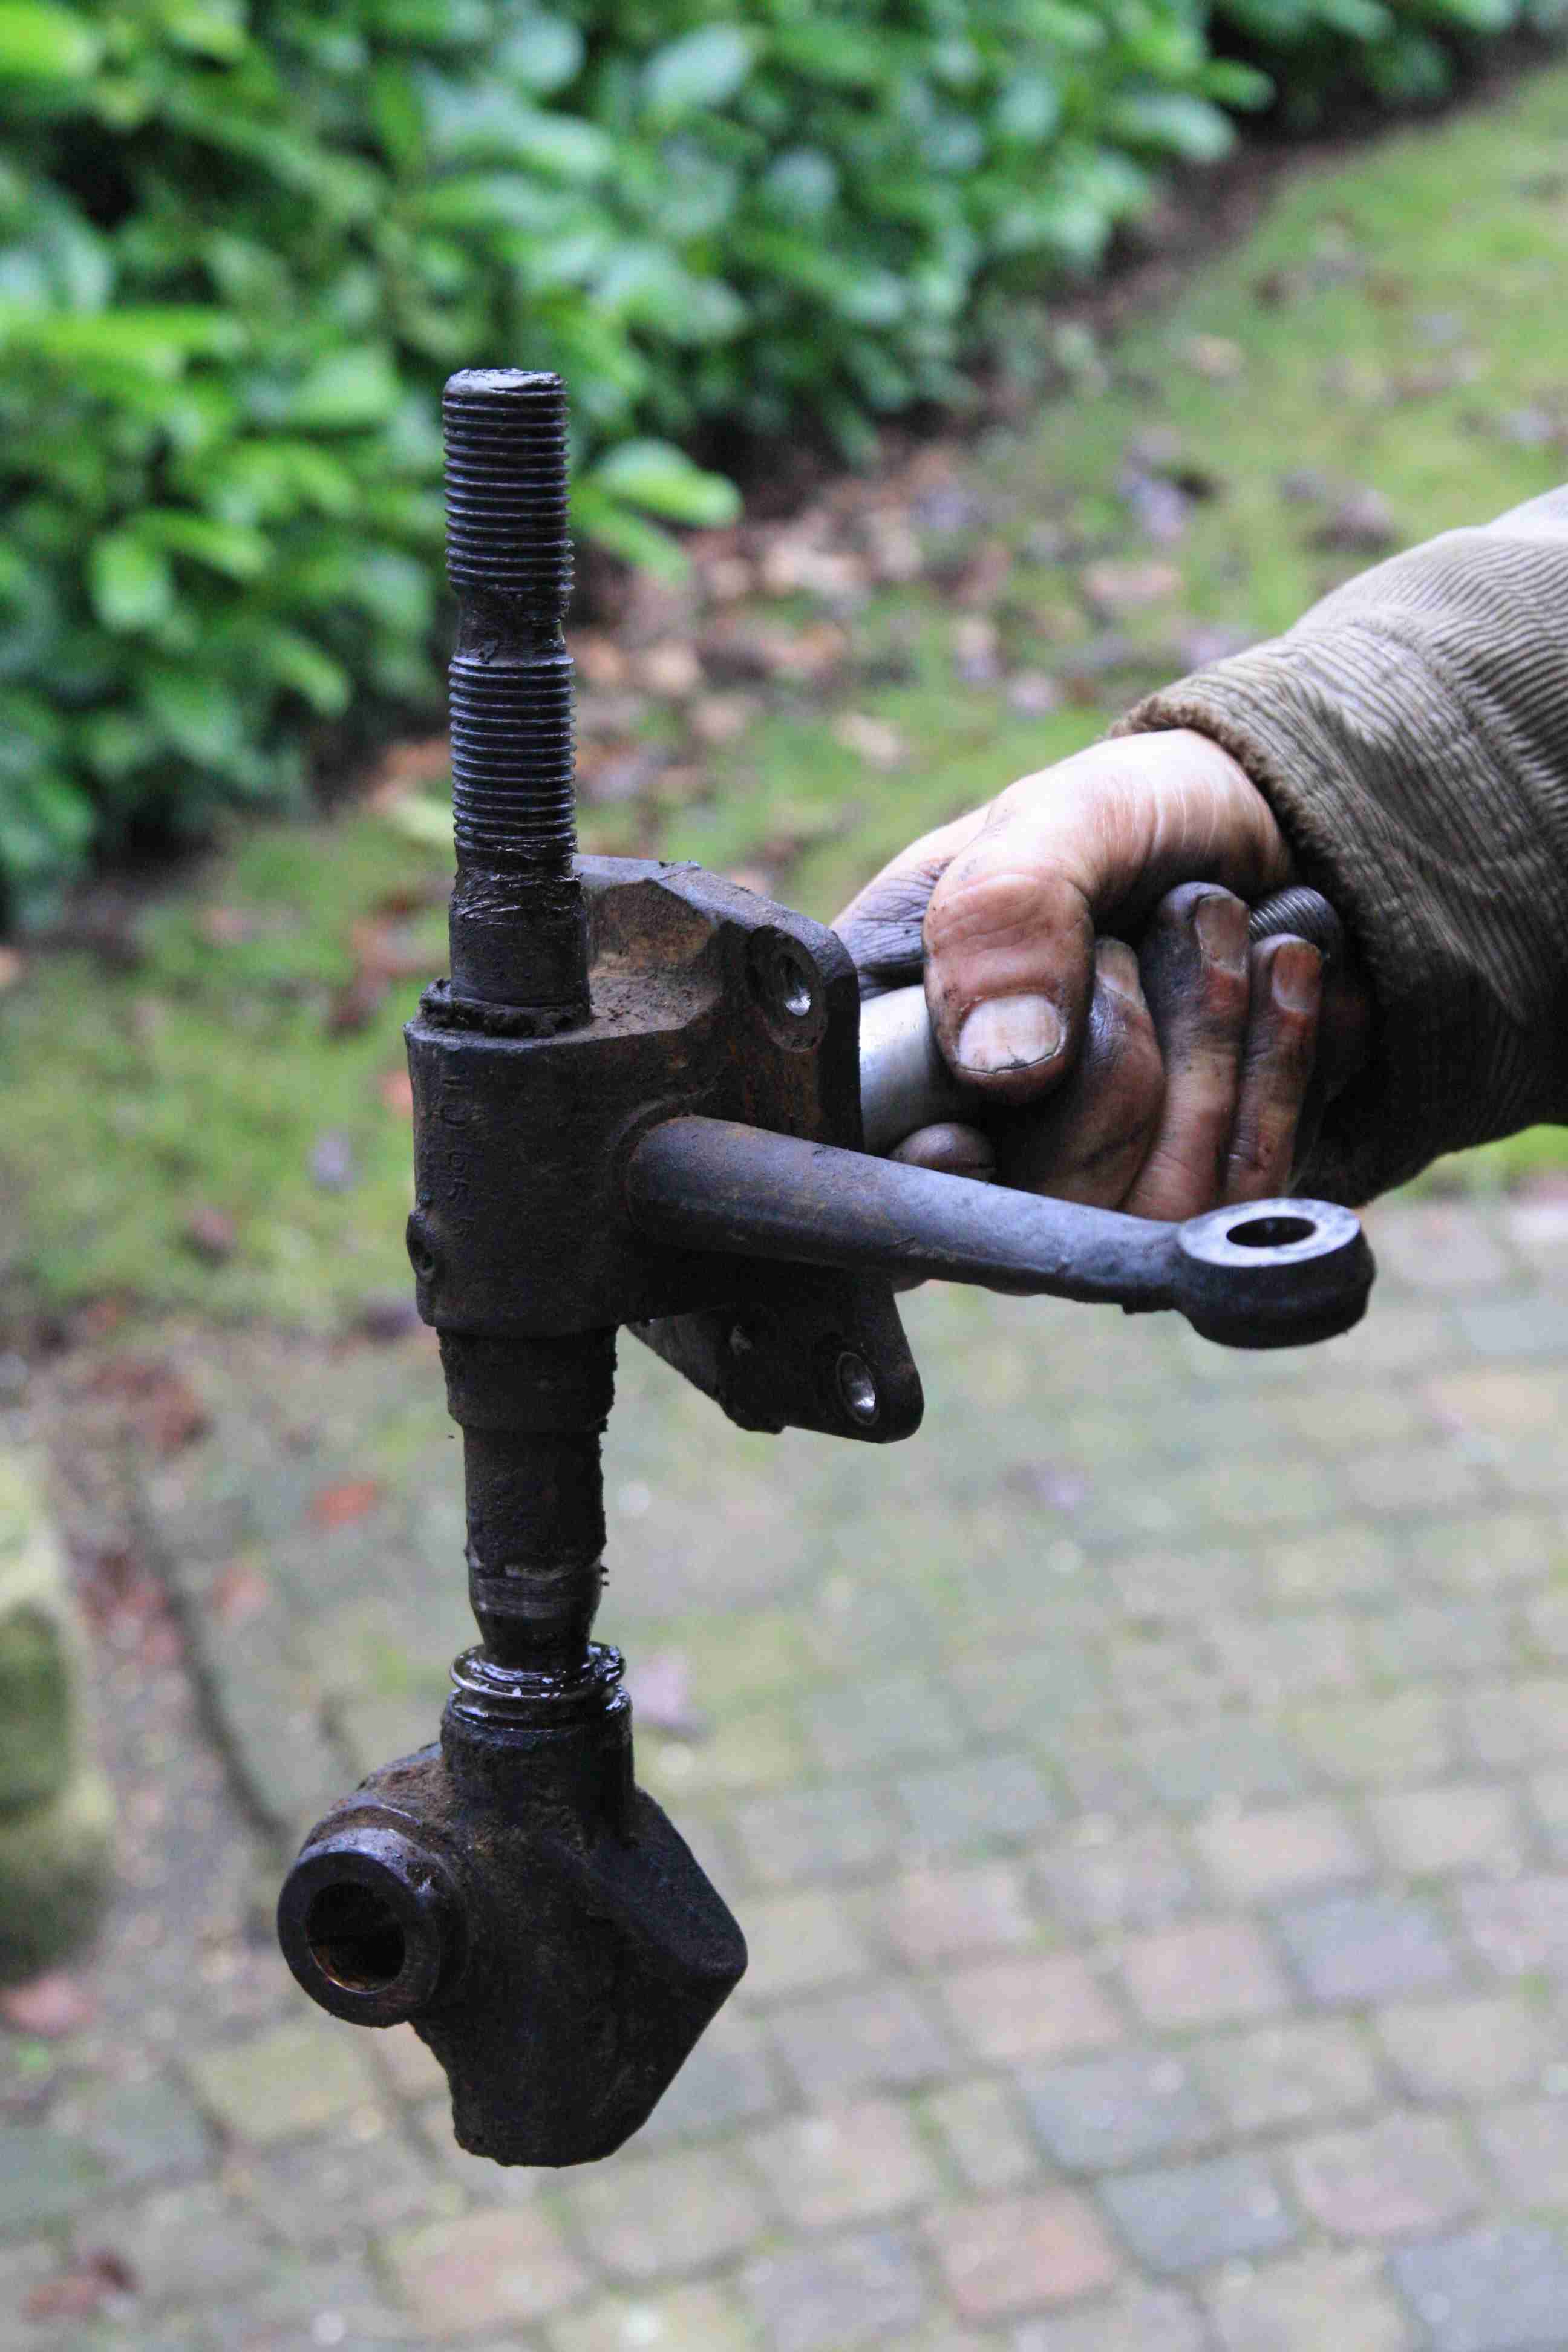
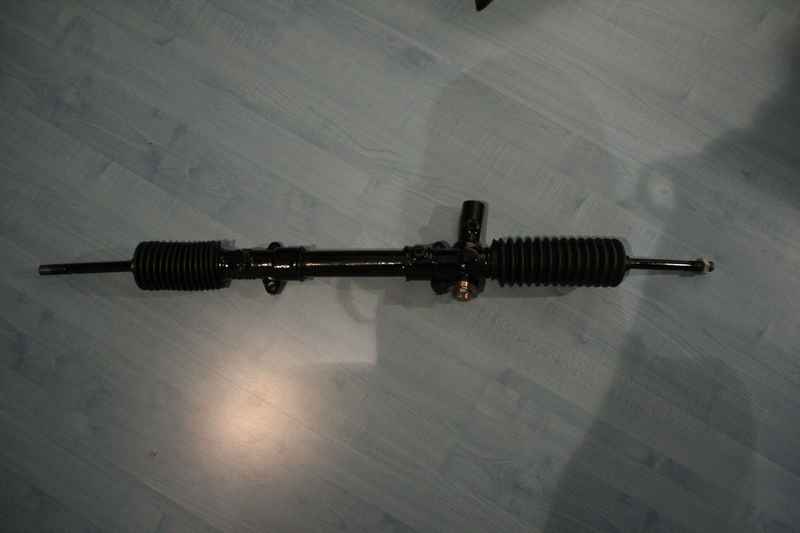
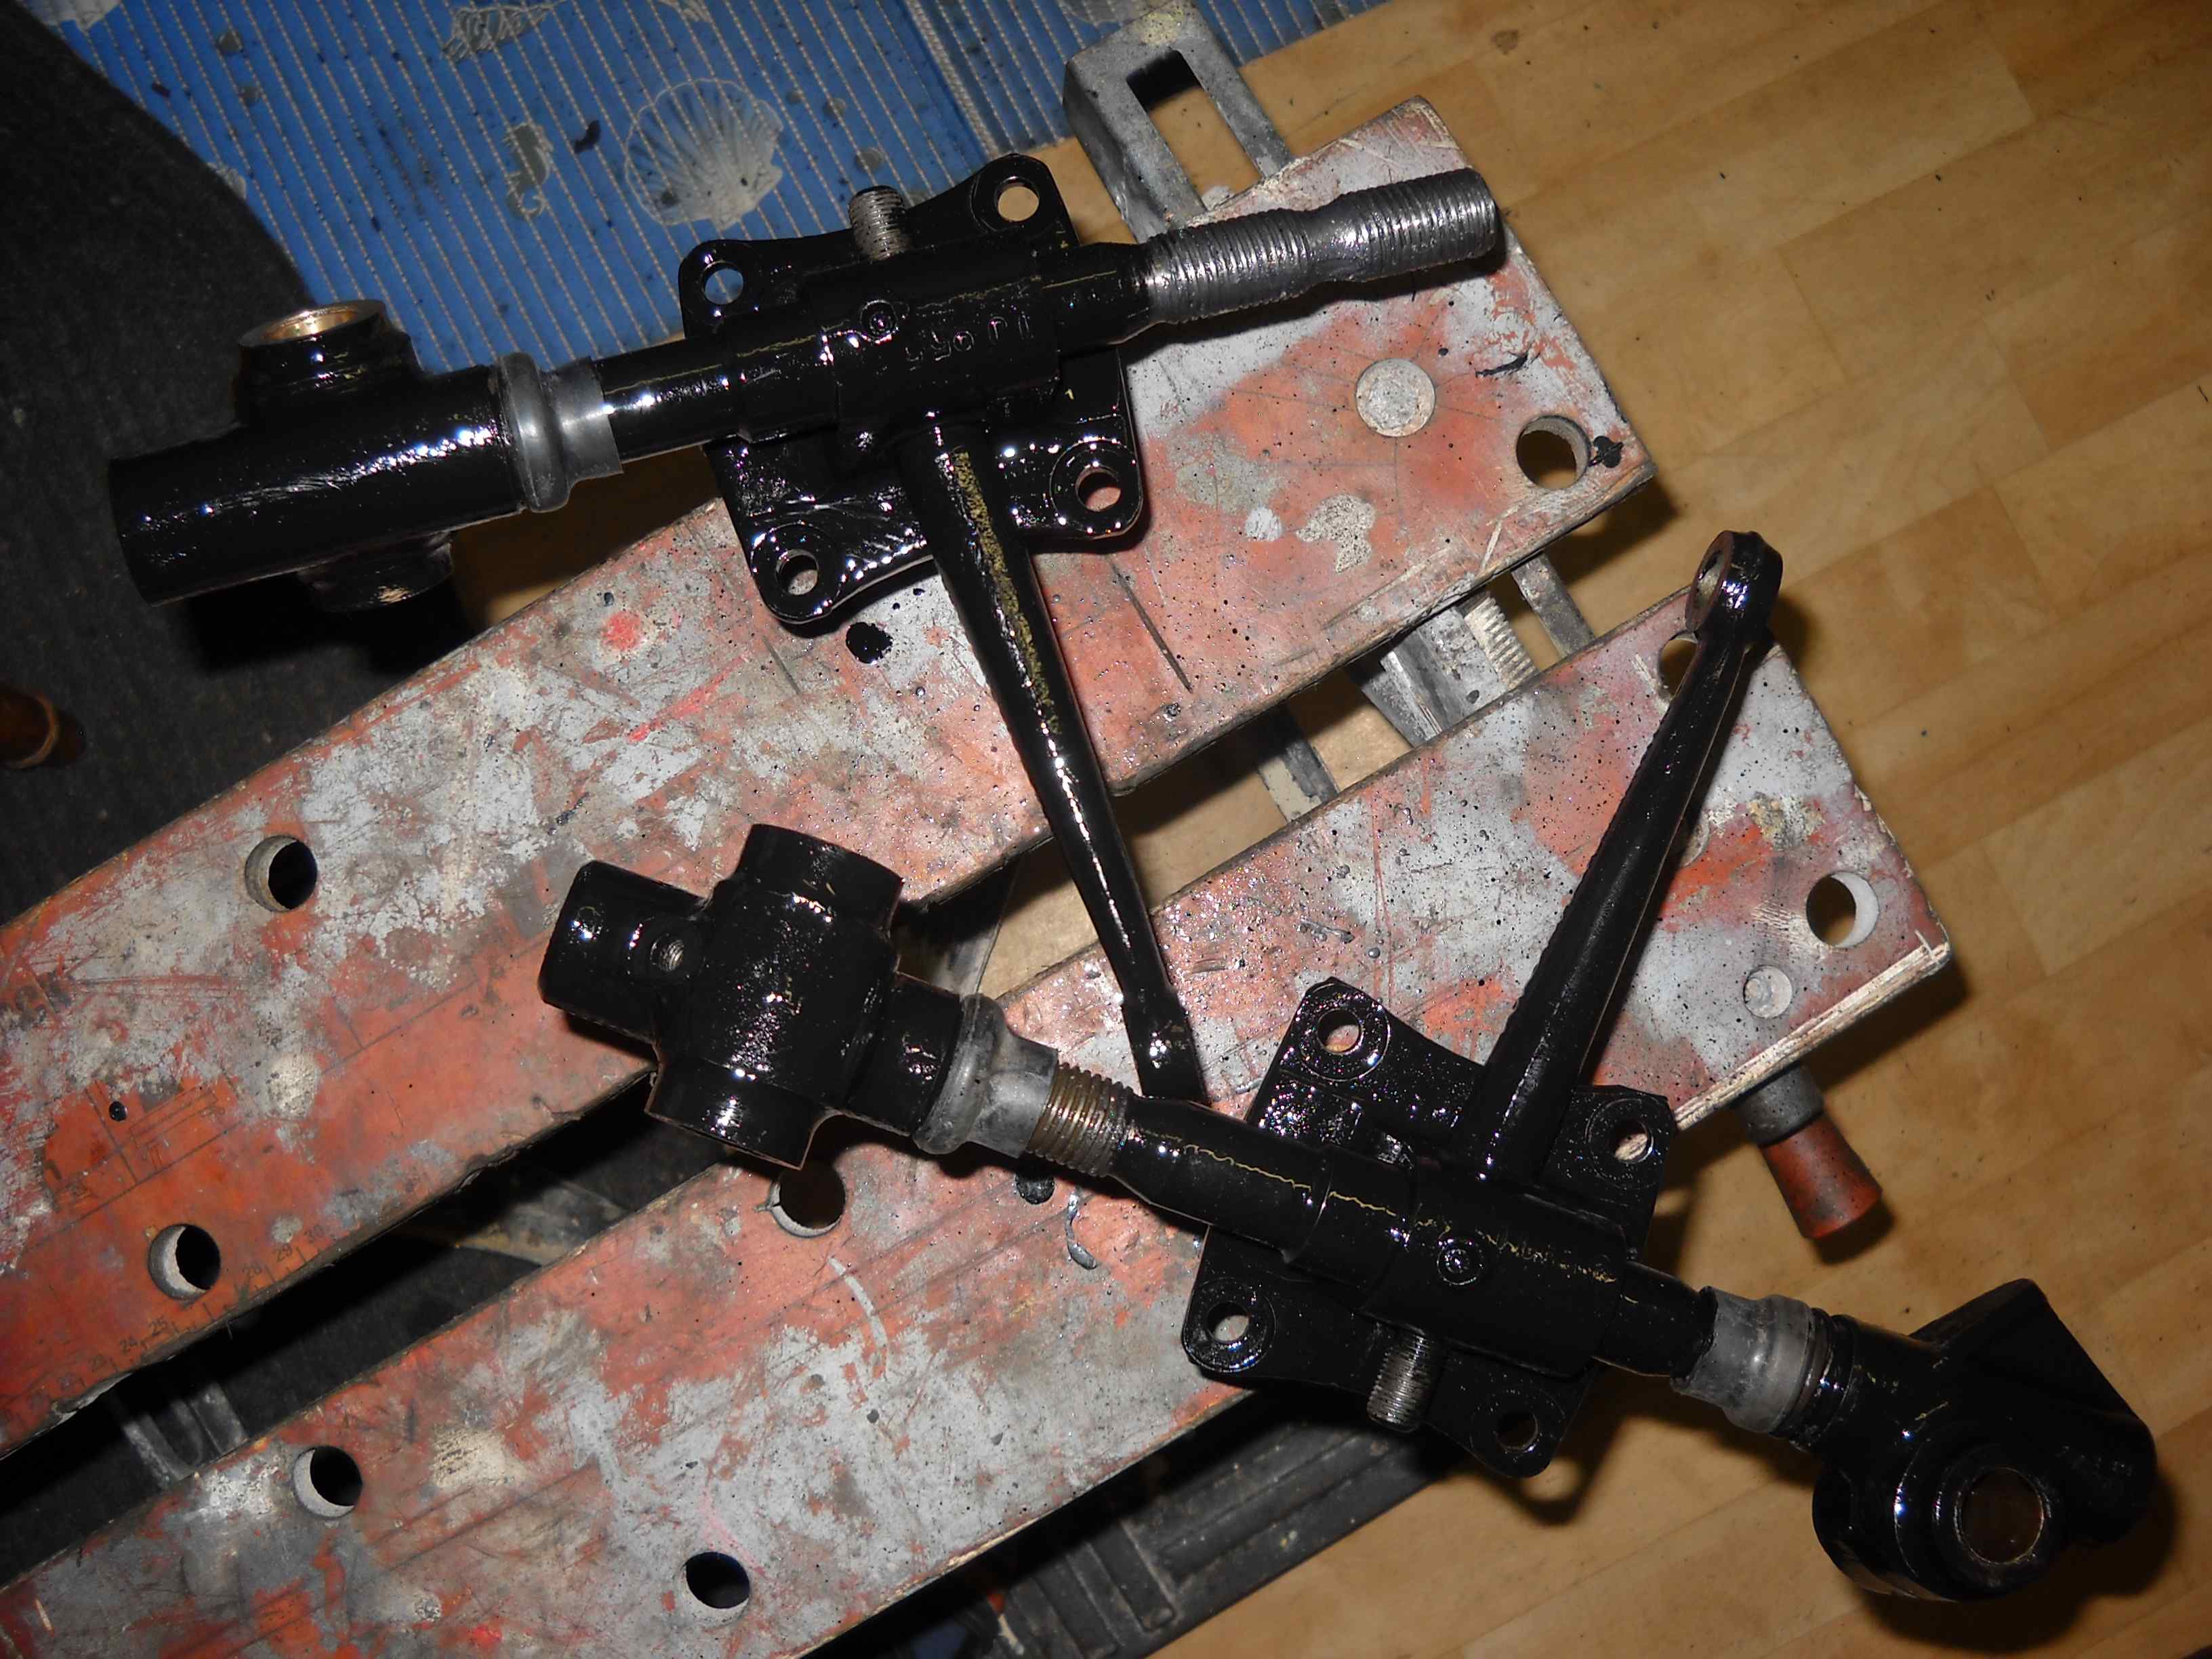 With the new swivel pin with the correct thread everything is bolted together, using new rubber seals. I gave it a good clean with a wire brush and a fresh layer of paint. The steering rack is still is good shape. Just a matter of removing all the grease. One of the rubber gaiters was torn and all the grease was on the outside. It was only a matter of cleaning, the thorough brush and a fresh layer of paint. With new rubber gaiters the steering rack is as good as new. In the meantime we collected all metal parts from the suspension, the petrol tank, suspension arms, panels of the heater, the brake drums and air filters to get them sandblasted and painted with epoxy primer. That is going to look very different....

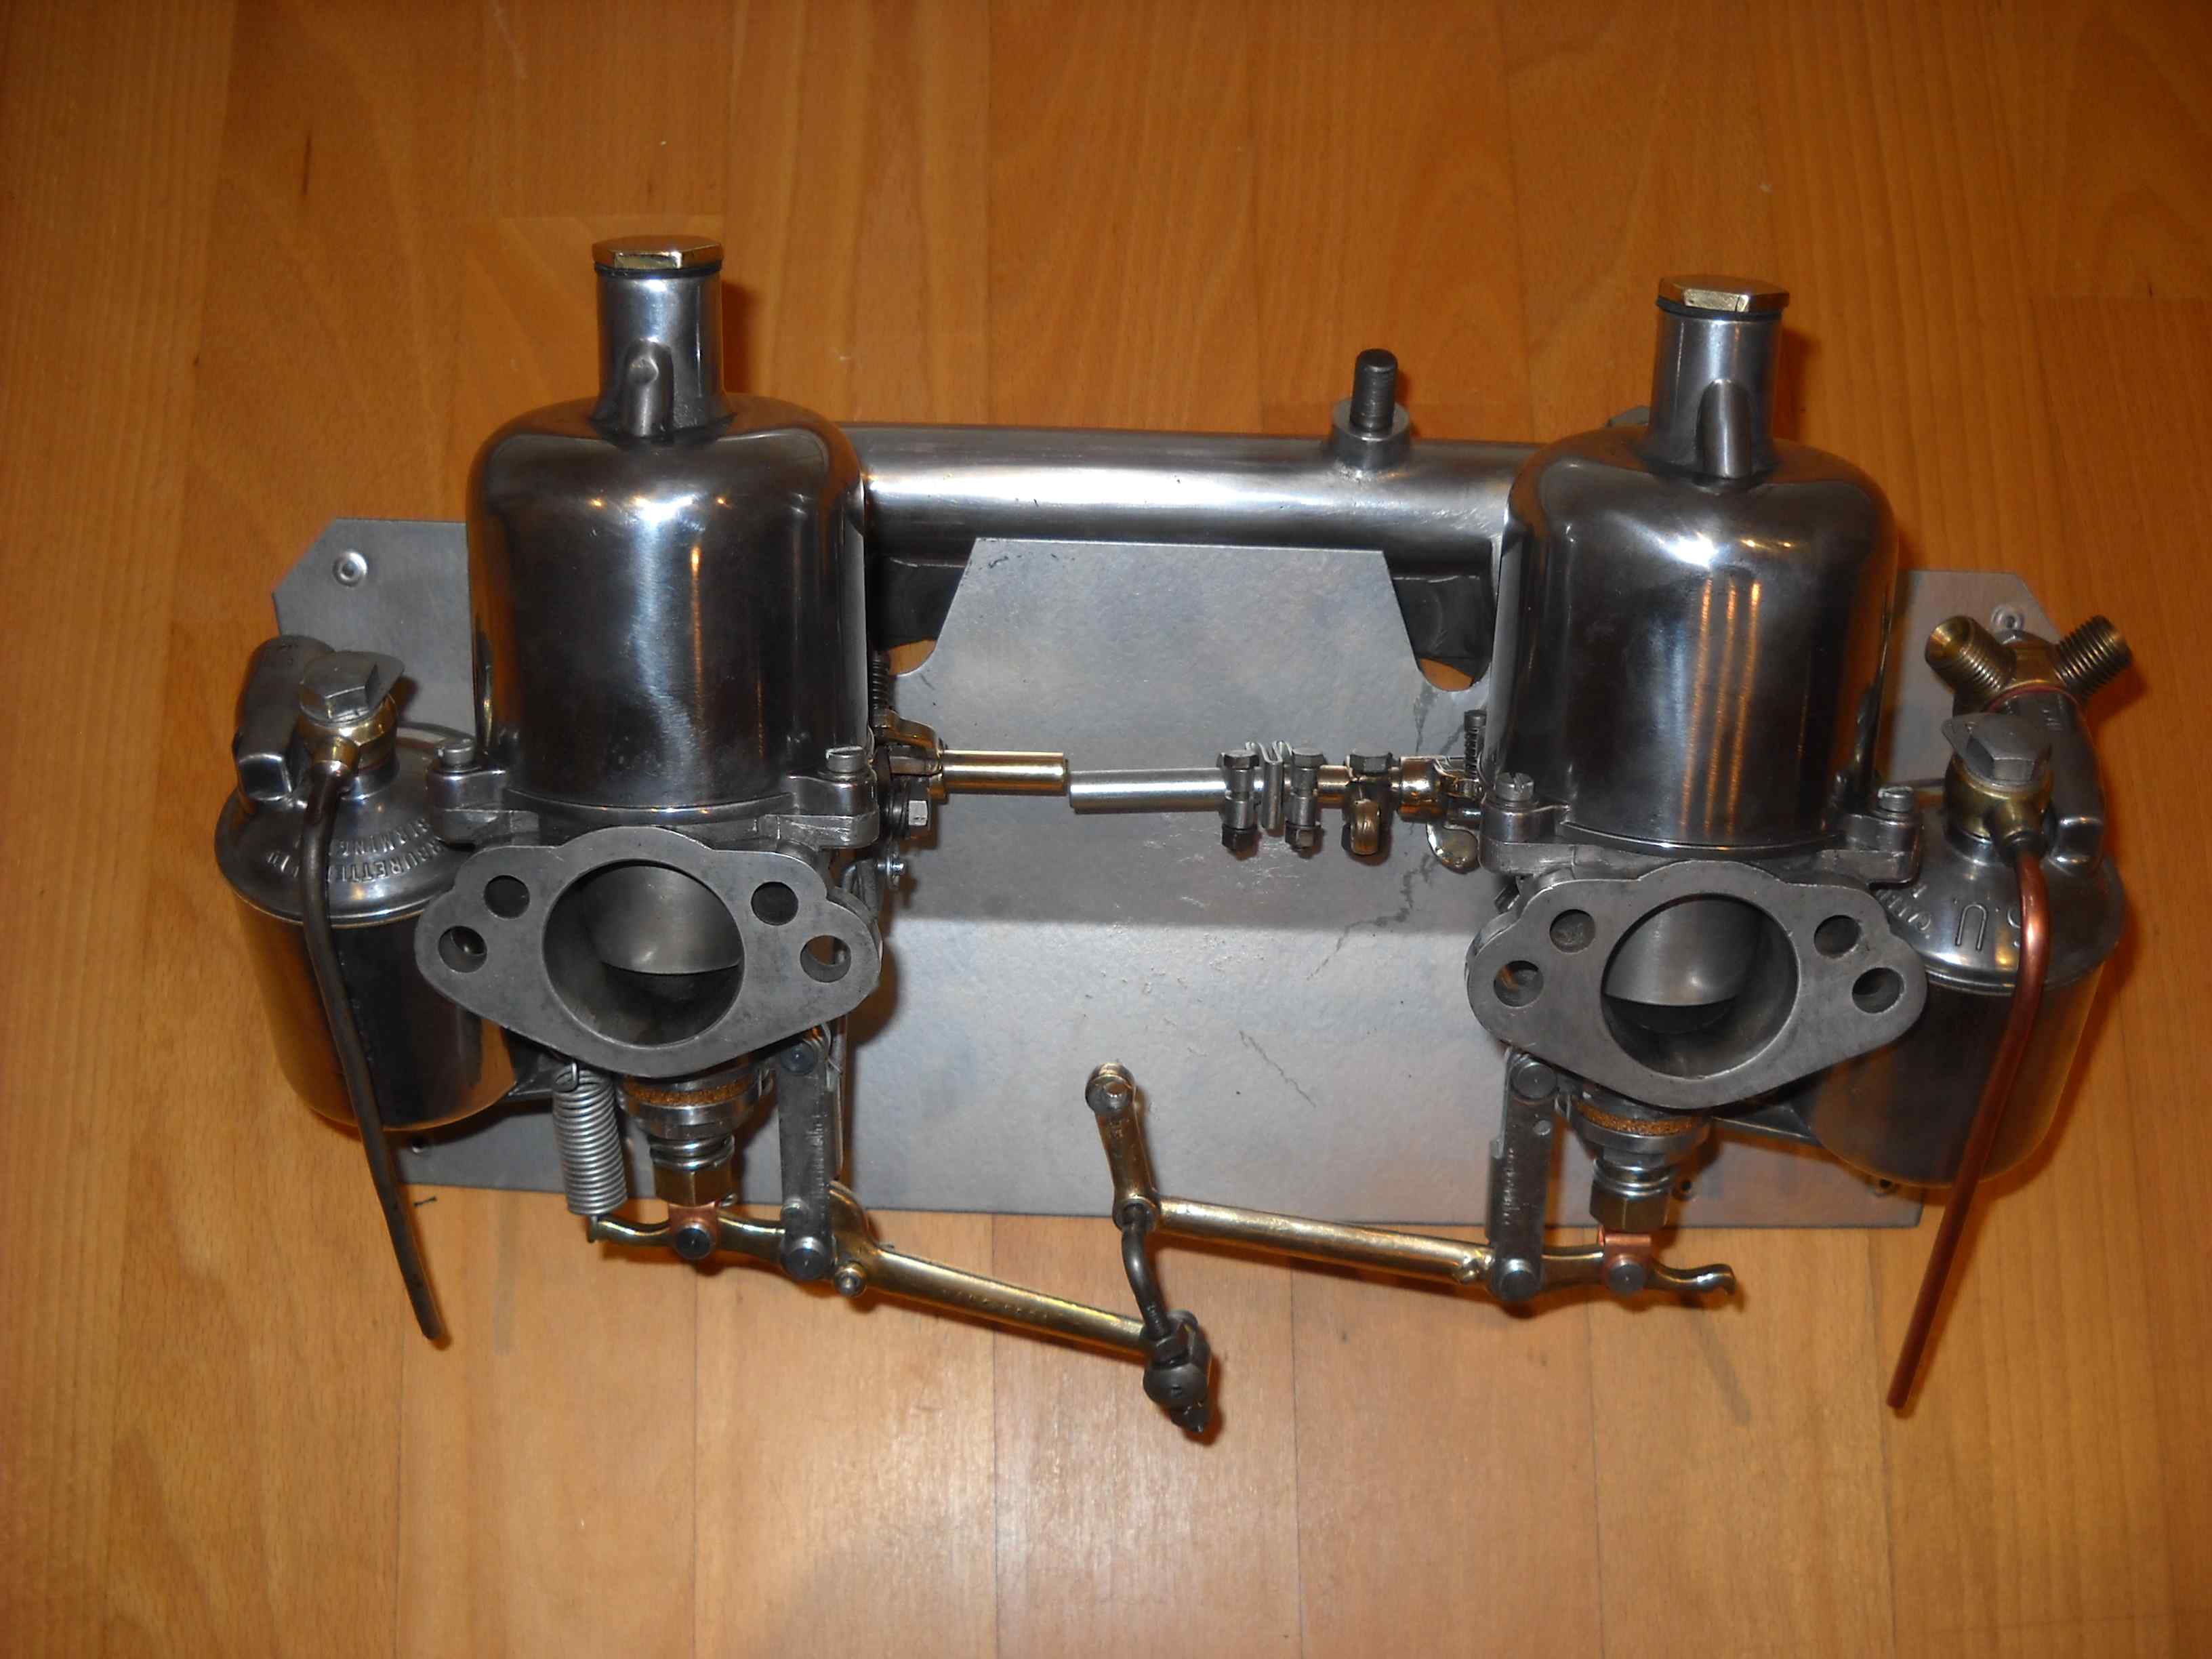
 The nicest part of all is the carburettor. We had a whole bucket of bolts and nuts re-galvanized. Among those bolts where some components of the carburettors. With a new gasket set and some other new components, it looks like new again. We had already polished some parts of the carburettors. Now we were able to put it back together again. Pretty... It is a shame this beautiful piece ends up under the bonnet. If there is a reader how knows where to get transparent MGA bonnets, then let me know....