
")
Our restoration stories
Lining up the gears
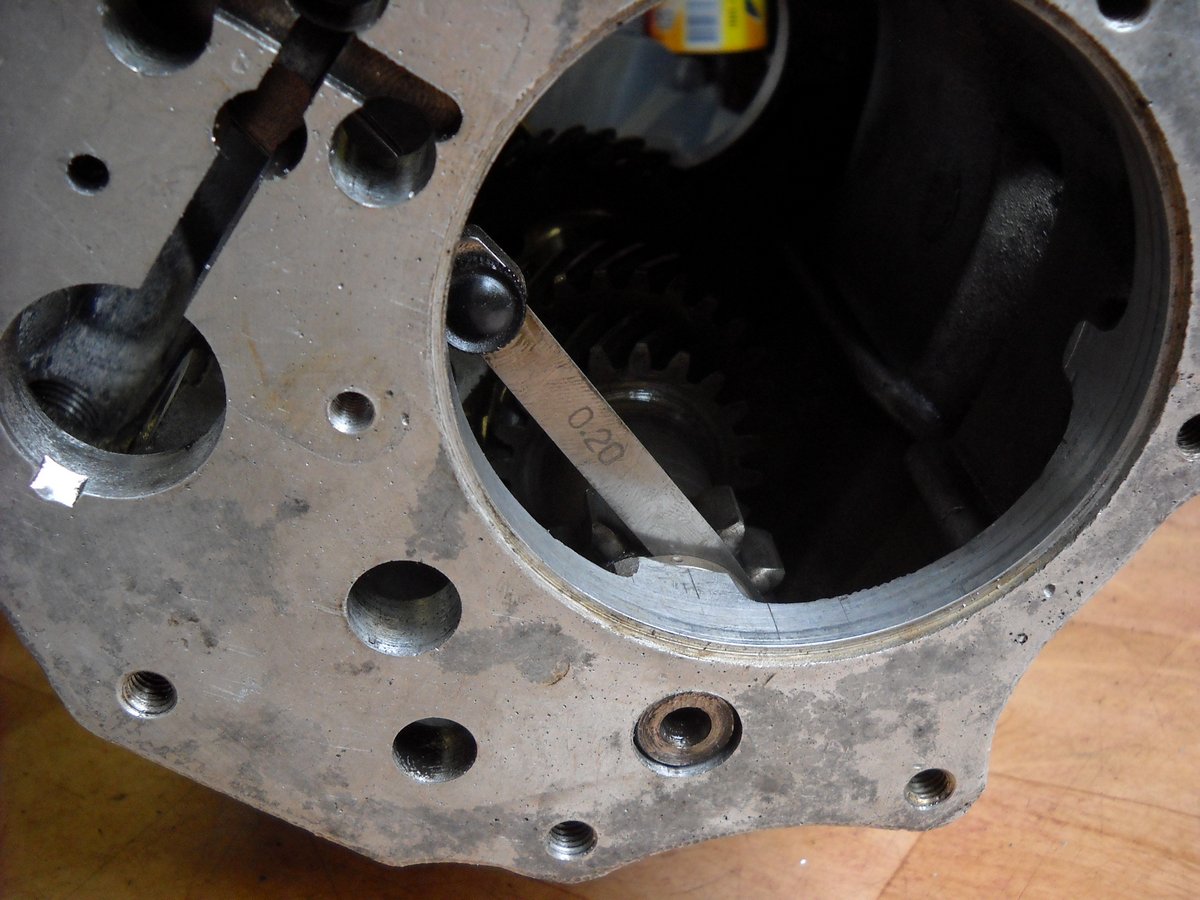
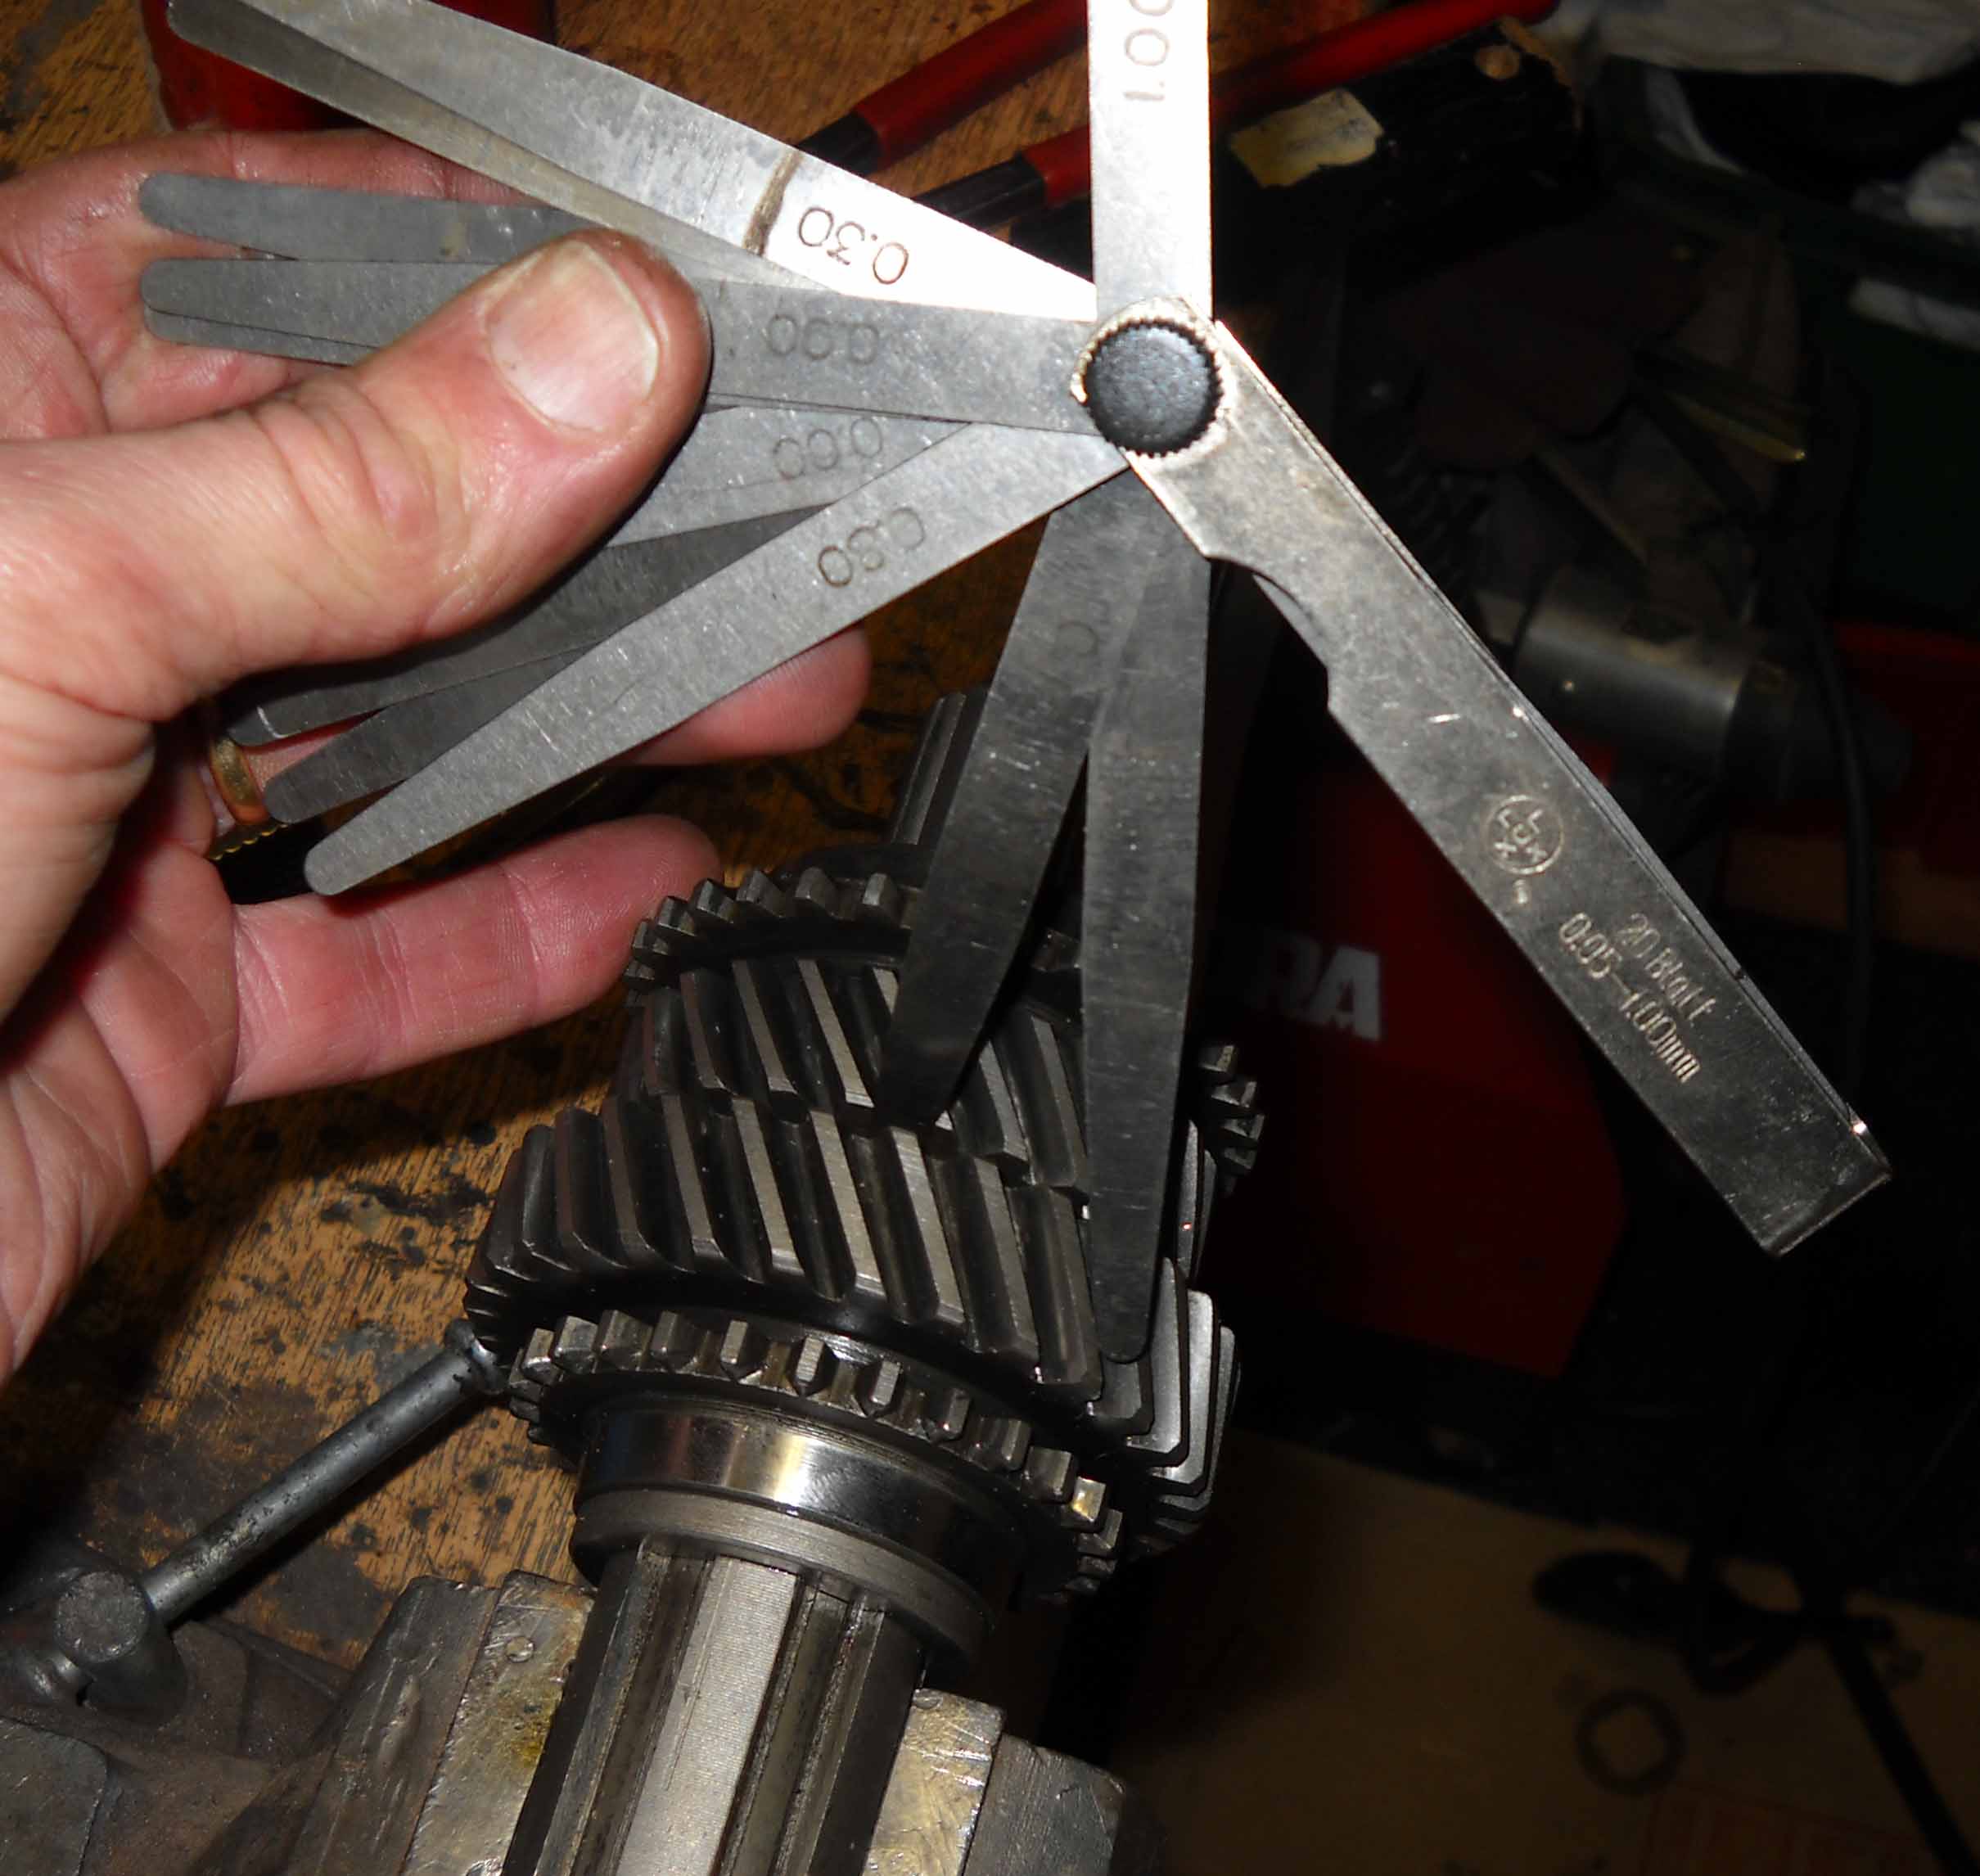 Finally we had all the spare parts to re-assemble the gearbox. Especially the rings to reduce the 2nd and 3rd gear float took some time arrive. There is one ring that locks up the 2nd and 3rd gear that is available in oversized thicknesses. However that availability appeared to be only hypothetical. We realized the end float for the 2nd and 3rd gear would end up just a bit over the upper spec limit. Well, it is what is it is. Several experts assured me that even twice that amount would not be an issue running the car.
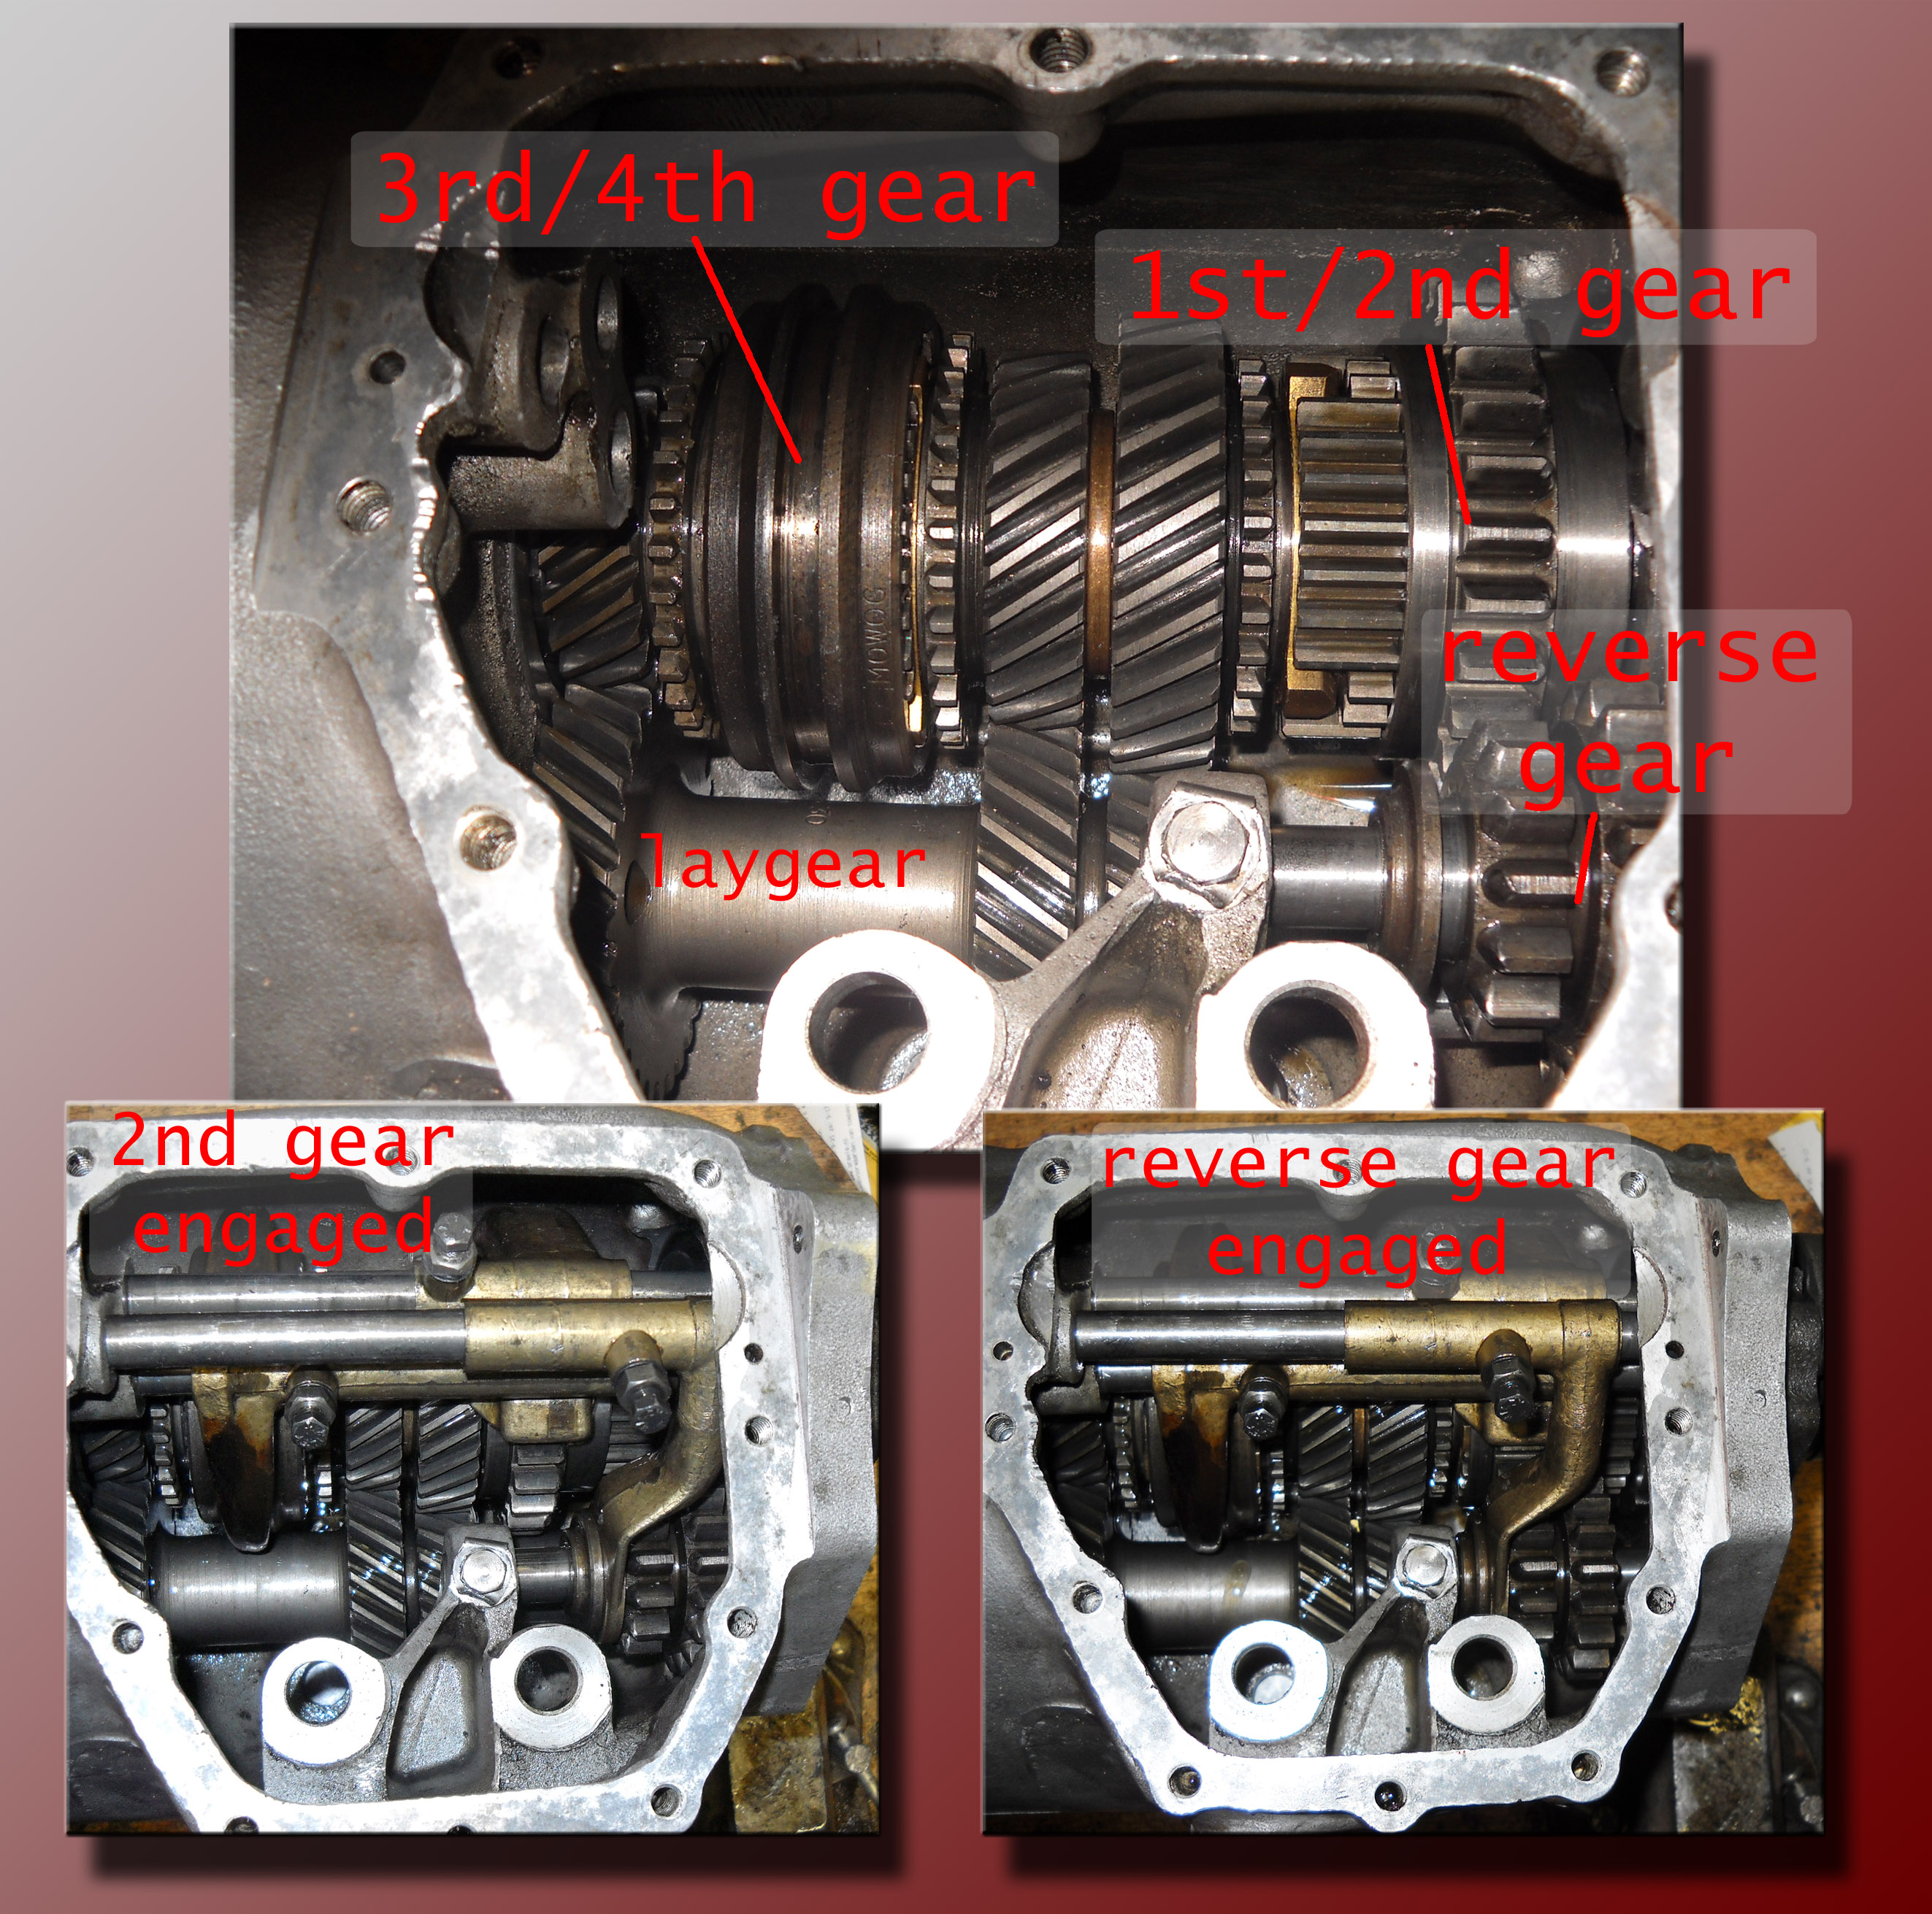 While we were putting the gearbox together, Daan took some pictures. We also engaged the different gears to check and double check the function of the gear selector. For the fun of it we added a picture to show the gearbox with the selector rods extracted and 2 small inserts showing the geabox with the 2nd gear engaged and the reverse gear engaged respectively... We want to share our learning. The only thing that did not work was the turret with the stick itself. There is a pin with a spring in the turret. Its function is to create extra pressure moving the stick to the left to differentiate between the reverse gear and the 1st/2nd gear. If you push the stick gently to the left and then forward, you will be in the 1st. Pushing it harder against some resistance, you will be in reverse. The pin and the spring responsible for this extra resistance turned out to be jammed. To disassemble everything I drilled out a locking pin. After cleaning out everything I used a new type of aluminium solder material. That is, new to me. Worked great!. Just have to heat it up considerably and evenly. Good to know that aluminium is that easy to repair.
 The gearbox itself it completed, including a new clutch pressure bearing and refurbished clutch slave cylinder. It is clean enough to put it under the Christmas tree. With the gearbox under the tree and still a few days for Christmas, it is time for some reflections. What else are we going to put under the tree? Dear MG enthusiasts: it is time to clean off the dirt from your hands too and do some serious shopping for your friends and family... and your MG :) ...
Fixing the Dash
 During the initial disassembly of the MGA, the dash was completely removed from the car. The knobs and meters in turn were all removed from the dash. The vinyl is damaged a bit through the years and the metal of the dash was a bit rusty. Worse yet extra holes were drilled in the dash for an extra switch and for a handle. I welded the holes and made it smooth before it was sandblasted and spray painted. We found a new vinyl material that is very similar to the leather we will use for the seats later on. With spray glue the vinyl is attached to the smooth repainted metal of the dash.
The chrome rings of the meters are polished and the meters are cleaned. I have been searching the web trying to understand how the temperature sensor works, convinced as I was that the temperature meter was broken. The sensor and the meter is connected with a thin copper tube with an inner diameter of about 2mm. It contains a fluid under pressure and repairing it is not so easy. We tried the sensor in a little bit of boiling water. To my surprise is simply worked. Just have to be careful not to break the tube now, or during the installation.
 The headlight switch had some molten plastic on it, obviously caused by heat. One of the internal connections in the switch was corroded, and with the thus created extra resistance most likely the root cause of this heating. I cleaned it all thoroughly and made the connection extra solid using solder: no fried wires under the new dash. The fuel gauge is cleaned re-adjusted with the tank sensor connected. The final test will be when we fill up the tank the first time, check the gauge and turn the key. When that will be? Not in 2011. I'll keep you posted. For now, we wish you a Merry Christmas.
Car fender archeology
 The raining season is setting in and so it is a good time to start working on the fenders in the garage, well protected from the weather. They have been dangling from the ceiling in the garage for almost a year. Now it is time to get them down and start working on the. At the first glance they look undamaged. There are parts that are severely rusted. There are also a couple of small dents. First we remove all the paint mostly by just scraping it off. Layer after layer comes off until we hit the bare metal. During our rear fender paint excavations we sometimes found an amazing 13 layers of paint.
 In some cases there were little rust spots where the metal had become very thin. By welding it up and grinding it flat again those spots were easily repaired. In other places the rust monster had progressed just a bit too much and a piece was cut out and a new fresh piece of sheet was formed to fill the gap. It took a long time, but eventually the fender regained its original strength and shape. Still it seems that the rear fenders are still the original ones. The lower 3 layers seem to be the original 3 layers of paint as it came out of the factory in Abingdon England, with the light green as the top coat. It is also impressive that despite the thick layers of filler that was used, the paint did not peel off over time.
 The front fenders were less dented compared with the rear fenders. The sheet metal of the front fenders is considerably thicker compared with the read fenders. Probably because the latter is more curved and this curvature provides some strength just by itself. Definitely saves some weight, but it makes it more vulnerable.
 After repairing the rear fenders, we fitted them on the car to see if everything fits. It is better to still modify the fender while it is not painted with the final paint. Right now there is just one front fender to go. The left front fender was not too bad. The lower left part had to be replaced, but apart from that it was a fairly easy repair. The right front fender is a different story. At the first glance it looked fine. But while removing the paint there was enough polyester on the fender to make a decent size sail boat. More on that in the next message.
Putting the engine back together...
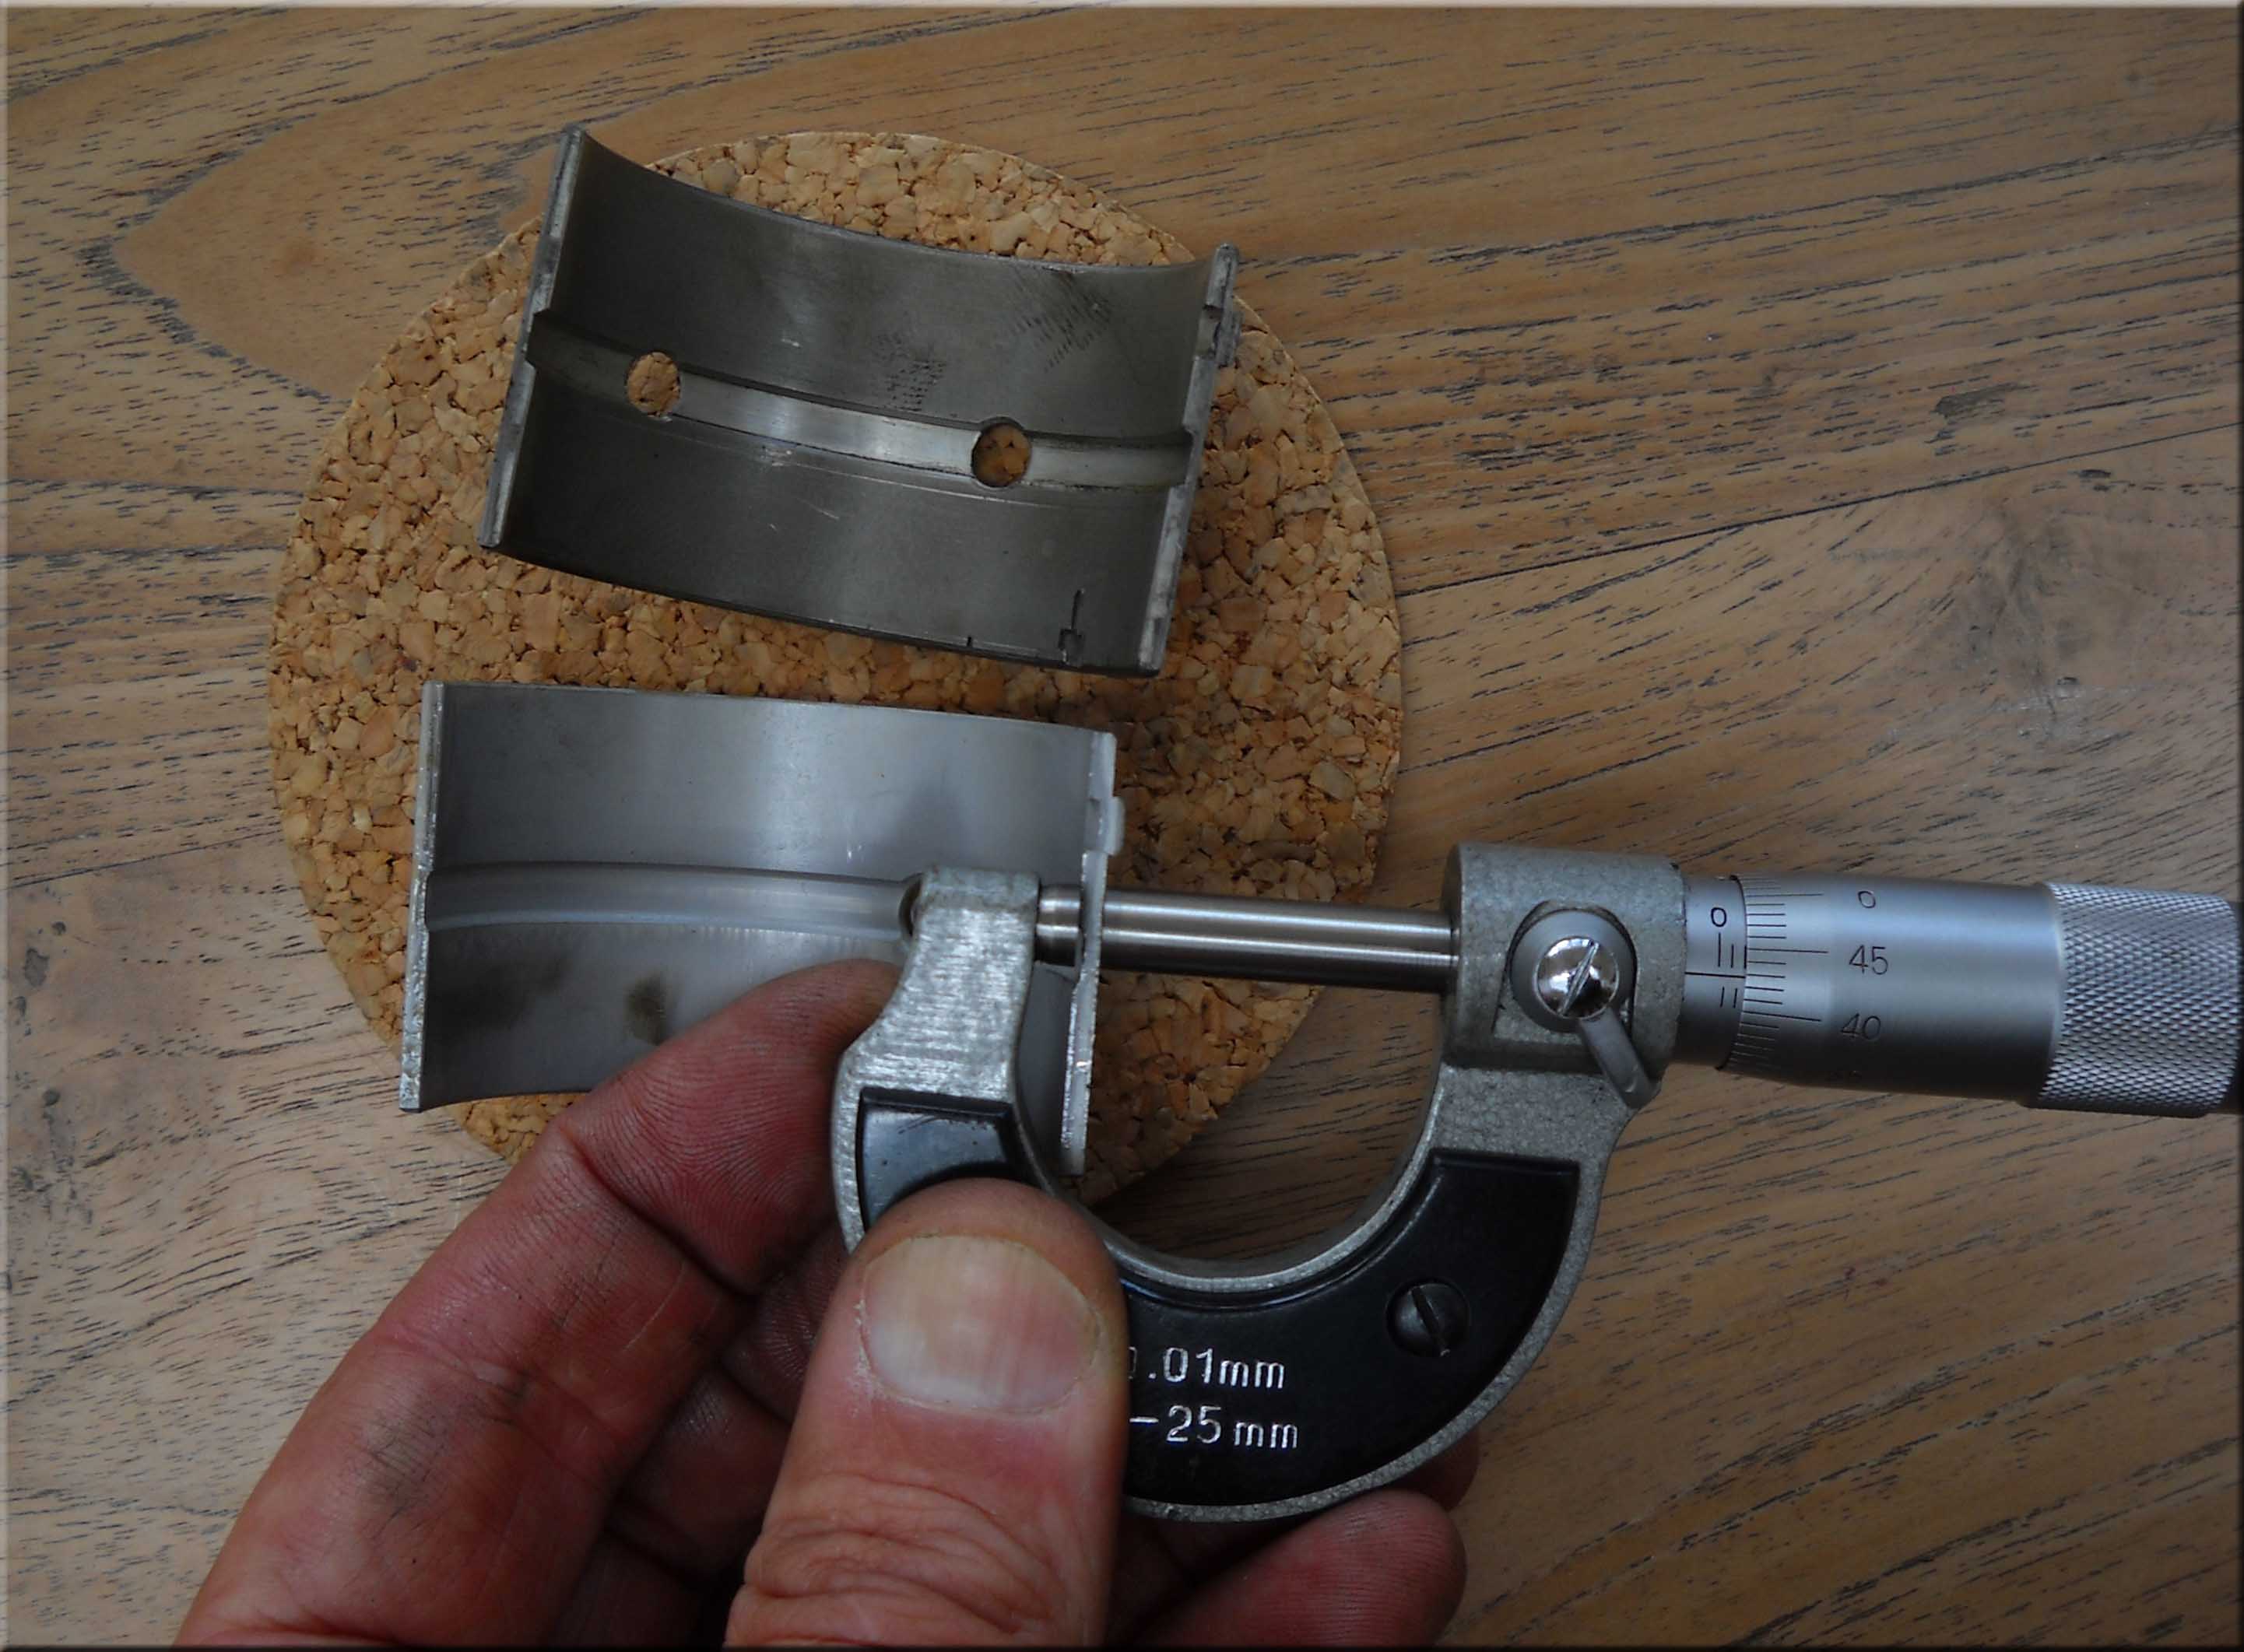
 Over our summer holiday in California we finally got all the remaining pieces of the engine delivered. We measured the bearings again to make sure that the tolerances are correct.The piston ring gap spacing ended up being a little on the big side: 0.45mm. But there is not much I can do about that now. At first I thought we just got the wrong rings, but that was not the case. We will just go for this. There is little chance of damaging the block with it.
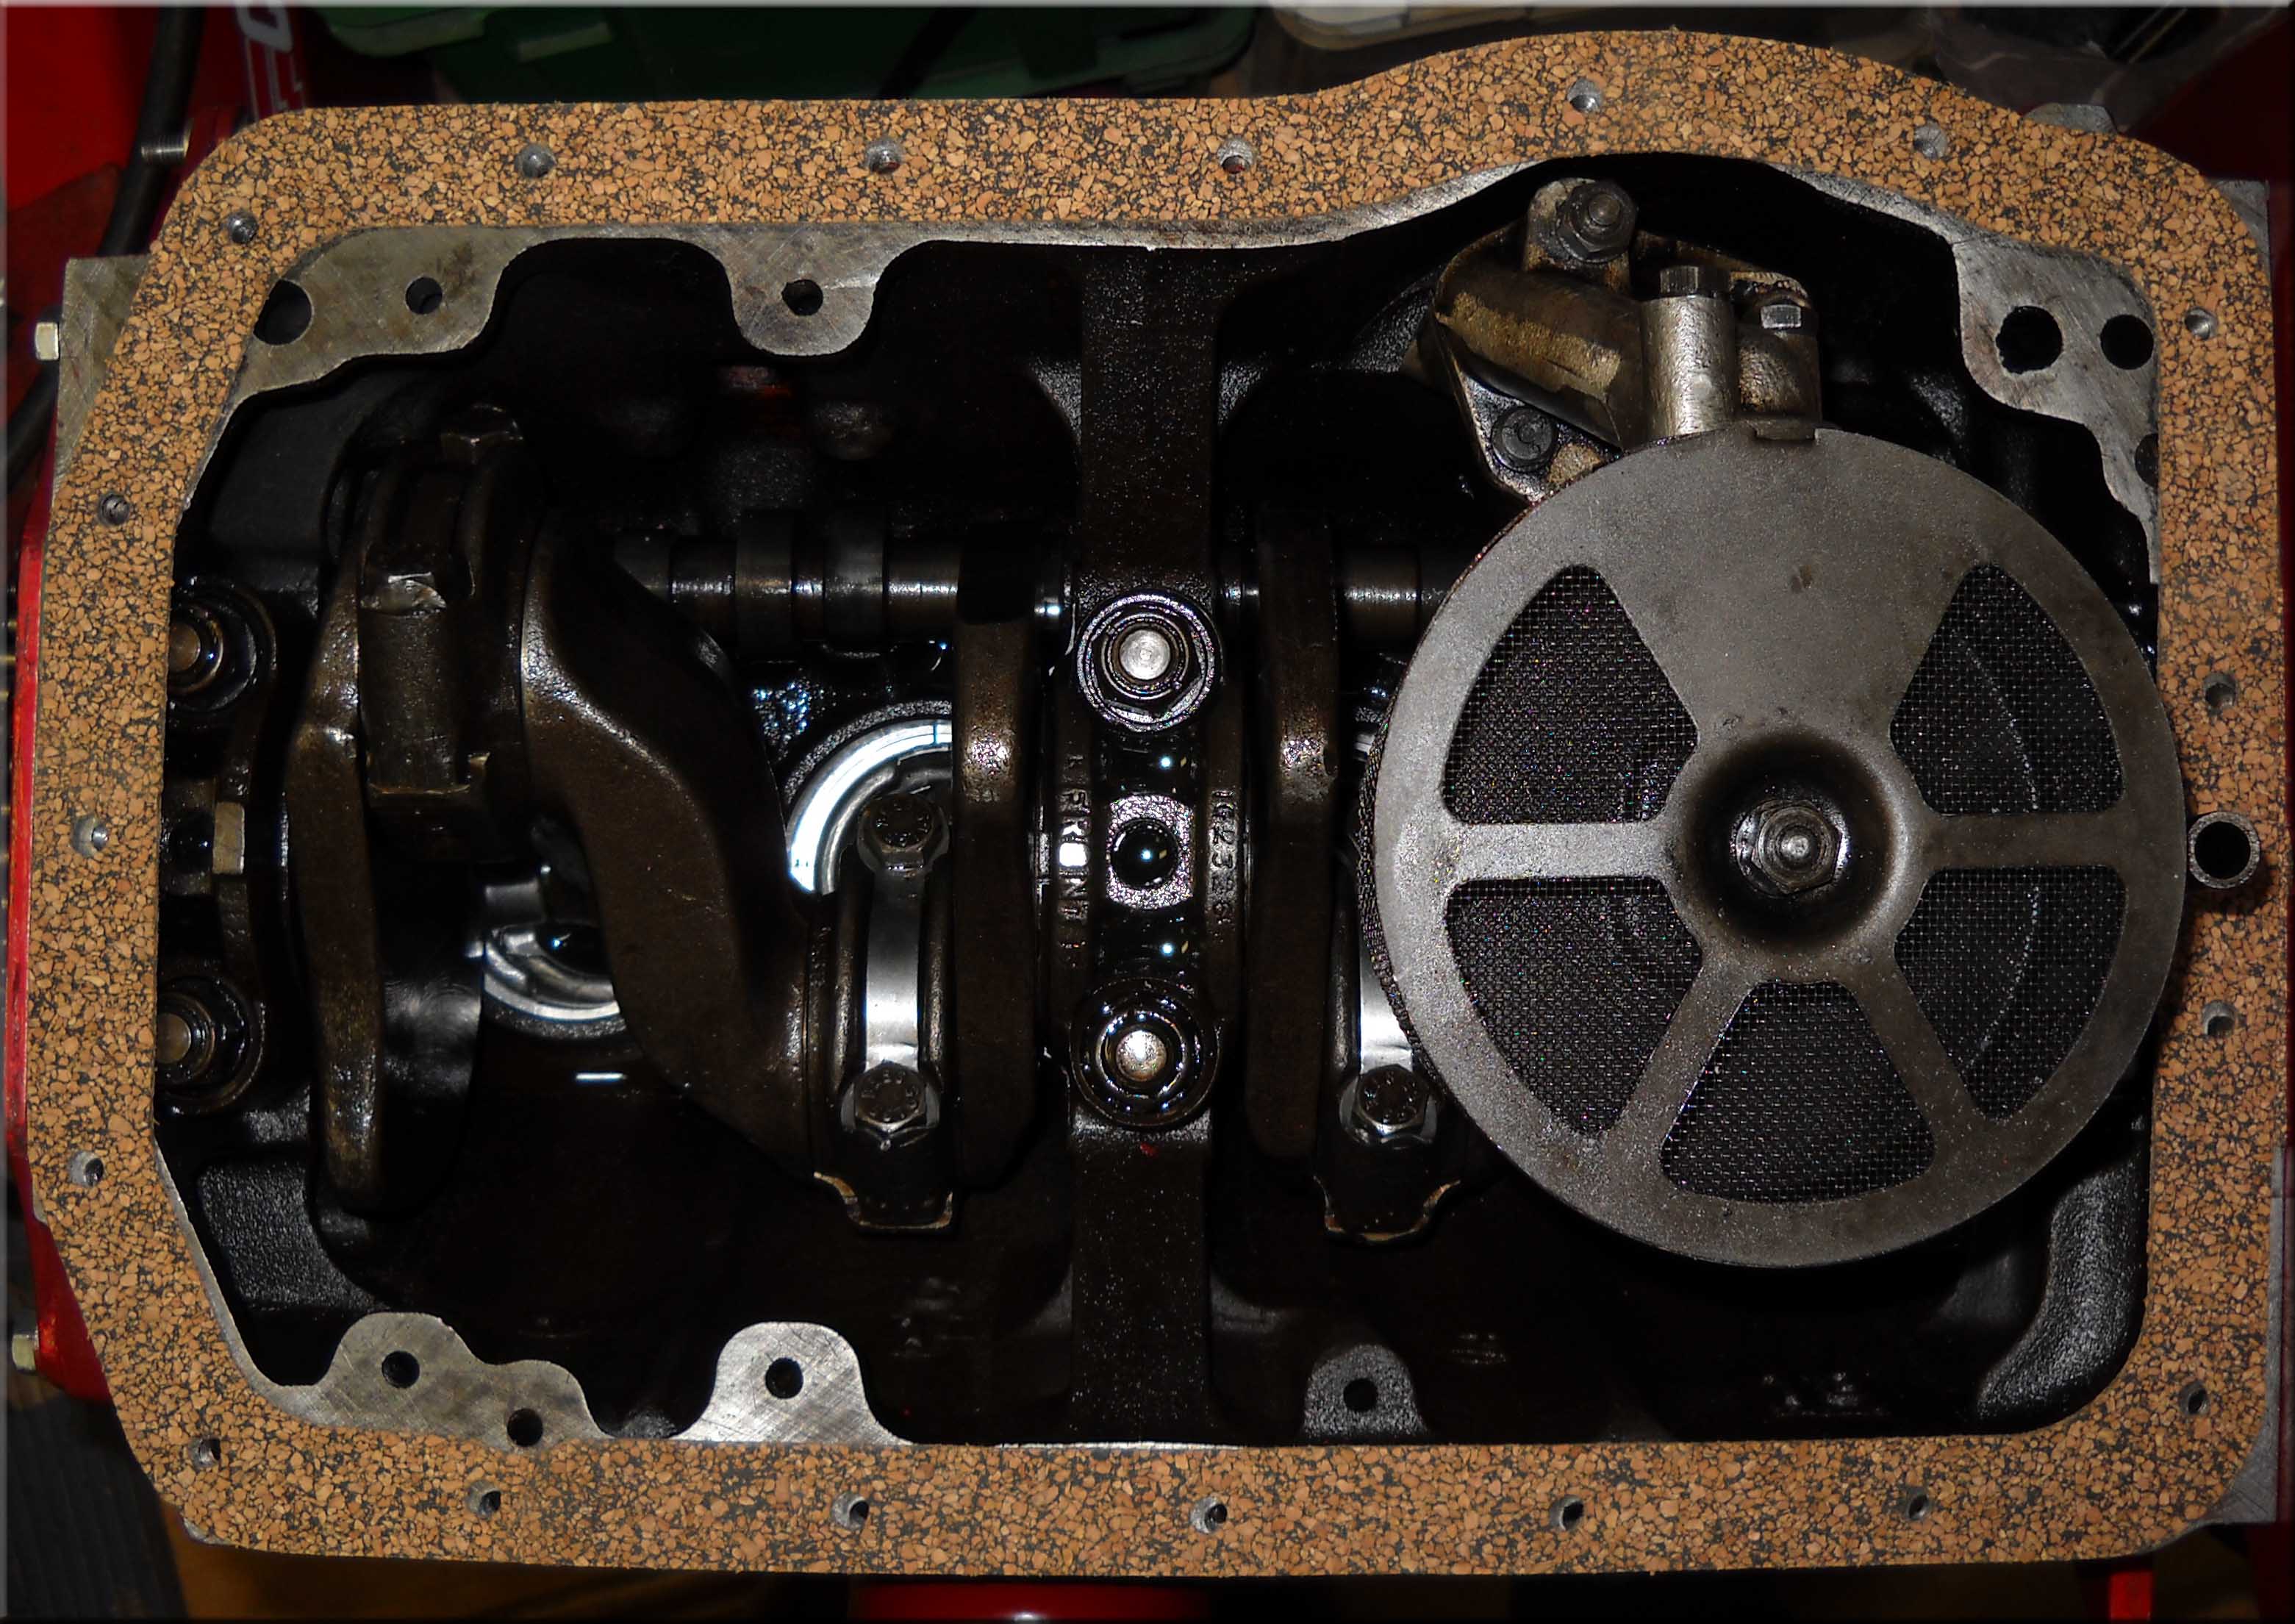
The pistons with the new rings went in smooth with enough oil to lubricate everything. The bearings all have 0.01" oversize, and that fitted quite well. A nice tight fit. New big-end lock plates are installed to make sure they stay tight. During the installation of the chain we found that the tensioner almost came out of the housing in order to push the chain straight. Better to replace it. The cause of the worn chain is probably 2 fold. First the car did quite a few miles to begin with. But the chain wheels were not perfectly aligned, which may have contributed to the wear. Adding a few shims will improve the alignment.

 During our visit to the US we picked up a modern device to upgrade the ignition. A Hall sensor that can be build into the original MGA distributor. It is not visible once the distributor cap is installed. The only evidence is a second wire that runs from the distributor to the coil. With the Peugeot we also upgraded the ignition to an electronic one. Now you need to know that I am an electrical engineer, so this is right in my alley. But apart from that, it is so much more reliable and stable: Electronic ignition in the MGA: go for it... An extra ground wire is soldered onto the ground plate to make sure the voltage drop is kept to a minimum. With the new electronic ignition, we also bought ourselves a new coil. Never trust an old coil. From the outside you can never see if it is bad. Even measuring a coil does not always reveal a possible bad condition, so just replace it to be sure...
On gears and bearings...
 The only part that has not been taken apart up to now was the gearbox. To still work on the gearbox once the car is rebuilt is not quite possible. In fact to later work on the gearbox would require the engine to be take out to access it. All the more reason to make sure the gearbox is in perfect condition before we build it back in. We were not able to do a test run with it, so all we can do is visual inspections and check for tolerances. The literature also gives some indications of part that have the tendency to wear. The layshaft is one of them and indeed that was indeed a part in need for replacement.
 We will have to replace that along with the layshaft bearings. Of all the 3 synchro rings, the one of the 2nd gear was definitely the worst. The 4th gear ring is still good enough. The 1st gear is not synchronized, just like the Peugeot 404.
 For the rest the the gears themselves look ok. The play on the layshaft is on the high side. We will first put the new layshaft in with new rings and then we can check again... For the time being we put all the gears and parts in a cardboard box: the 'gearbox'.
'How on earth will you be able to put it back together again', is what some of you will think. Well it is not that bad. There are a lot of drawings and sketches in books, so for now I think we will be ok. Time will tell: If the MGA once completed all of a sudden has 4 reverse gears and one forward, we definitely did something wrong...