
")
Our restoration stories
Dings and dents and worse...
 When we first got the car, only a few dents we visible. The rear of the car had suffered a significant blow once. Judging by the rust visible in the dent, it has been there a while. How do we tackle such a problem? How to get the dent back out? First we do some research in literature and on the internet. And then we just grab a couple of hammers and start. The trick is not to hammer too much. In case the sheet metal is hit by a foreign object, part of the metal will deform permanently. Other areas will just bend because of this initial deformation, but will bend back like a spring once the deformation is eliminated. It is best to only work on those points in the sheet metal that are directly hit.
During the time consuming process of working out the dings and dents you realize one thing: Getting it out takes longer than getting a dent in... The latter is also much easier. The picture here shows the first steps. Gentle taps are better than hard blows. Keeping a dolly on the other side of the metal helps flattening out the dings. First you need to 'look' for the dolly as it is on the other side of the metal. You can do that by just tapping with the hammer and listen for the sound. Once you hear a high pitched 'pling' you know that you are on the dolly. A large file can reveal local low and high areas. A temporarily layer of high gloss plaint also helps. We also need that to protect the sheet metal for rusting before it gets the final paint, which is still some time away. The picture shows that after step 1, 2 and 3 a 4th step is still required. Once we are at that point, we will surely add that to the site.
Comparing old and new
 Let us see where we are with the restoration. We pulled up one of the first pictures of the engine bay, just to compare the before and after. The heater core housing is sandblasted and painted in a semi-gloss black paint. The heater core itself is cleaned internally with a mild acid to dissolve the rust deposits. The heater core was plugged with a wooden pin and is obviously not used in the last couple of years of active life of the car.
The rocker cover is that rusty piece of metal you can see on the top of the engine. If you see how it is now: Hard to imagine... The Carburettors with the basted and newly painted air filters look great again. Too bad these are tugged away under the bonnet. We are going to pick up the engine soon, as it is getting near completion. Curious how that will look eh run... (or both).
It is getting serious...
 It is amazing how bad underlying pieces of metal can be after the outer sheet metal is removed. The right outer sil is completely rusted away. The last bit is even completely disjoint from the front part. Fortunately the construction is rather simple. Moreover this car has a separate chassis that preserves the overall integrity of the car even with the sil completely removed. With other cars one would have to weld in re-enforcement structures to maintain the integrity even before the first sheet metal is cut out.

 Not only the sil has to be replaced, even he sheet metal the sil is welded to is just too bad to repair. We are replacing one piece at the time, so that we can align the new sheet metal to the old piece. The welding in is a slow process to allow for the metal to cool down. In retrospect we still did not do it slow enough. The good thing is that the sil will straighten is up. It is a good lesson for the next time: the sil on the left!

 The welding skills themselves are improving. If the weld is good, only a little grinding is needed. I guess once the car is done, we will be professionals. Since the car was involved in a few collisions, we are looking for another MGA coupe on which we can take some measurements for comparison. It would not to hurt to do some checking. It would be bad if the panels do not fit at the very end.
If the weather is not good, or you are sick of all the rust, there are many other parts you can work on to cheer you up again. The different elements from the dashboard as well as all the metal parts from the engine are cleaned with a wire brush and painted again. Those parts are all waiting for the engine to return. The machine shop is almost ready so in a few weeks I can pick it up again and put everything back together again. Can't wait ... The only part still in the car is the gearbox. The main reason for this fact is because there is no space left in the garage!
Fixing the rear axle
 On a nice day in March Daan and I removed the rear suspension from the car. The gaskets has been leaking a bit and the oil that used to be in the differential housing now settled on the outside of it. Over the years is was able to different types of dust and sand from the California roads. The 30 years in storage turned this mixture into a material that will probably be very suitable to use for an average highways top layer. It took some persuasion to chip it off. The differential itself looks ok. Just new oil seals and gaskets, and of course a new layer of paint.
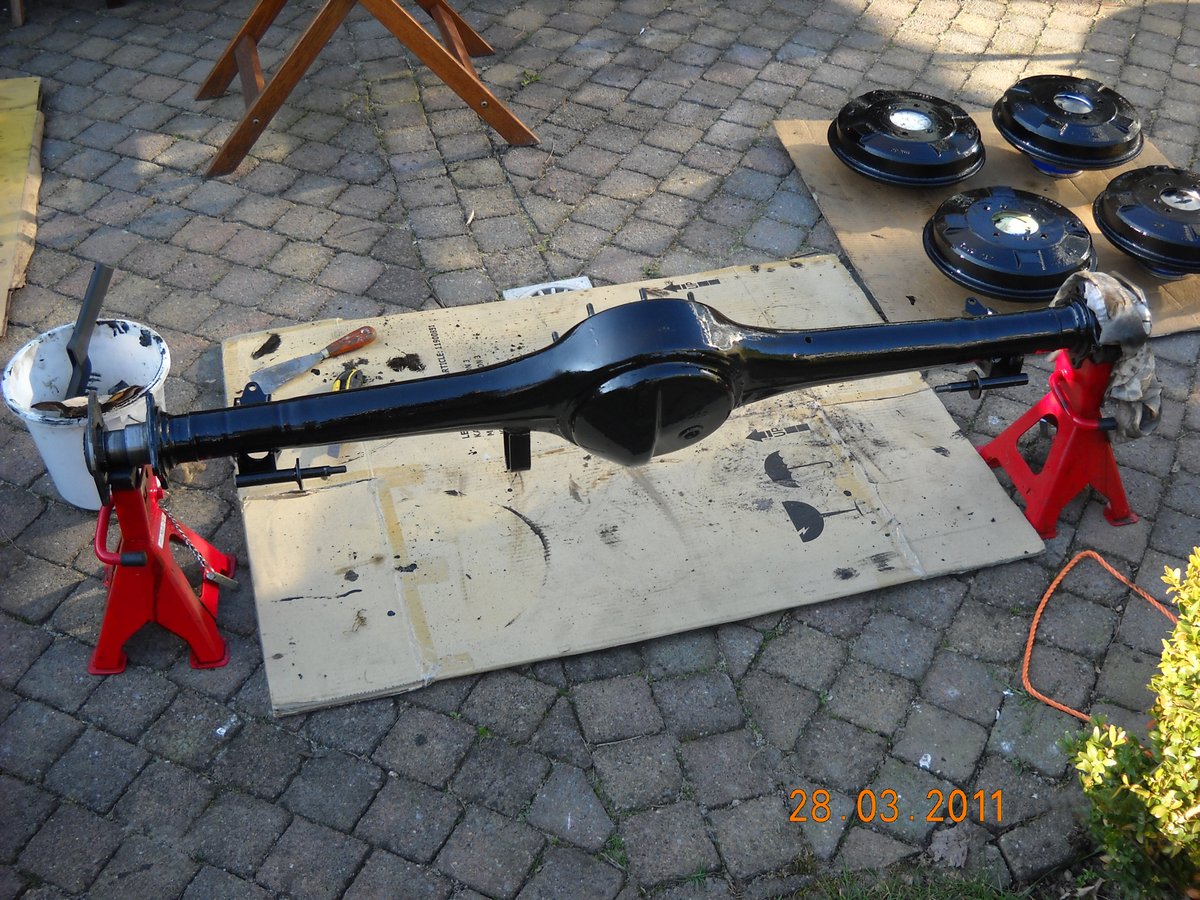 We also had a first batch of parts sandblasted: Brake drums, bumper mounts, suspension arms, the metal frame of the dashboard, the fuel tank and the housing of the heater core housing. We put a rust preventive topcoat on top, and so all these parts look like new again. At the same time, all the rusty bolts and nuts have been re galvanized, while parts that were beyond repair are replaced. All bearings will be replaced any ways. Almost all of them made some sounds when turned by hand. Once mounted it is amazing how much noise old bearings van produce: just replace all of them.
Fuel pump upgrade
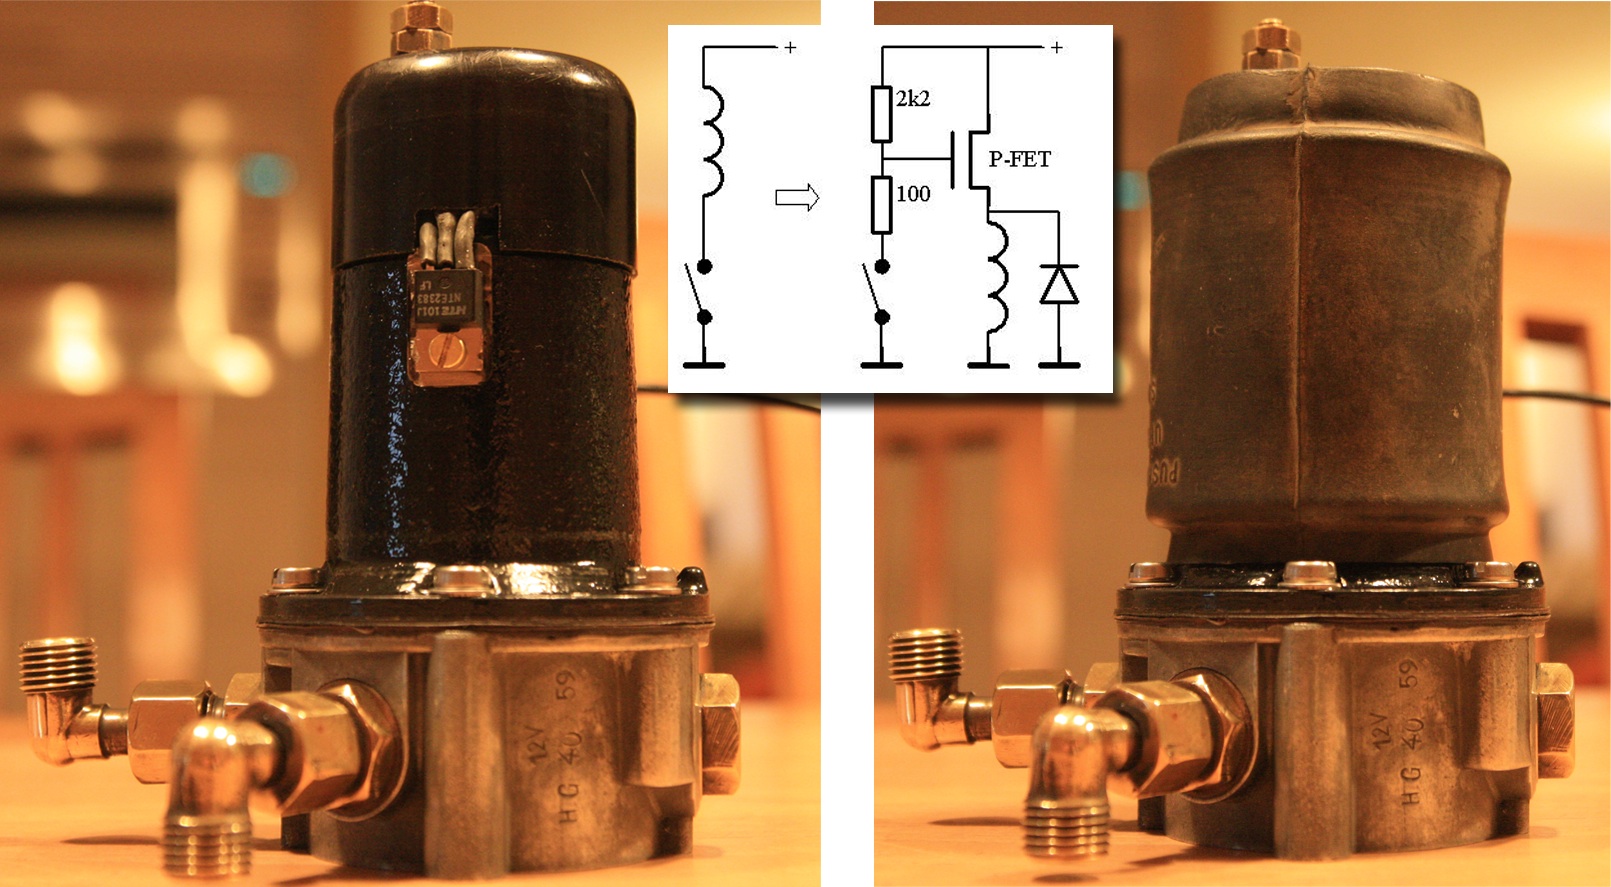 For some it is a welcome improvement, for the other a disgrace. The fuel pump had serious burned in contacts. In those days it was hard to suppress the sparks on the contacts of a switch that is turning off the current in a coil. A capacitor will diminish the sparks somewhat. When a FET is used to switch the current, the spark can be suppressed. With the protective rubber sleeve, it is invisible. And yet, I did made the decision to put the negative the ground. With + to ground is just too confusing...