
")
Our restoration stories
Chrome restoration
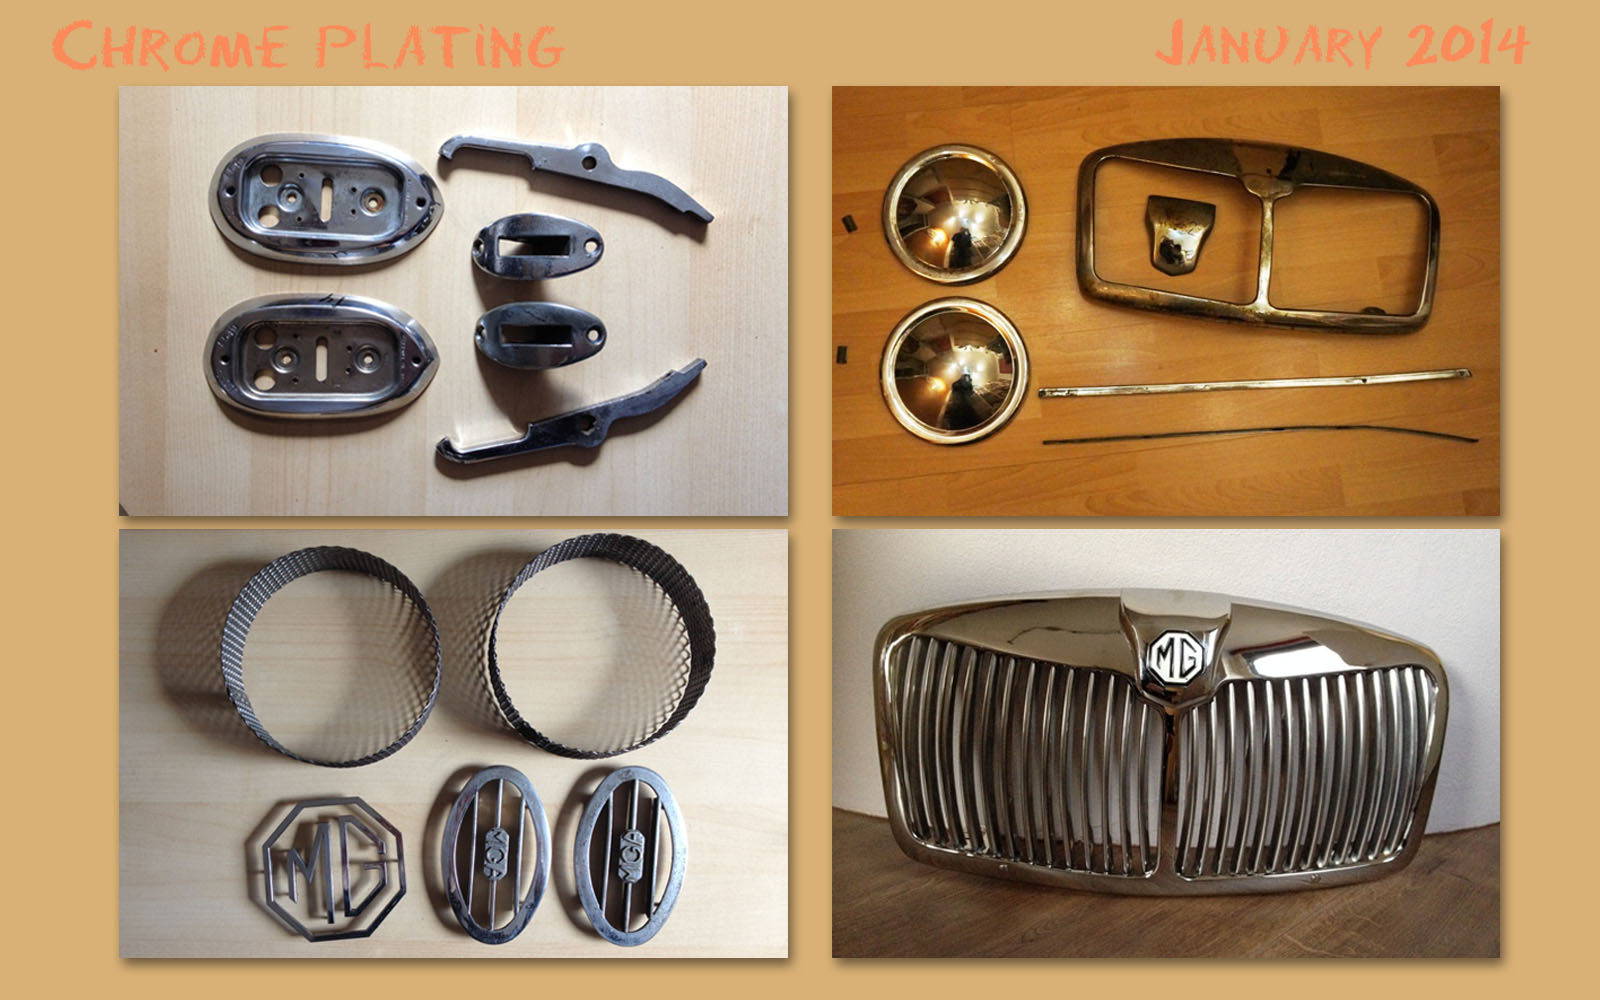 Now that all the welding work is done and the paint work is in progress, we can focus our attention on refurbishing all the chrome work of the MGA. Some of it was still in good shape, like the window frames of the door. That only needed a firm polish, so a couple of hours with some rags and chrome polish later, those were as good as now. Other parts were too far gone. For example 2 of the hub caps and the grill on the front. Chrome plating is a costly process. Mainly because of the extensive labour that is required. First the chrome is removed using chemical solutions. The grill was so badly rusted that we had to weld in some patches. After these repairs all the parts were plated with copper, nickel and finally chrome. This plating is done electro-chemically. After all this plating the parts are polished to their full shine. It looks all like new again.
I painted the backside of the hub caps and grill with a primer to prevent it from rusting. This is because the plating does not really get to cavities and edges as it gets to the outside of the parts, which makes it susceptible to corrosion. The bumpers were not salvageable. So for those we will have to find replacements.
All welding work is done
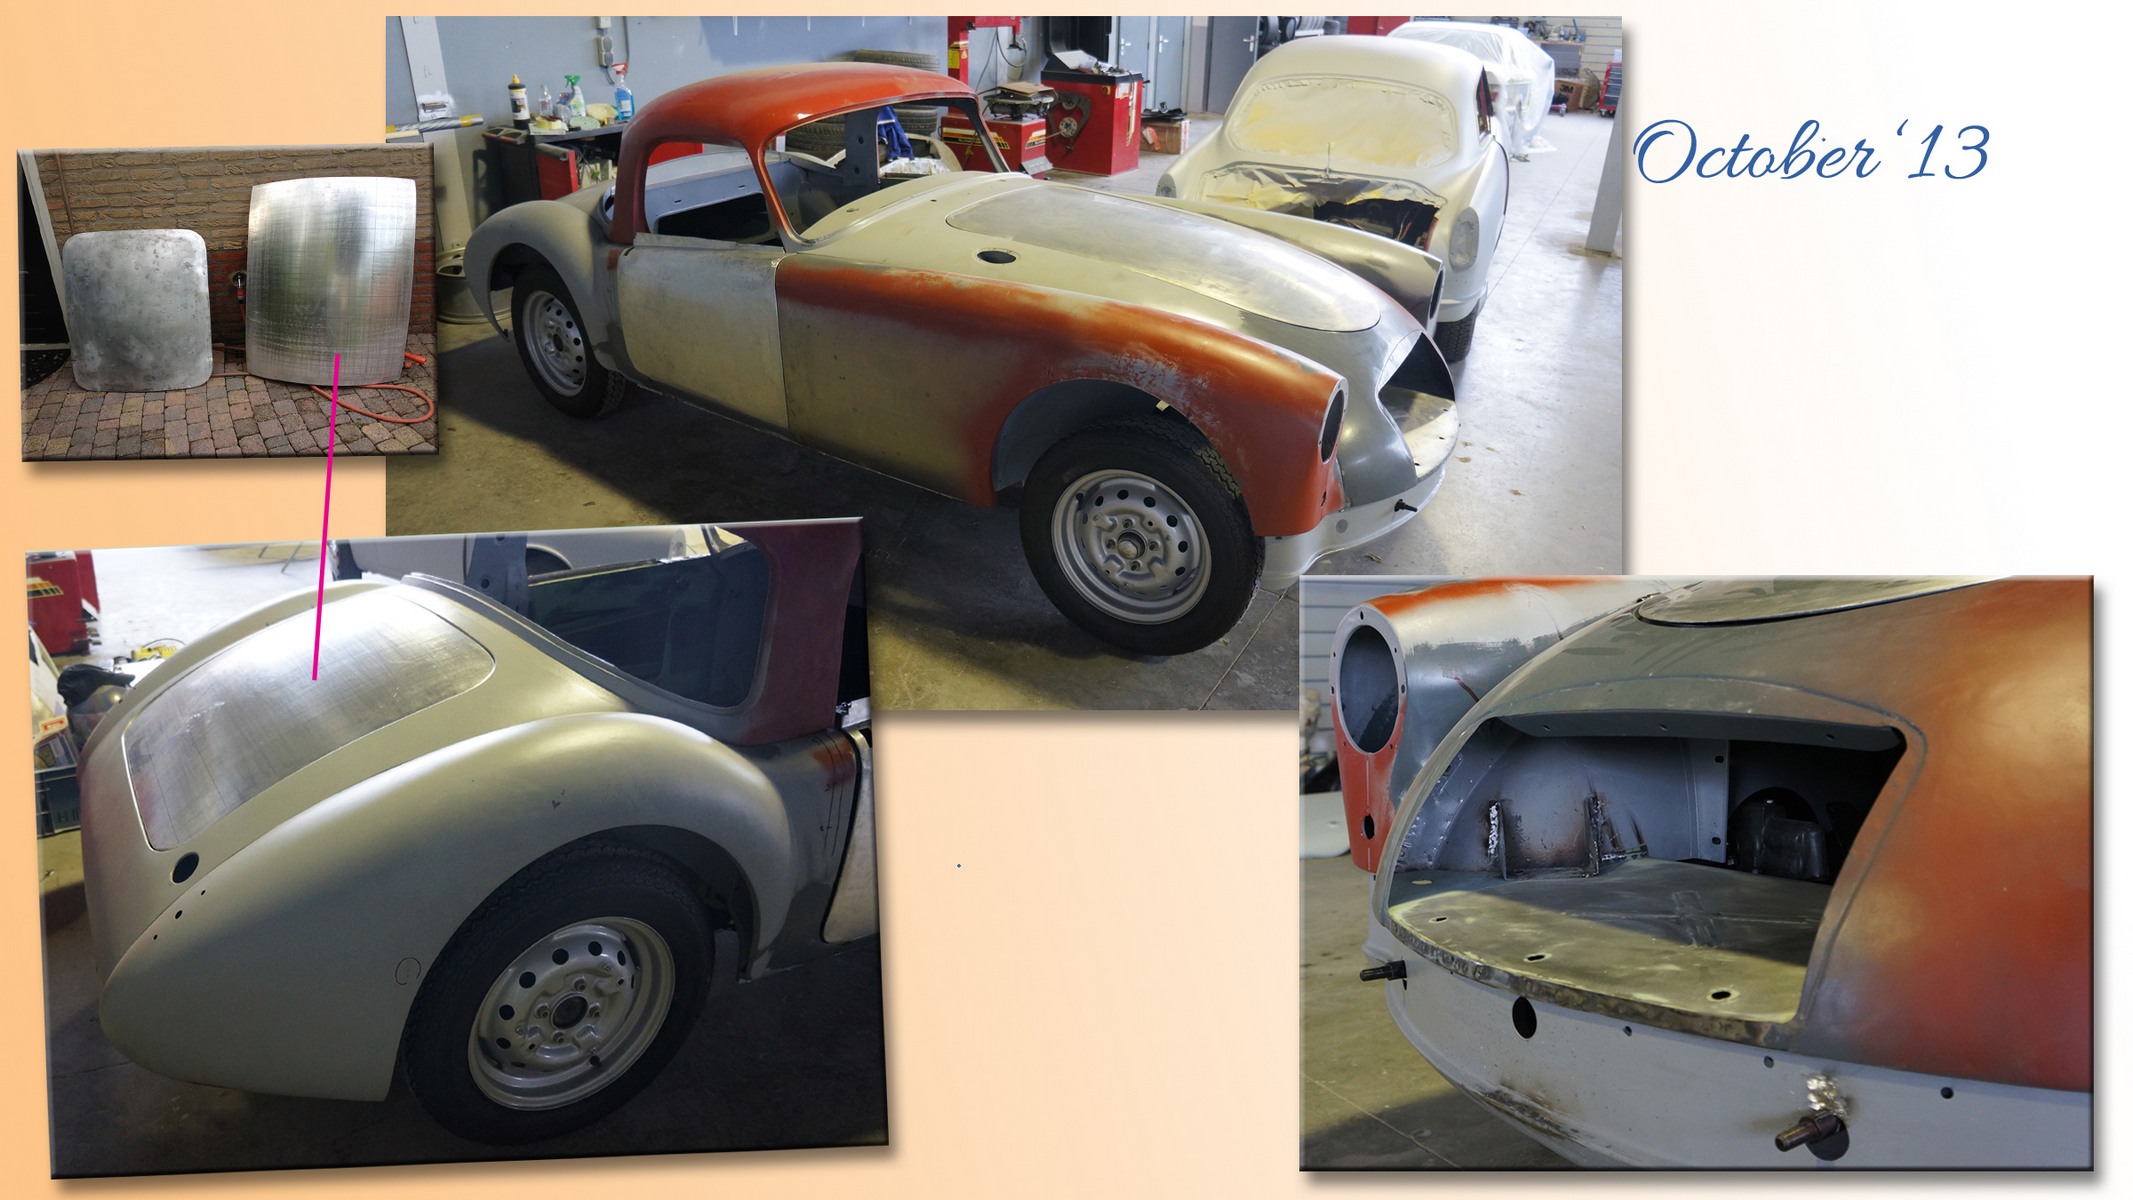 All the welding work is finally done. We ended up calling in the help of an expert to help us with the alignment of all the remaining panels and installing the aluminium skins of the door and boot lid. Everything is properly aligned now and the car at now waiting to get a primer and filler to make the bodywork perfectly smooth.
 After that it will receive a primer to lock in the filler material. When that is all done, we can pick up the chassis to mount the engine, while the body shell will receive its final layers of paint on the inside: engine bay, inside of the doors, boot, inner fenders etc. Once that is all done the two can be put together again, after which the final paint on the outside can be applied. How will it look and how will it drive? In a couple of months we will know. Keep an eye on our website....
An extensive nose job
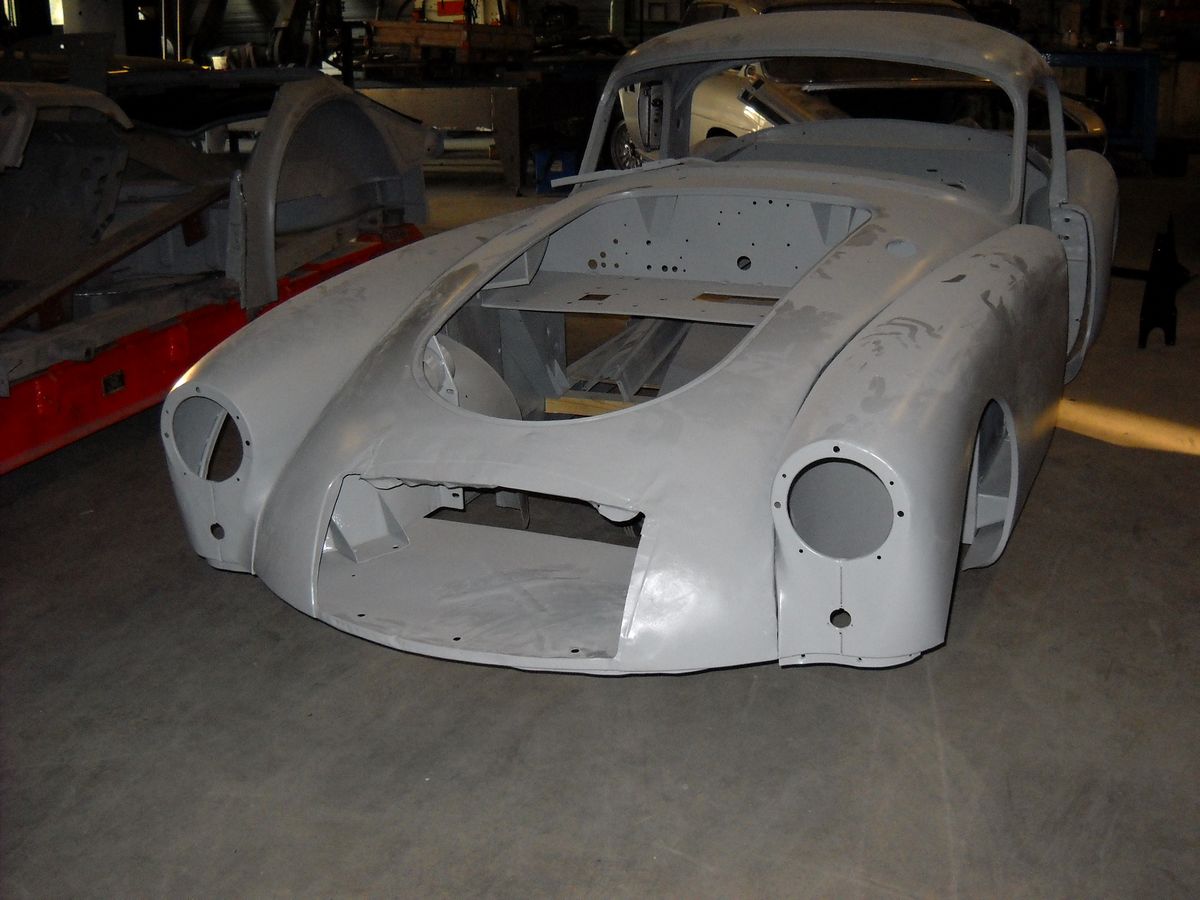
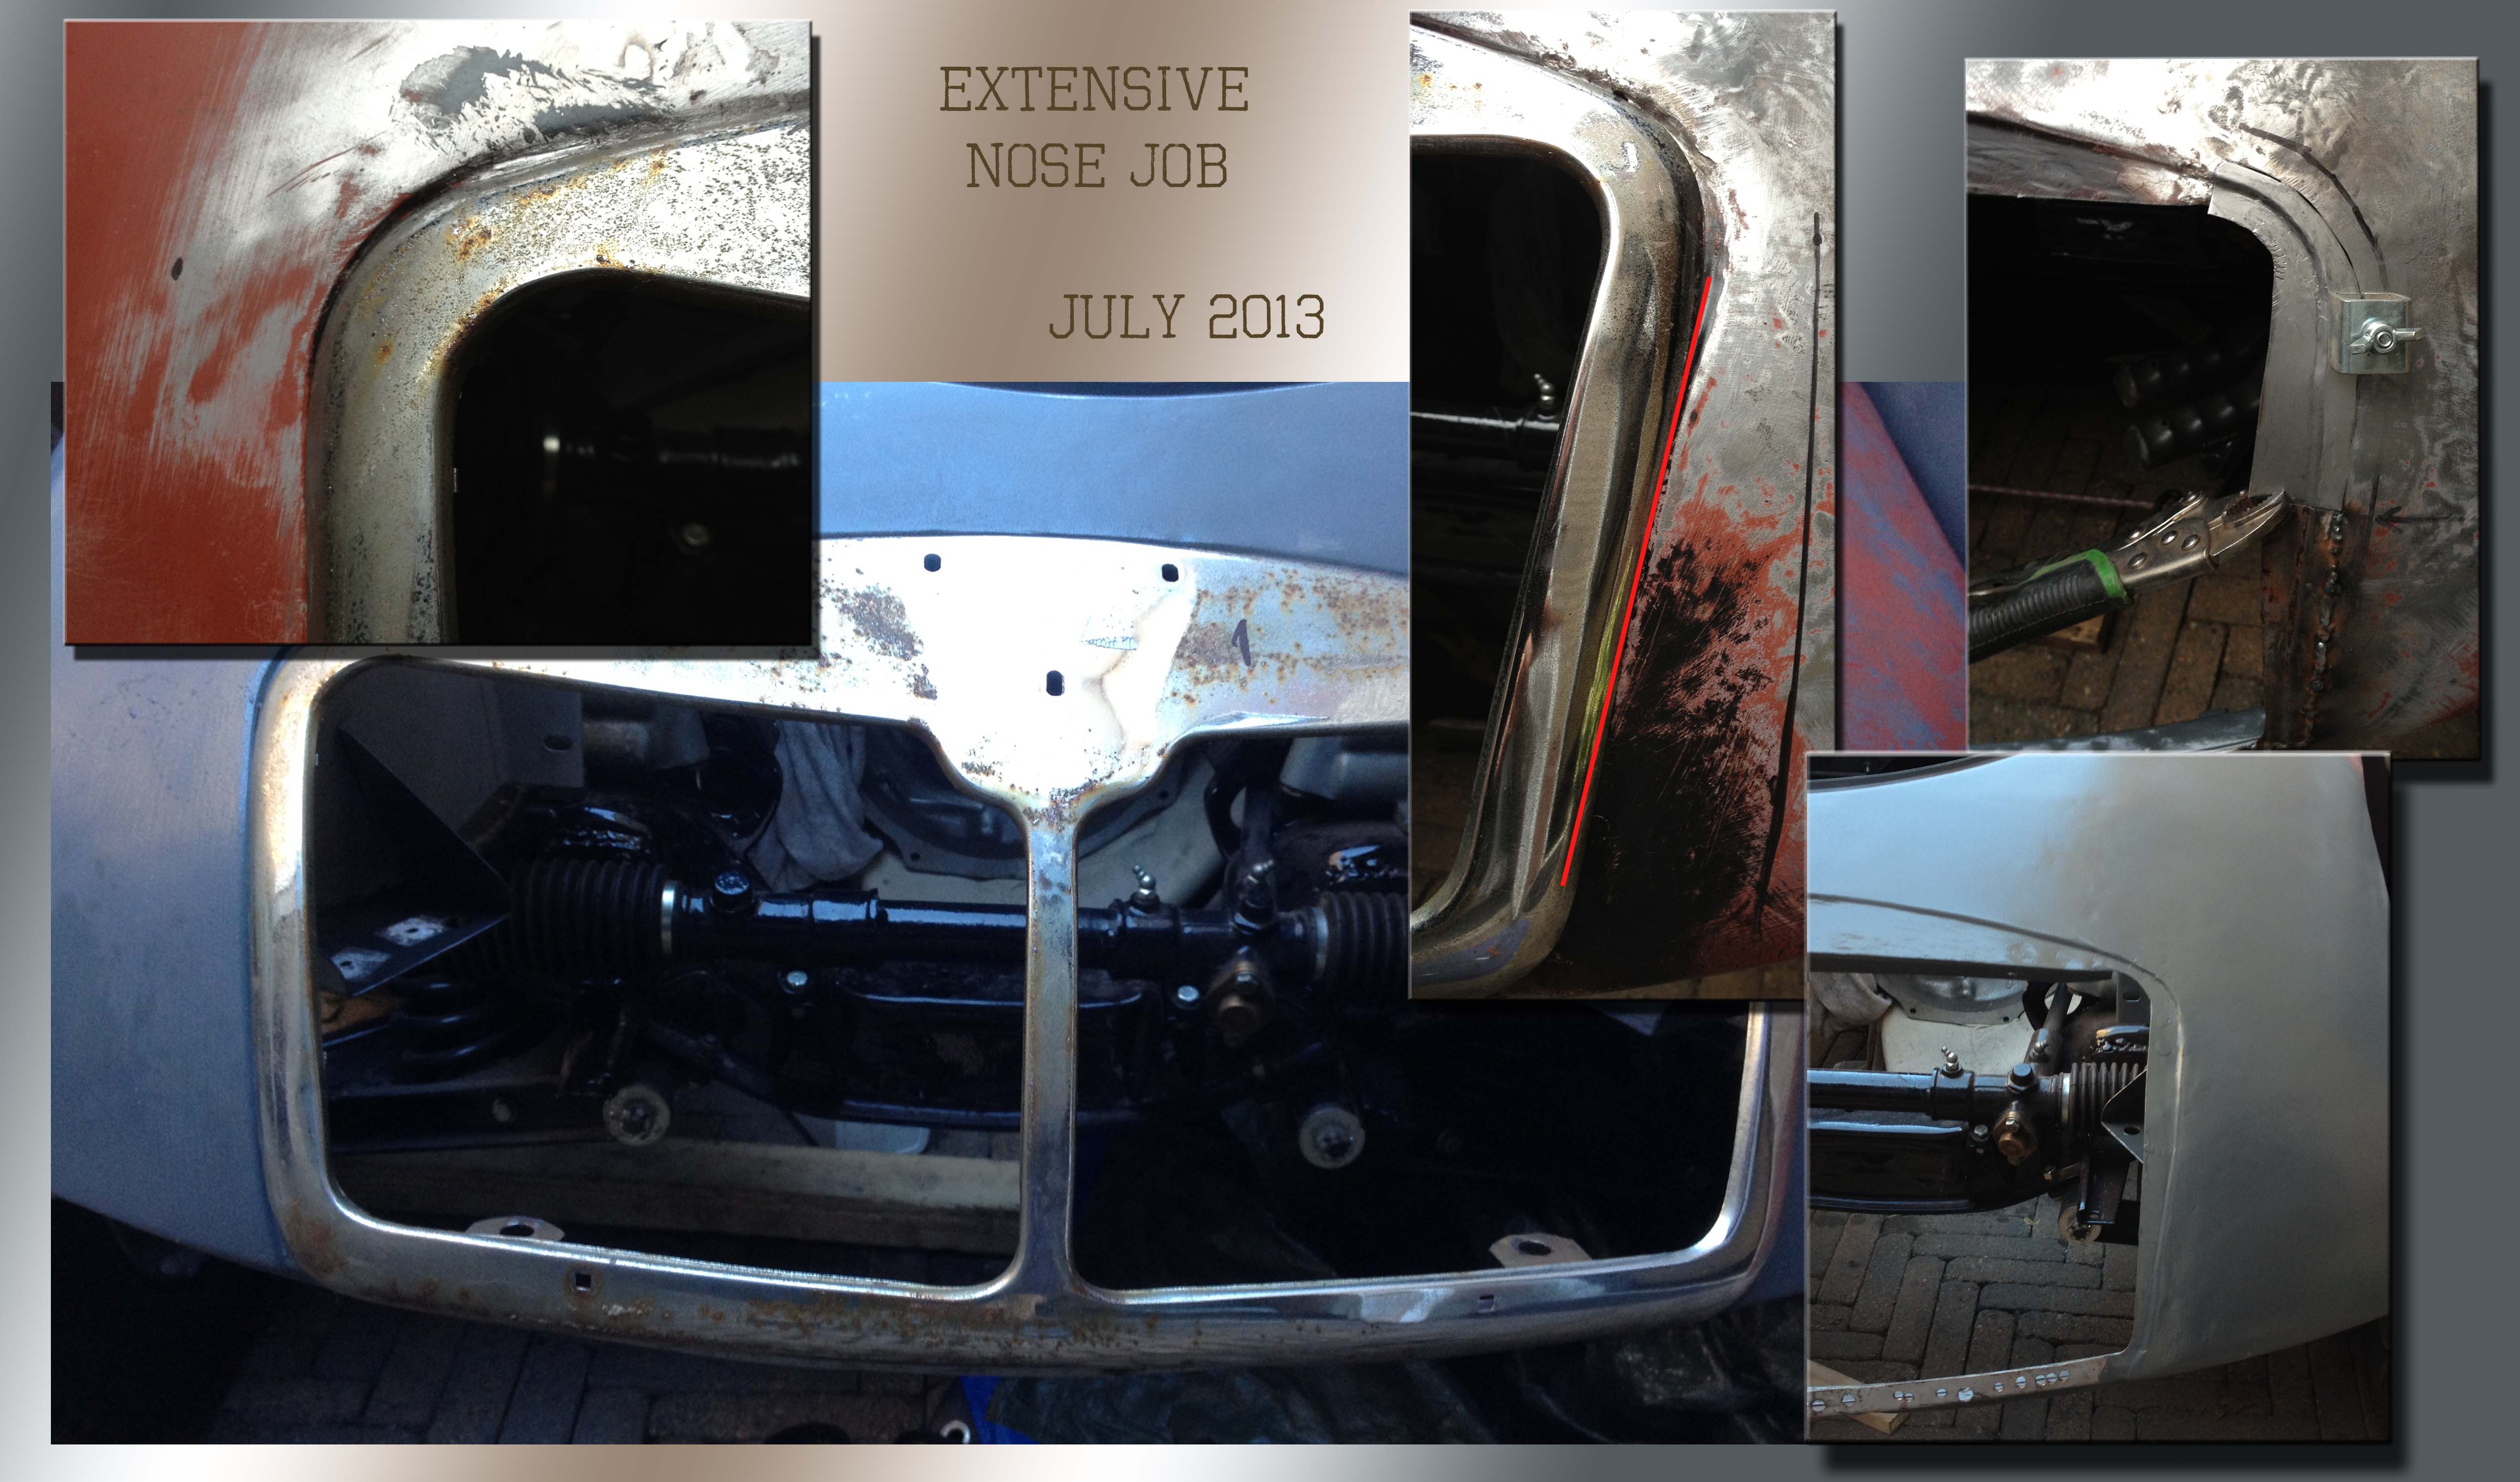 The nose is about the first thing you see when you meet a person. And if you hurt your nose it is hard to hide in day to day life. Not much different when it comes to cars. Our MGA was seriously damaged at the front. The fenders did not align properly with the centre front panel. In addition there was (again) lots of filler used to 'shape' the front area. The grid was also a bit deformed and did not align in the recess of the front panel. On one side that was relatively easy to fix using solder techniques. On the left-hand side things were much worse, and I ended up cutting out a piece and re-shaping it from a new piece of sheet metal. The rest can be solved with just a tiny bit of filler.
Learn from someone else's mistakes
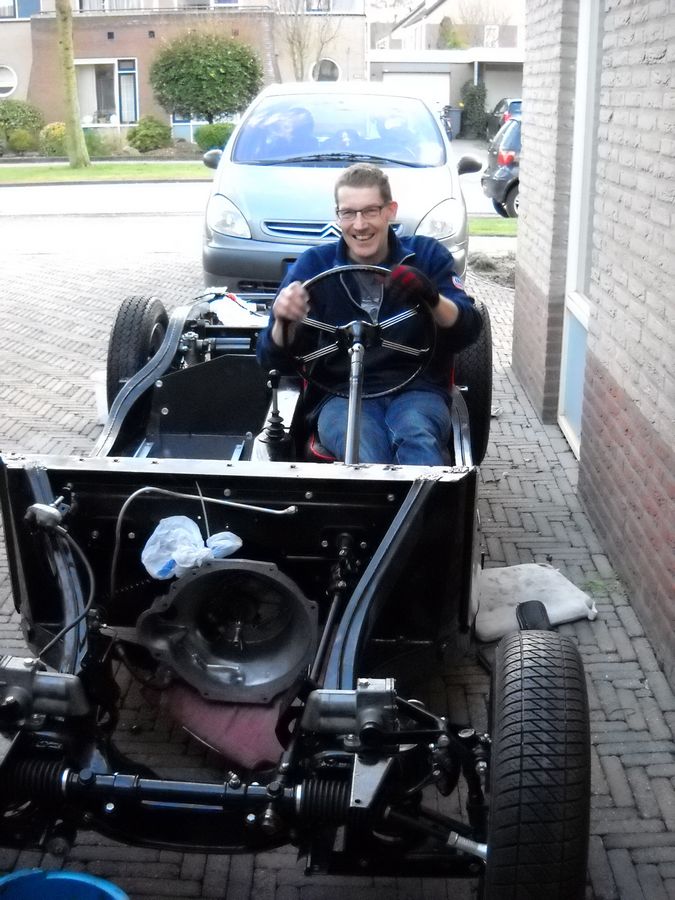
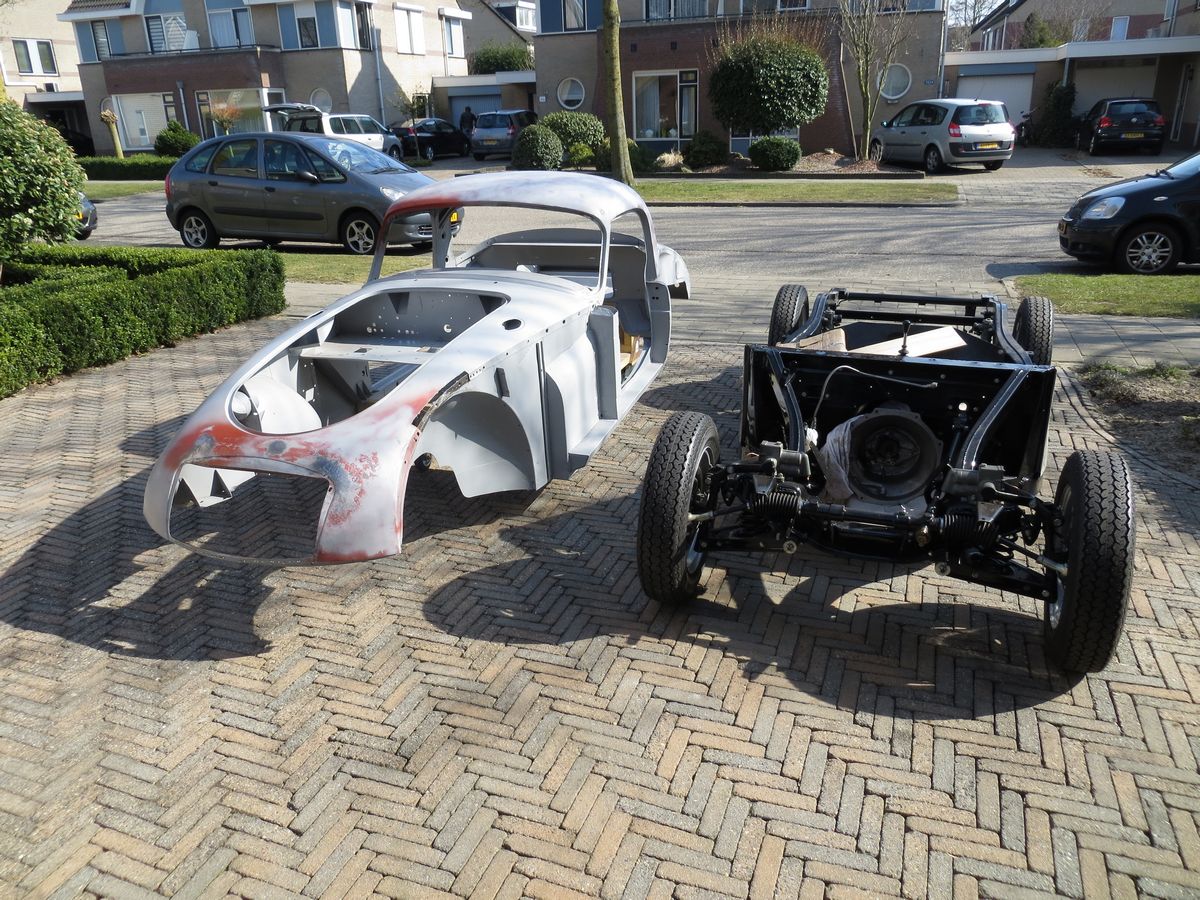 The body shell received some attention from a professional car restoration expert Martin Dijkhof. He was able to smooth out the roof and do some repair work on the front of the body shell. Now it is our turn again. He helped us fitting the bodyshell to the chassis again. I am sure you are familiar with the experience: a hot and cold feeling at the same time. It did not quite fit. Measurements to the chassis revealed that the latter was the root cause of the bad fit. The right-front wheel was 2 cm out of alignment. This needed to be fixed to ensure a smooth ride once the car is completely done. Considering the thickness of the chassis, it is clear the chassis took quite a beating. Similar force was required to make it straight again.
 Painful to realize that some of the clean paintwork would eventually have to be redone. The best we can do is learn from our mistakes. Better yet, learn from these mistakes valued reader. Before any painting, repairing, welding is done to the chassis and body shell, remove all the paint first and measure. The same happened to the wheels. One of the wheels is painted twice. Only because during the balancing of a newly painted wheel I found out it was bent and needed a lot of weight to get it balanced.
With the roof taken care of, we used soldering to straighten out small uneven patches. Looks like the rear of the car is getting into shape. We fitted the fenders and are pleased with the results. The fitting of the grill to the body is not quite there yet. We will have to get new chrome on the grill any ways, so we can make it to fit before the chrome job. The next step is to fit the remaining body parts to make sure everything lines up. Then we can painting the inside of the body shell and the fenders in the right colour.
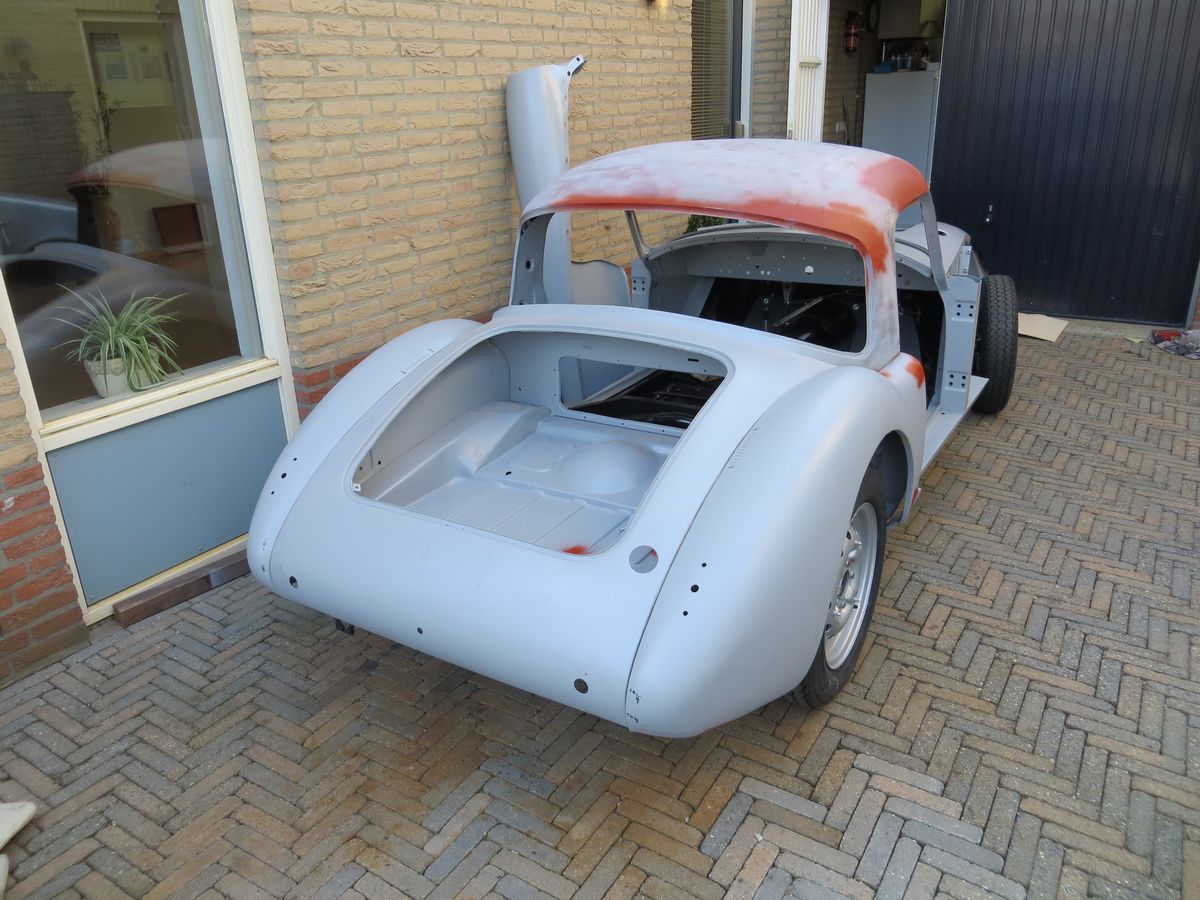 There is still a long way to go. Just once in a while I scroll back to the pictures of the beginning with rusted and dented sheet metal at best and plain holes in the more severe cases. Right now the main colour is primer-gray with some remaining dents and a few panels that do not quite align, yet...
Battle on two fronts
 With the body shell separated from the chassis, the restoration becomes a two-front battle: the chassis at home and the body shell at a professional car restoration expert Martin Dijkhof. The roof had many dents and I needed help from an expert to get the roof perfectly smooth. With the roof being as low as this MGA, it is first thing one sees when walking up to the car and so that has to be perfect. With the work I did on the roof the metal stretched a bit too much here and there. By heating it up, the metal can be shrunk back again.
 The first thing the expert did did was removing the last bit of paint and rust. As much as possible we removed the old paint ourselves with sand paper and chemical means. The roof is particularly vulnerable and so that was already paint free when I got it to the body shop. On the front side of the car there is a a bit of lurking labour. It looks like the whole front is distorted during one of the many crashes this car has been involved in. Looking at the air duct panel below wrinkles are clearly visible. The best is probably to replace this panel altogether in order to undo the deformation.
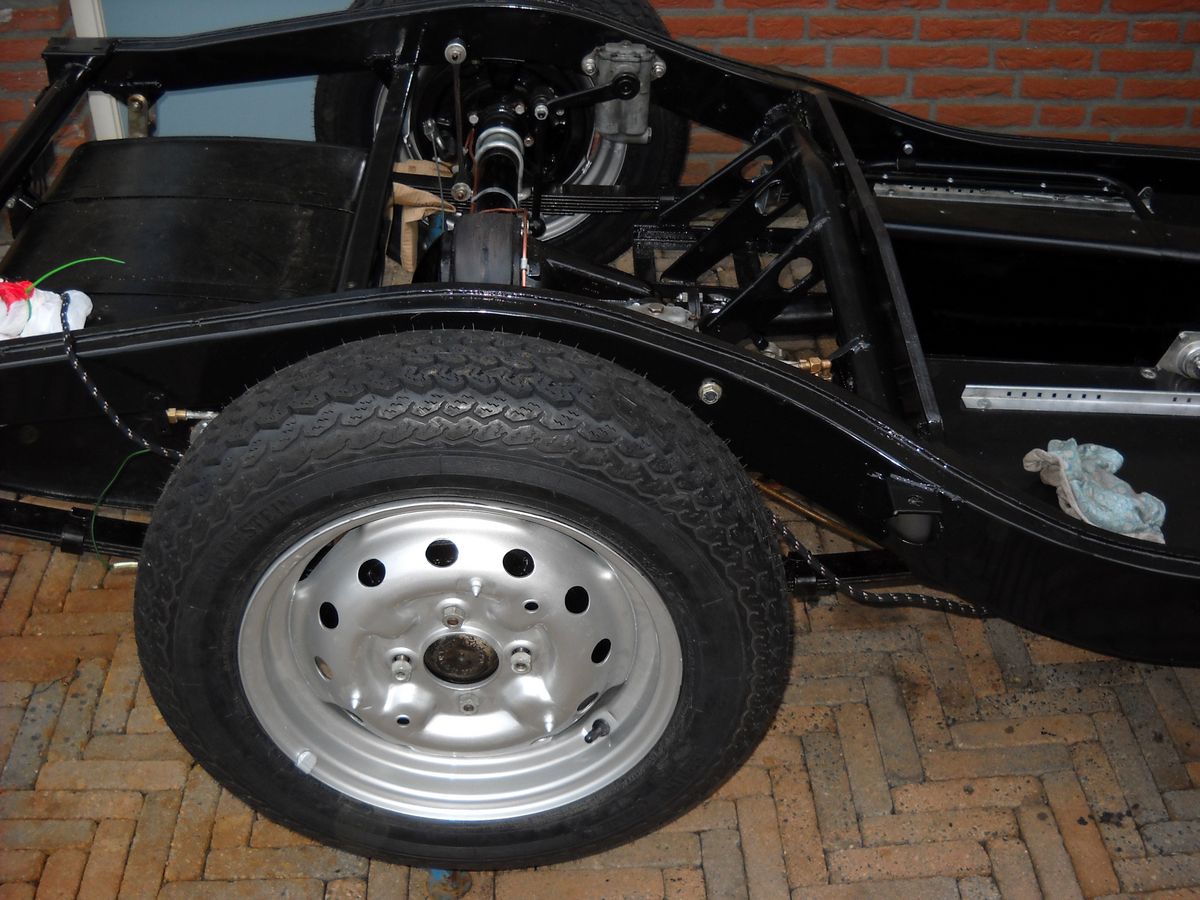
 In parallel Daan and I have been working on the chassis We mounted the fuel tank, suspension, the gearbox, and the driveshaft. The brake lines are renewed as well as the wiring. Finally we mounted the wooden floorboards. The edges of the boards are sealed with a polyurethane seam sealer. We are not planning to use this car in bad weather, but an occasional rain shower can not always be avoided: the car shall be driven.... The chassis is completely ready now. Once the body shell is ready, it can be fitted.
With the car in the building up phase, we speculate on the date we can take it for a spin. Well, to be perfectly frank: looks like we are closer to the finish than to the start. But if that also means closer to the finish in time, still remains to be seen. As much as we would like to put it on the road, we also enjoy the restoration process just as much... Time will tell.