
")
Other
Chrome restoration
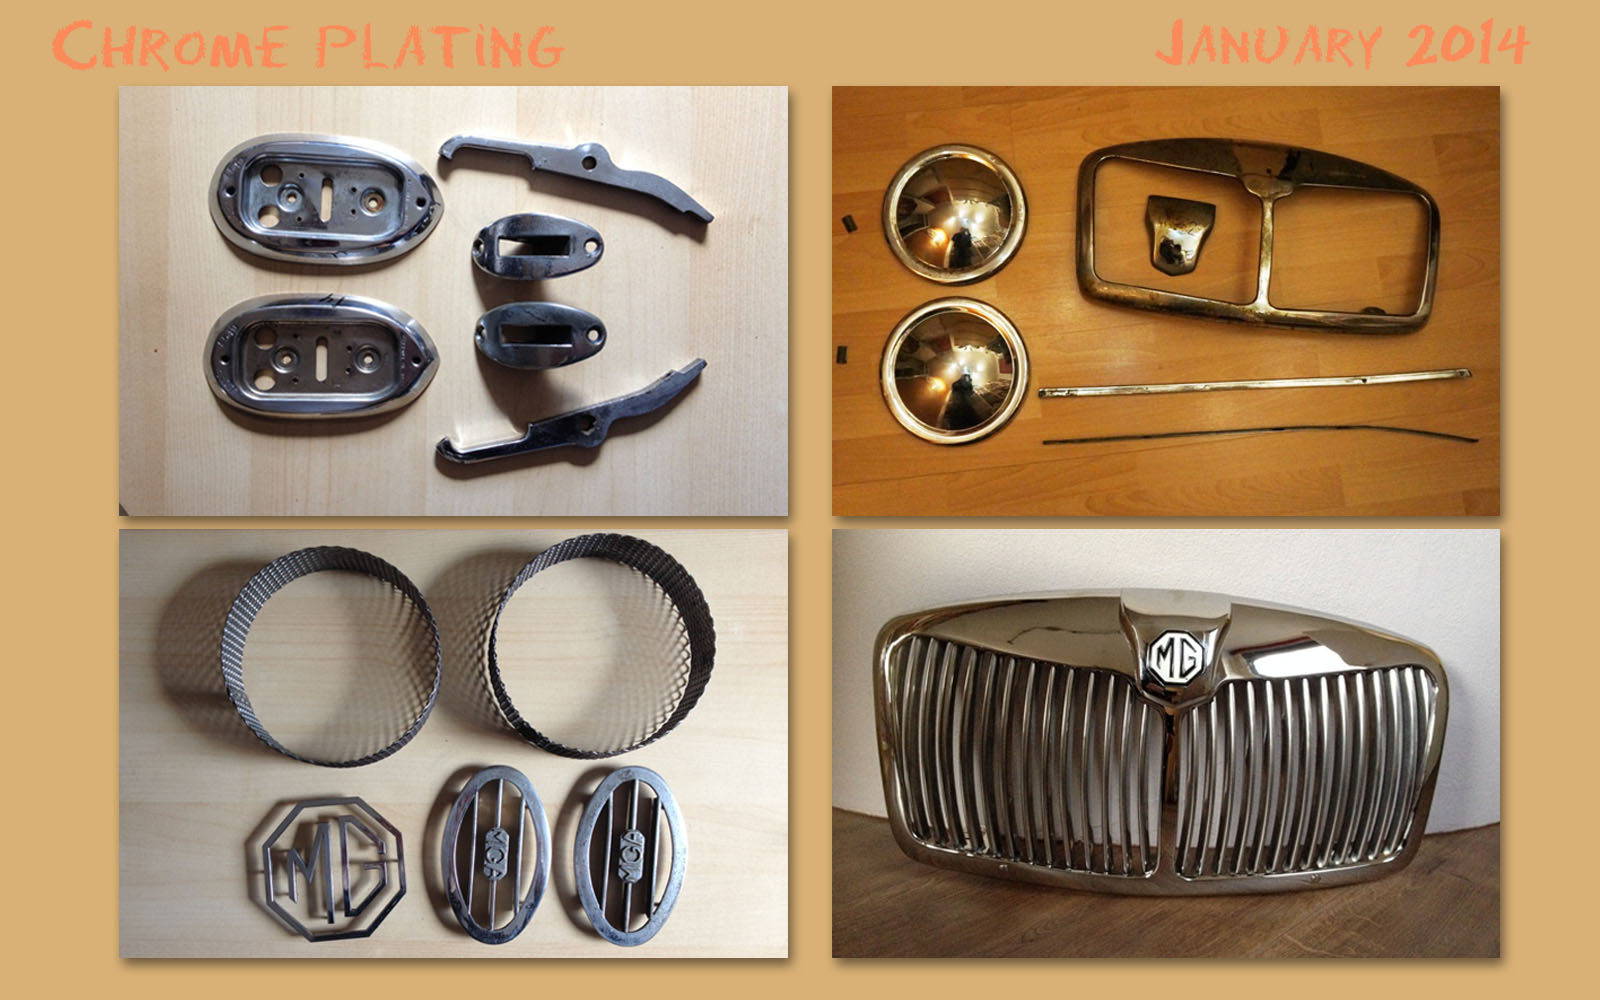 Now that all the welding work is done and the paint work is in progress, we can focus our attention on refurbishing all the chrome work of the MGA. Some of it was still in good shape, like the window frames of the door. That only needed a firm polish, so a couple of hours with some rags and chrome polish later, those were as good as now. Other parts were too far gone. For example 2 of the hub caps and the grill on the front. Chrome plating is a costly process. Mainly because of the extensive labour that is required. First the chrome is removed using chemical solutions. The grill was so badly rusted that we had to weld in some patches. After these repairs all the parts were plated with copper, nickel and finally chrome. This plating is done electro-chemically. After all this plating the parts are polished to their full shine. It looks all like new again.
I painted the backside of the hub caps and grill with a primer to prevent it from rusting. This is because the plating does not really get to cavities and edges as it gets to the outside of the parts, which makes it susceptible to corrosion. The bumpers were not salvageable. So for those we will have to find replacements.
The story on the Upholstery
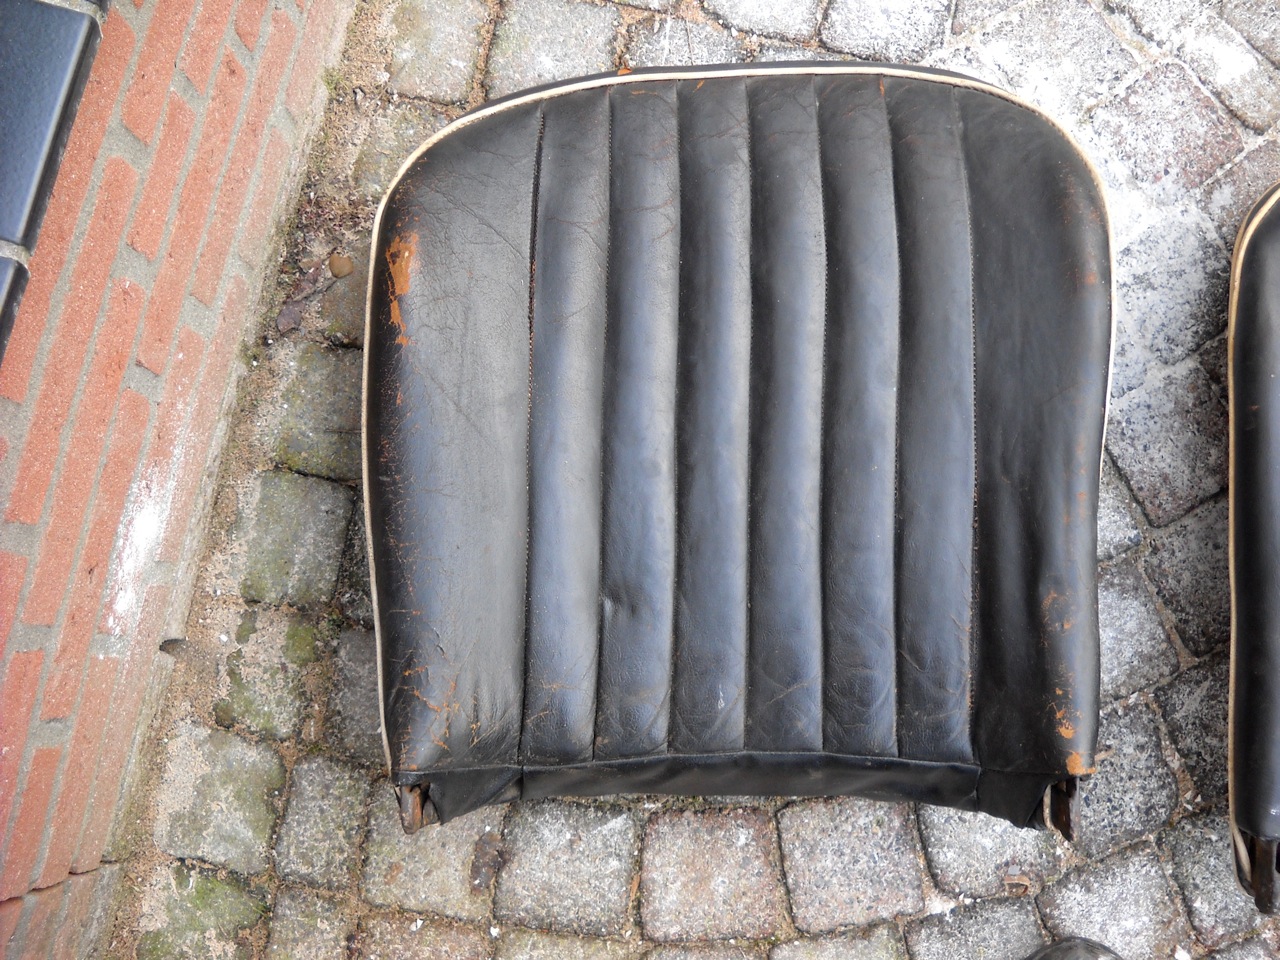 Although it is going to take a while before the seats can be installed in the car, we could work on the frames in the garage in the winter time. We had to clean the frames and make some modifications, because it turned out that the back of the seats were not the original ones. The ones in our MGA coupe came from a roadster. The roadster seat back has a vertical seam pattern, whereas the coupe has as pattern of 5 horizontal seams and 2 vertical seams on the sides.
 Also the frame is a bit different: A coupe has a horizontal top while the back of a roadster seat is slightly sloped down towards the sides of the car. The leather was too old and damaged to be preserved anyway so we decided to discard the old upholstery and modify the back of the seats to turn it into a coupe seat again. Since the leather seats had to be redone, we wanted the seams to match the original MGA coupe pattern again.
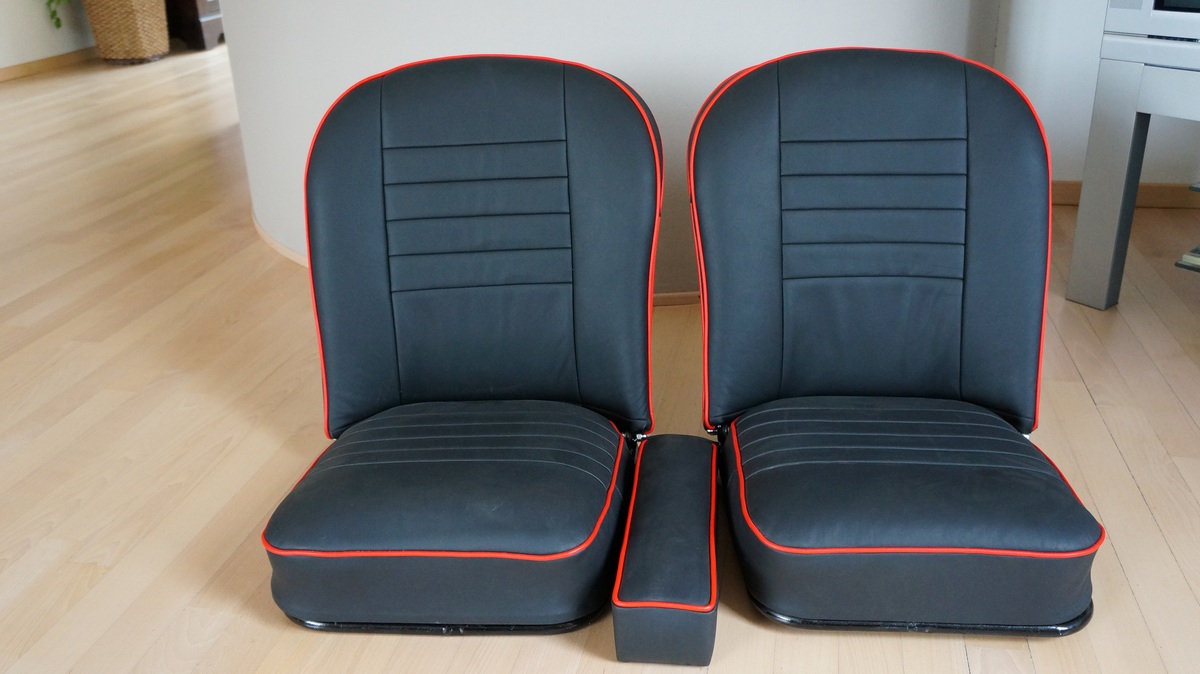 Sewing leather requires a special sturdy sewing machine and so we looked around for a person that could do the leather upholstery for us. After some research we contacted Bekleding Totaal in Ede to do this work for us. We could select the leather ourselves as well as the colour of the piping. Once it was done we were very eager to fit the new seats in the car. Instead of putting the new seats in the car as it is now, use used Photoshop to test fix it. Much easier to move around, the comfort of a nice cup of coffee nearby and no risk of damaging the new leather on the sharp edges of the body shell under construction.
 One of the first things we noticed on the car while it was still in San Francisco was the cracked and damaged steering wheel. I was almost at a point to discard the steering wheel and get a new one. A bit of research on the internet learned that some MGA fanatics were able to fill the cracks and make the steering wheel look like new again. While I was in the US for work I picked up the 2 component putty several people used to do the job. What do you say? Much nicer to have a wheel in your hands that lived through all those year. If only this wheel could tell the tales of all the accidents it lived through...

Fixing the Dash
 During the initial disassembly of the MGA, the dash was completely removed from the car. The knobs and meters in turn were all removed from the dash. The vinyl is damaged a bit through the years and the metal of the dash was a bit rusty. Worse yet extra holes were drilled in the dash for an extra switch and for a handle. I welded the holes and made it smooth before it was sandblasted and spray painted. We found a new vinyl material that is very similar to the leather we will use for the seats later on. With spray glue the vinyl is attached to the smooth repainted metal of the dash.
The chrome rings of the meters are polished and the meters are cleaned. I have been searching the web trying to understand how the temperature sensor works, convinced as I was that the temperature meter was broken. The sensor and the meter is connected with a thin copper tube with an inner diameter of about 2mm. It contains a fluid under pressure and repairing it is not so easy. We tried the sensor in a little bit of boiling water. To my surprise is simply worked. Just have to be careful not to break the tube now, or during the installation.
 The headlight switch had some molten plastic on it, obviously caused by heat. One of the internal connections in the switch was corroded, and with the thus created extra resistance most likely the root cause of this heating. I cleaned it all thoroughly and made the connection extra solid using solder: no fried wires under the new dash. The fuel gauge is cleaned re-adjusted with the tank sensor connected. The final test will be when we fill up the tank the first time, check the gauge and turn the key. When that will be? Not in 2011. I'll keep you posted. For now, we wish you a Merry Christmas.
Comparing old and new
 Let us see where we are with the restoration. We pulled up one of the first pictures of the engine bay, just to compare the before and after. The heater core housing is sandblasted and painted in a semi-gloss black paint. The heater core itself is cleaned internally with a mild acid to dissolve the rust deposits. The heater core was plugged with a wooden pin and is obviously not used in the last couple of years of active life of the car.
The rocker cover is that rusty piece of metal you can see on the top of the engine. If you see how it is now: Hard to imagine... The Carburettors with the basted and newly painted air filters look great again. Too bad these are tugged away under the bonnet. We are going to pick up the engine soon, as it is getting near completion. Curious how that will look eh run... (or both).
Fuel pump upgrade
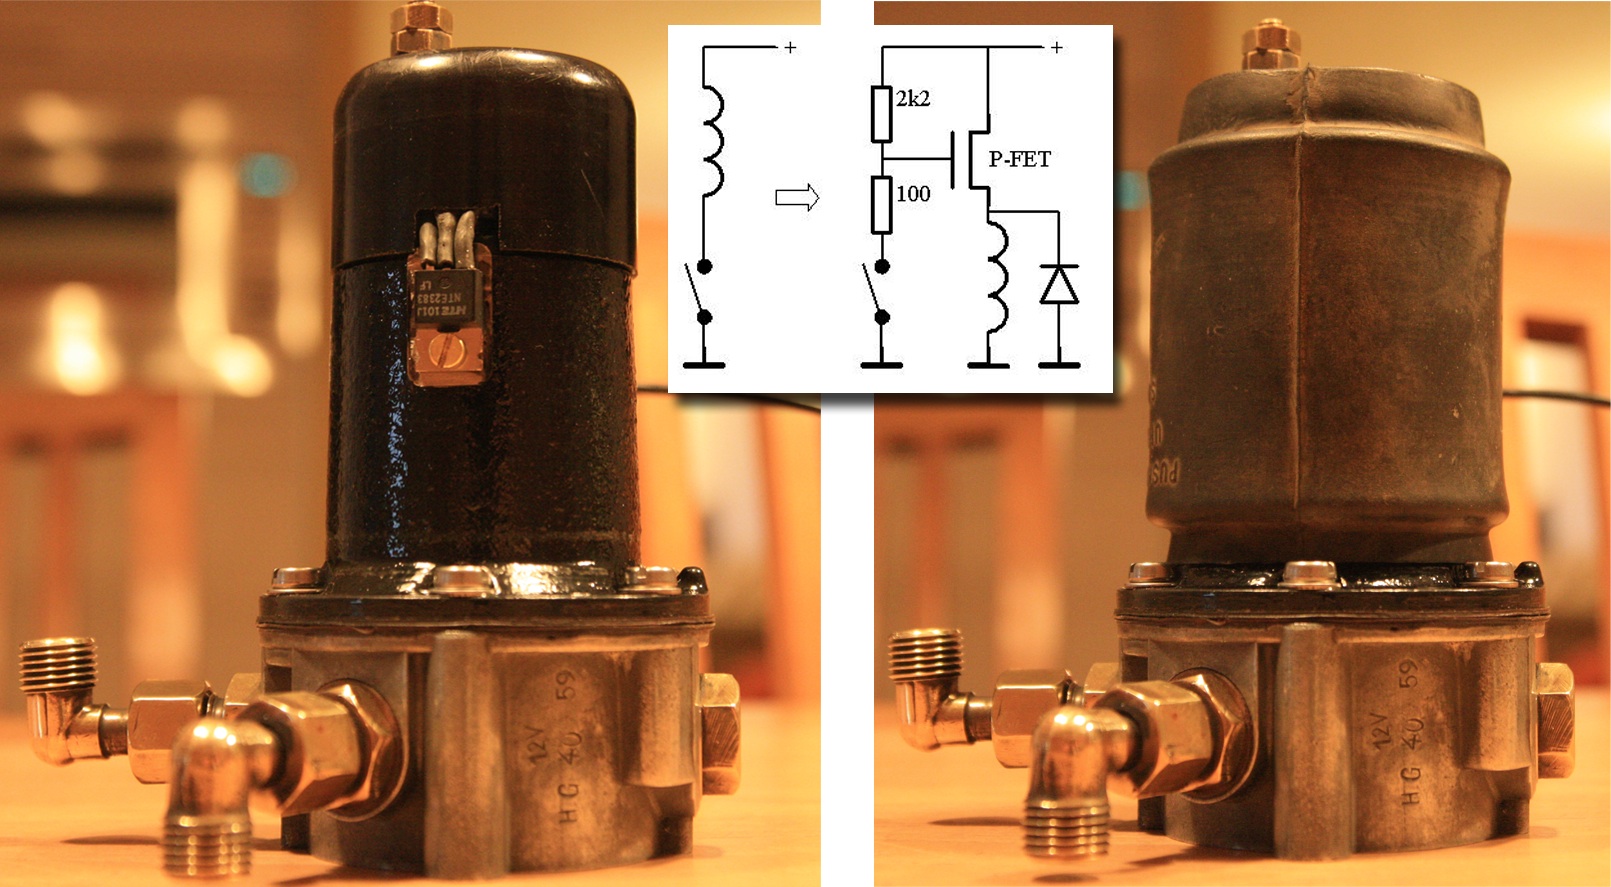 For some it is a welcome improvement, for the other a disgrace. The fuel pump had serious burned in contacts. In those days it was hard to suppress the sparks on the contacts of a switch that is turning off the current in a coil. A capacitor will diminish the sparks somewhat. When a FET is used to switch the current, the spark can be suppressed. With the protective rubber sleeve, it is invisible. And yet, I did made the decision to put the negative the ground. With + to ground is just too confusing...