
")
Our restoration stories
Remake an airfilter cover
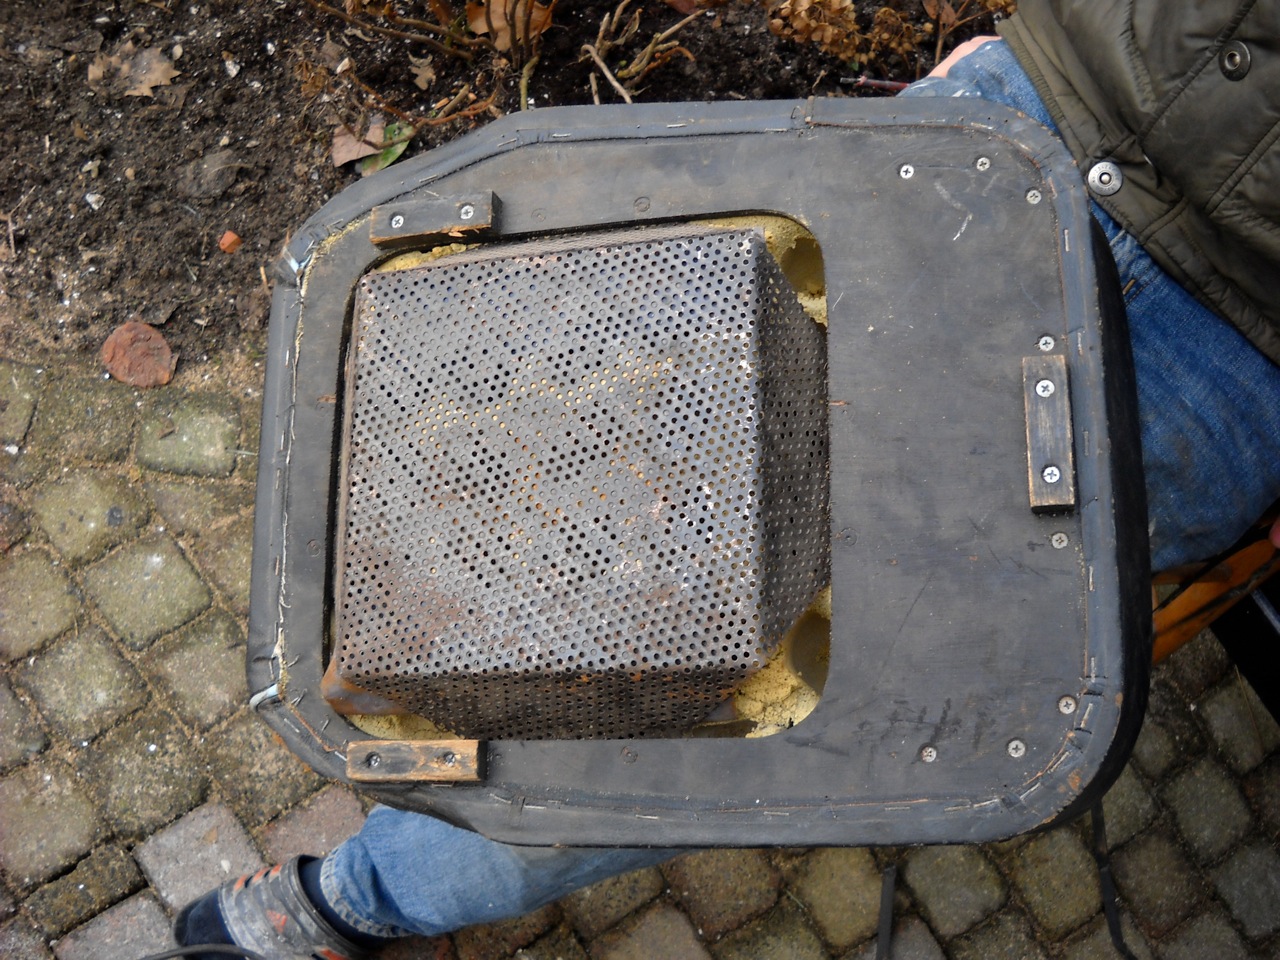
 One of the 2 air filter covers was missing. To buy a complete new air filter is definitely an option. More fun is to make one yourself from a straight piece of sheet metal: a lot of hammering: not too hard, but just a lot. It is amazing how easy it is. You should give it a try. Wear ear protection, and better do it when the neighbours are out...
Before and after
 We are making some progress. Not very fast, but that was never the intention. The 'fun' is in the making and restoring. All the front suspension is now removed. Dirty hands and lot of dirty rags to clean it all up. Every piece you grab is grease with sand and dust. The front suspension of an MGA is rather strange. Where other cars have some sort of top bearing, the MG has a swivel pin with a thread. The thread has a left turn on the left-hand side and a right-turn thread on the right-hand front suspension. This car must have had some repair done to it, as the threads were identical. That would make the steering pull to one side on a smooth road. All bushes in the suspension were seized and needed a lot of persuasion to get them removed. You can see that this part requires some maintenance. It does need some grease on regular intervals. As result of the insufficient lubrication a bolt of the lower suspension arm has been worn out. It has been pivoting around the bolt rather than the bush. It would not have been long before the bolt would have been broken! Fixing the lower arm was easy with bit of welding and grinding.
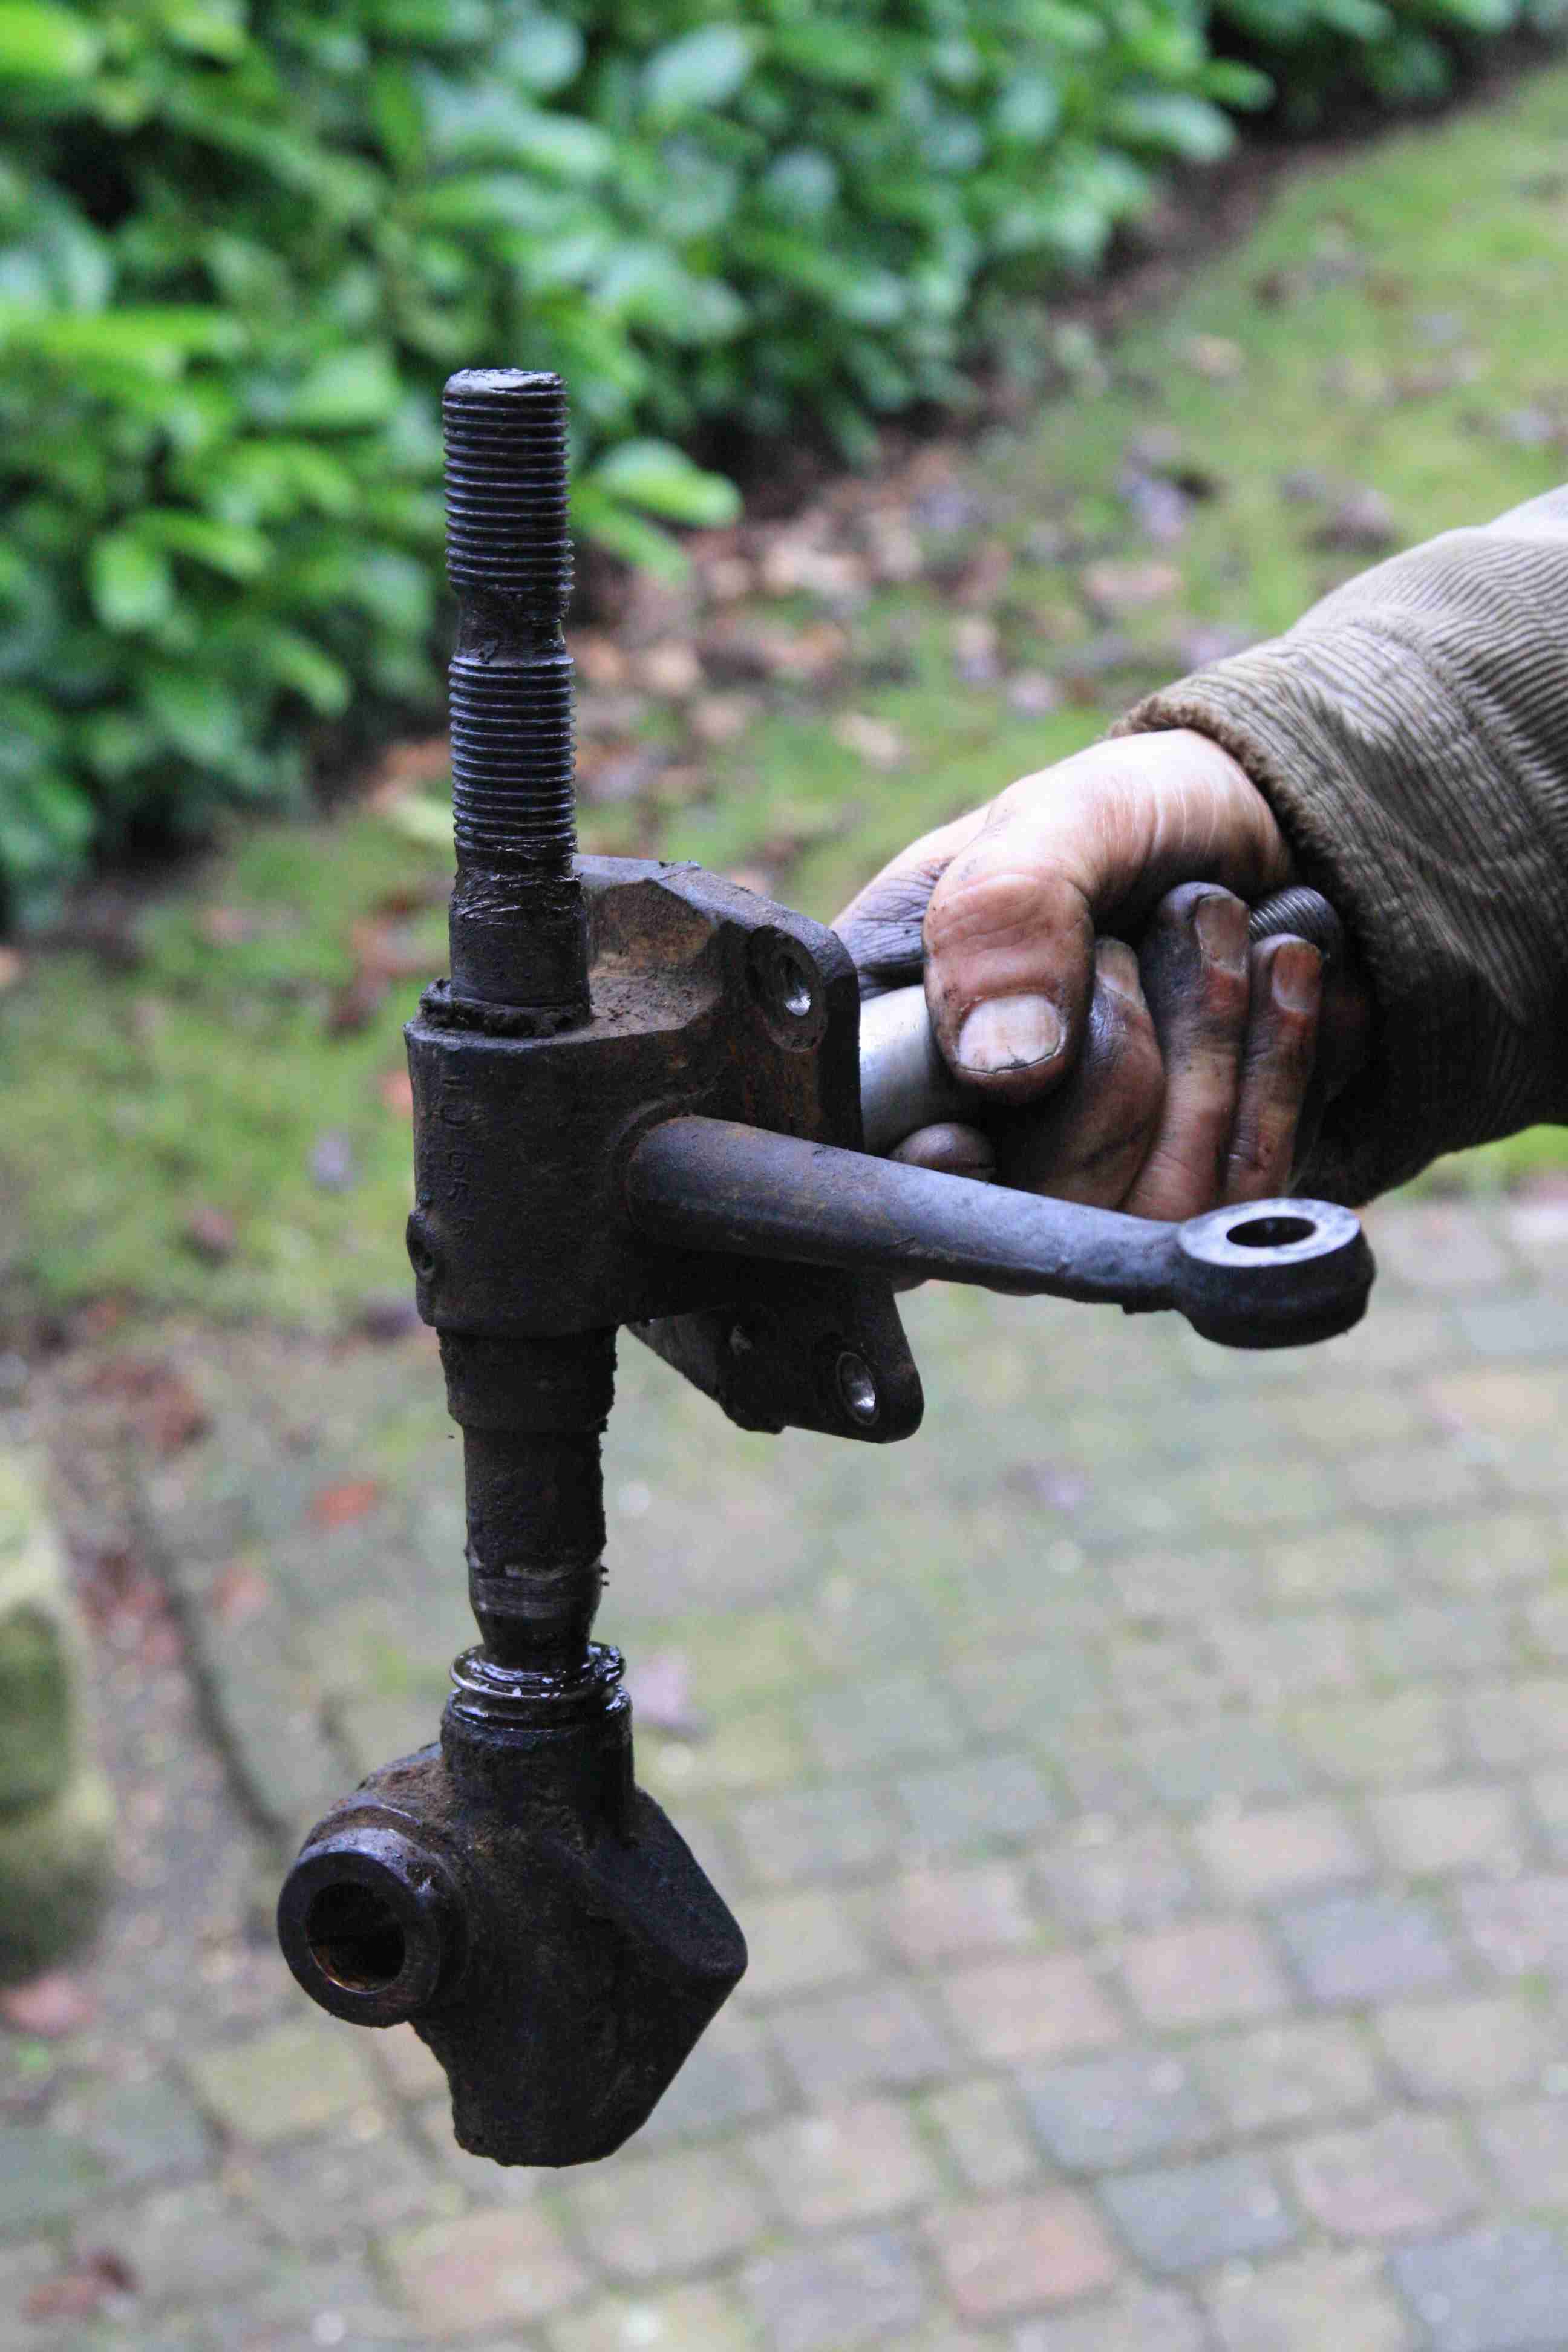
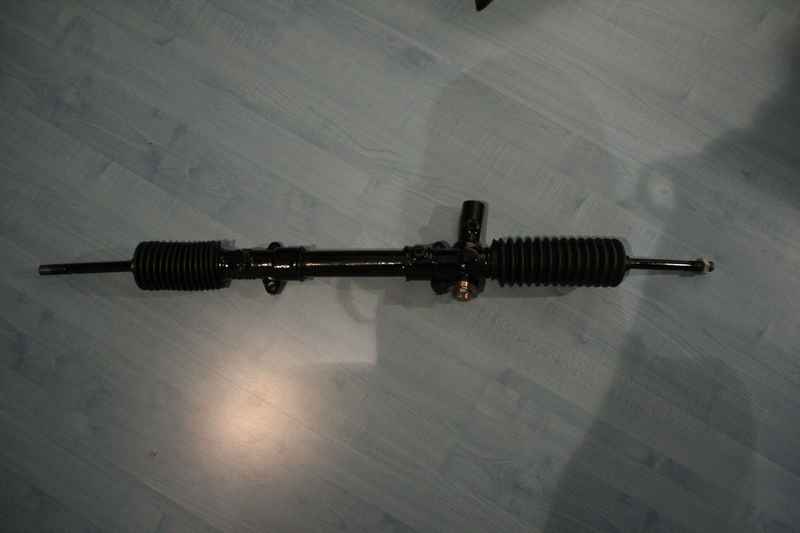
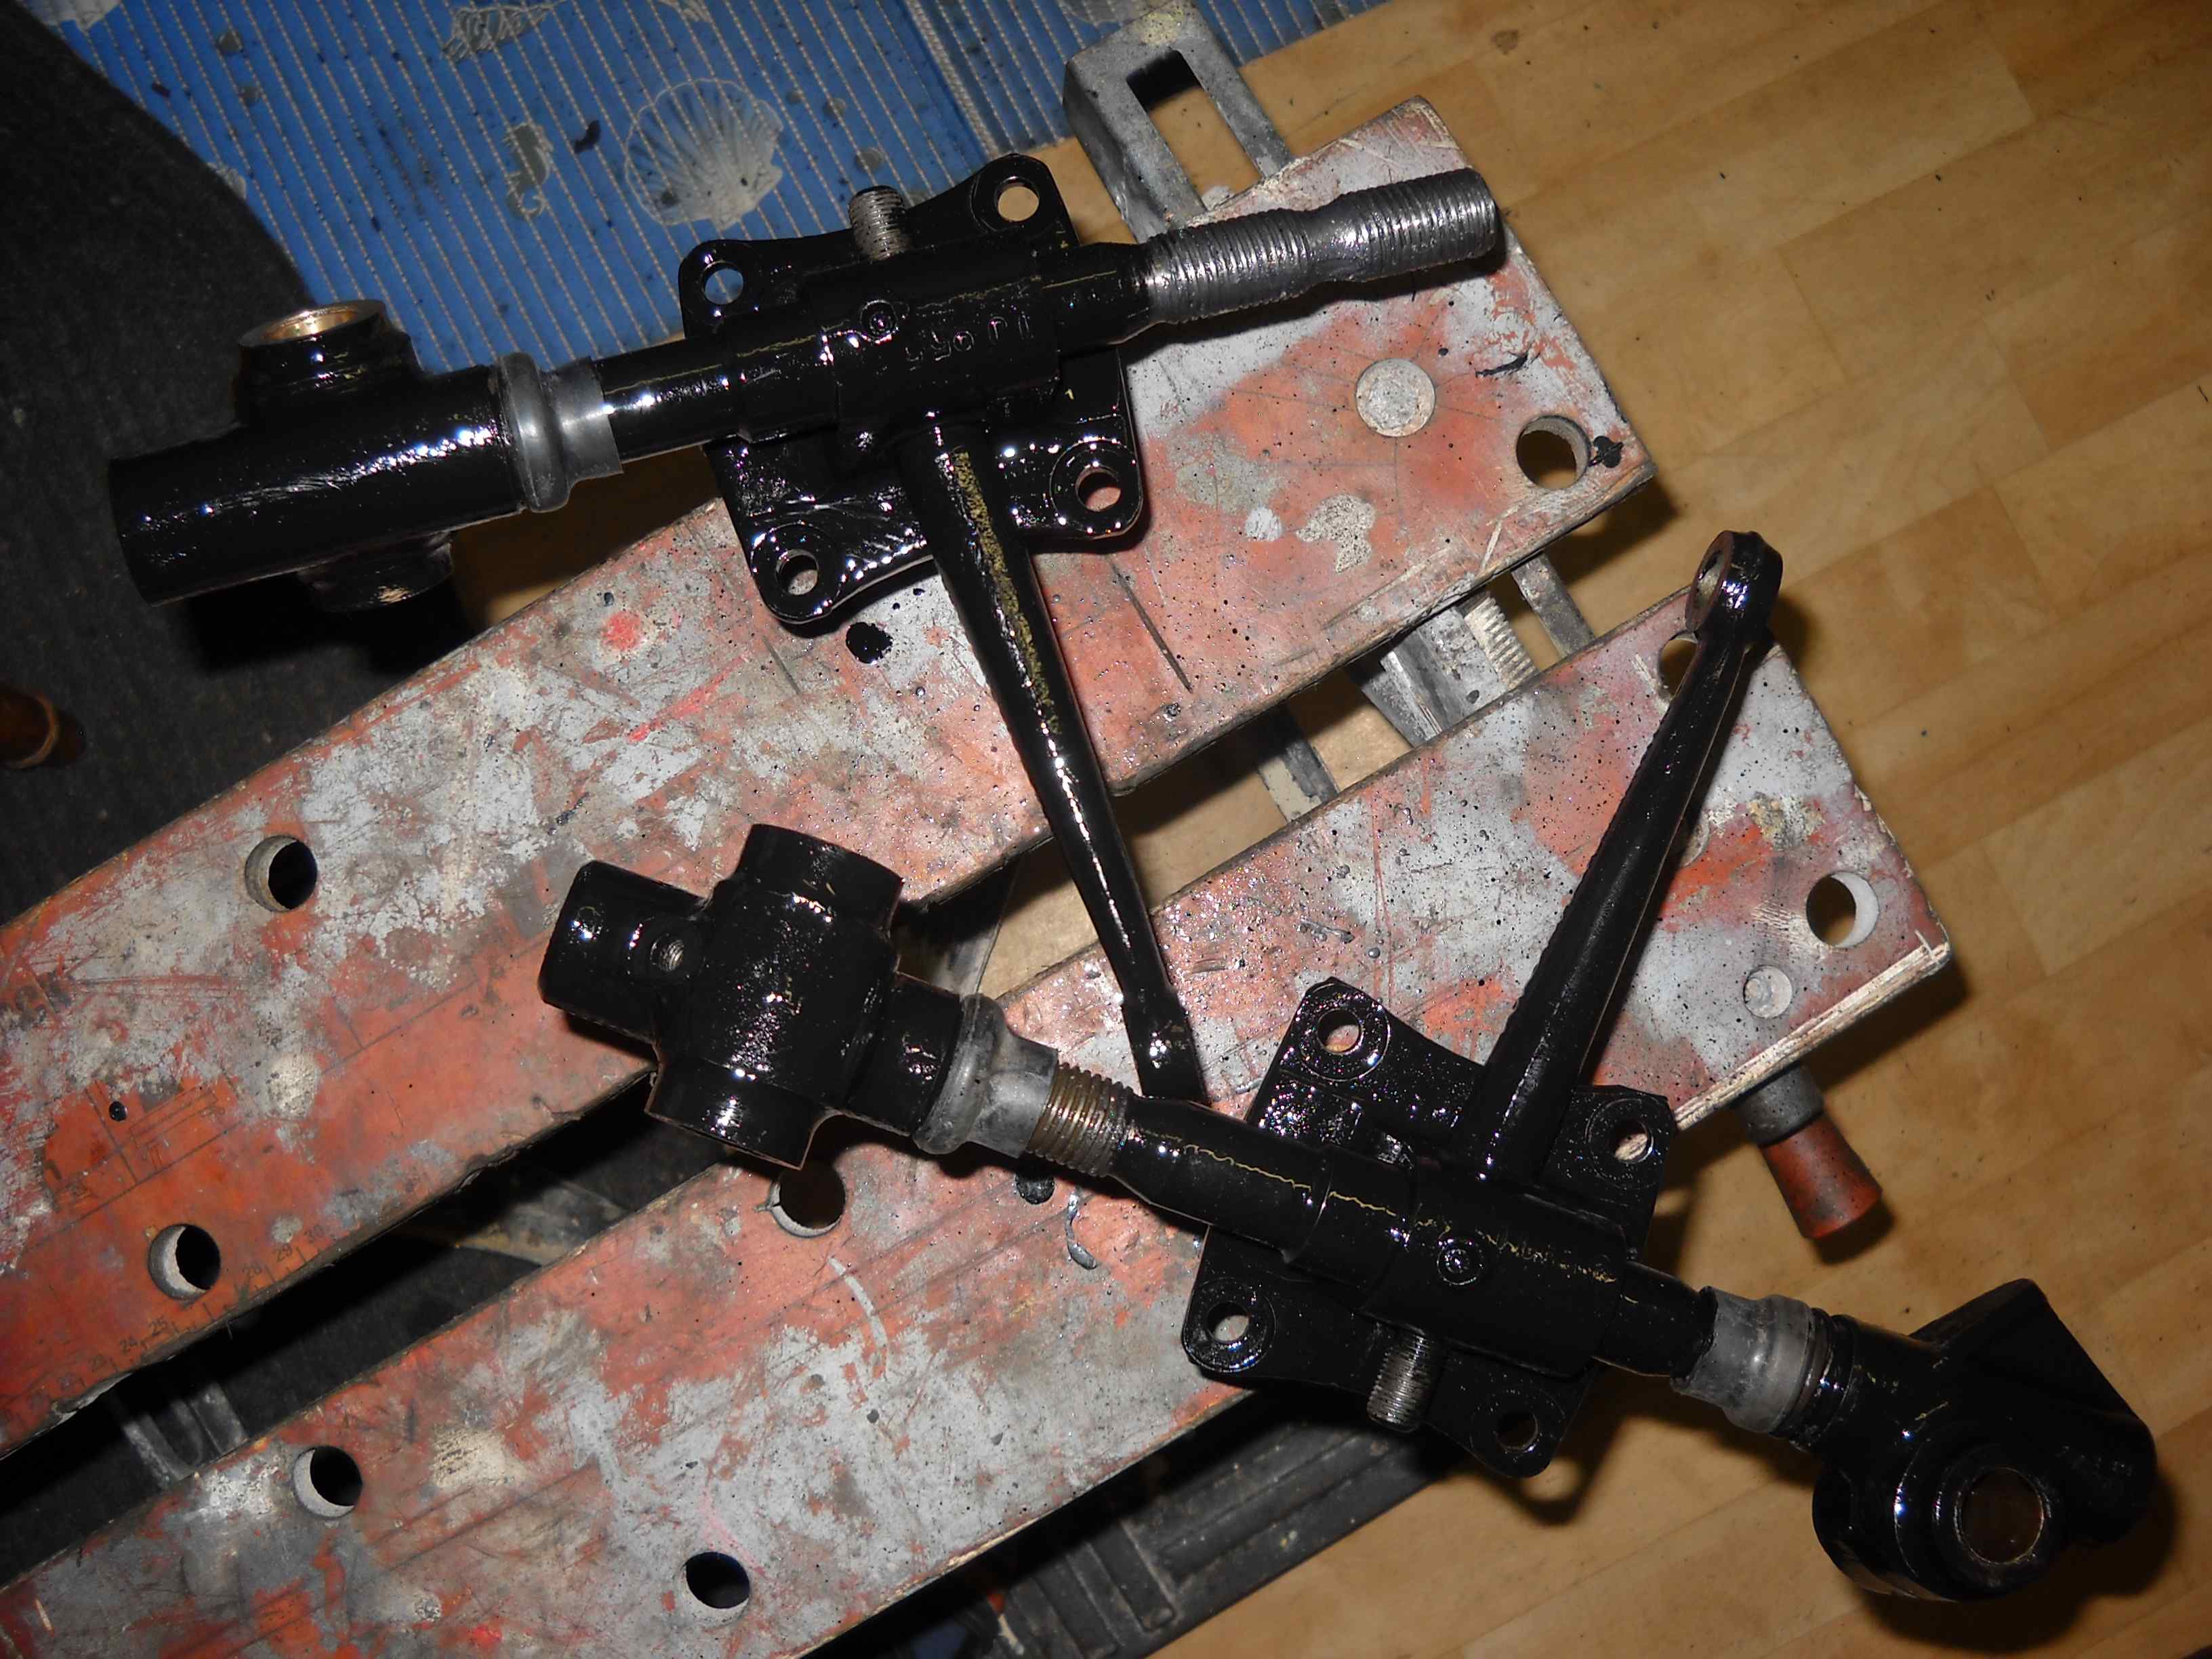 With the new swivel pin with the correct thread everything is bolted together, using new rubber seals. I gave it a good clean with a wire brush and a fresh layer of paint. The steering rack is still is good shape. Just a matter of removing all the grease. One of the rubber gaiters was torn and all the grease was on the outside. It was only a matter of cleaning, the thorough brush and a fresh layer of paint. With new rubber gaiters the steering rack is as good as new. In the meantime we collected all metal parts from the suspension, the petrol tank, suspension arms, panels of the heater, the brake drums and air filters to get them sandblasted and painted with epoxy primer. That is going to look very different....

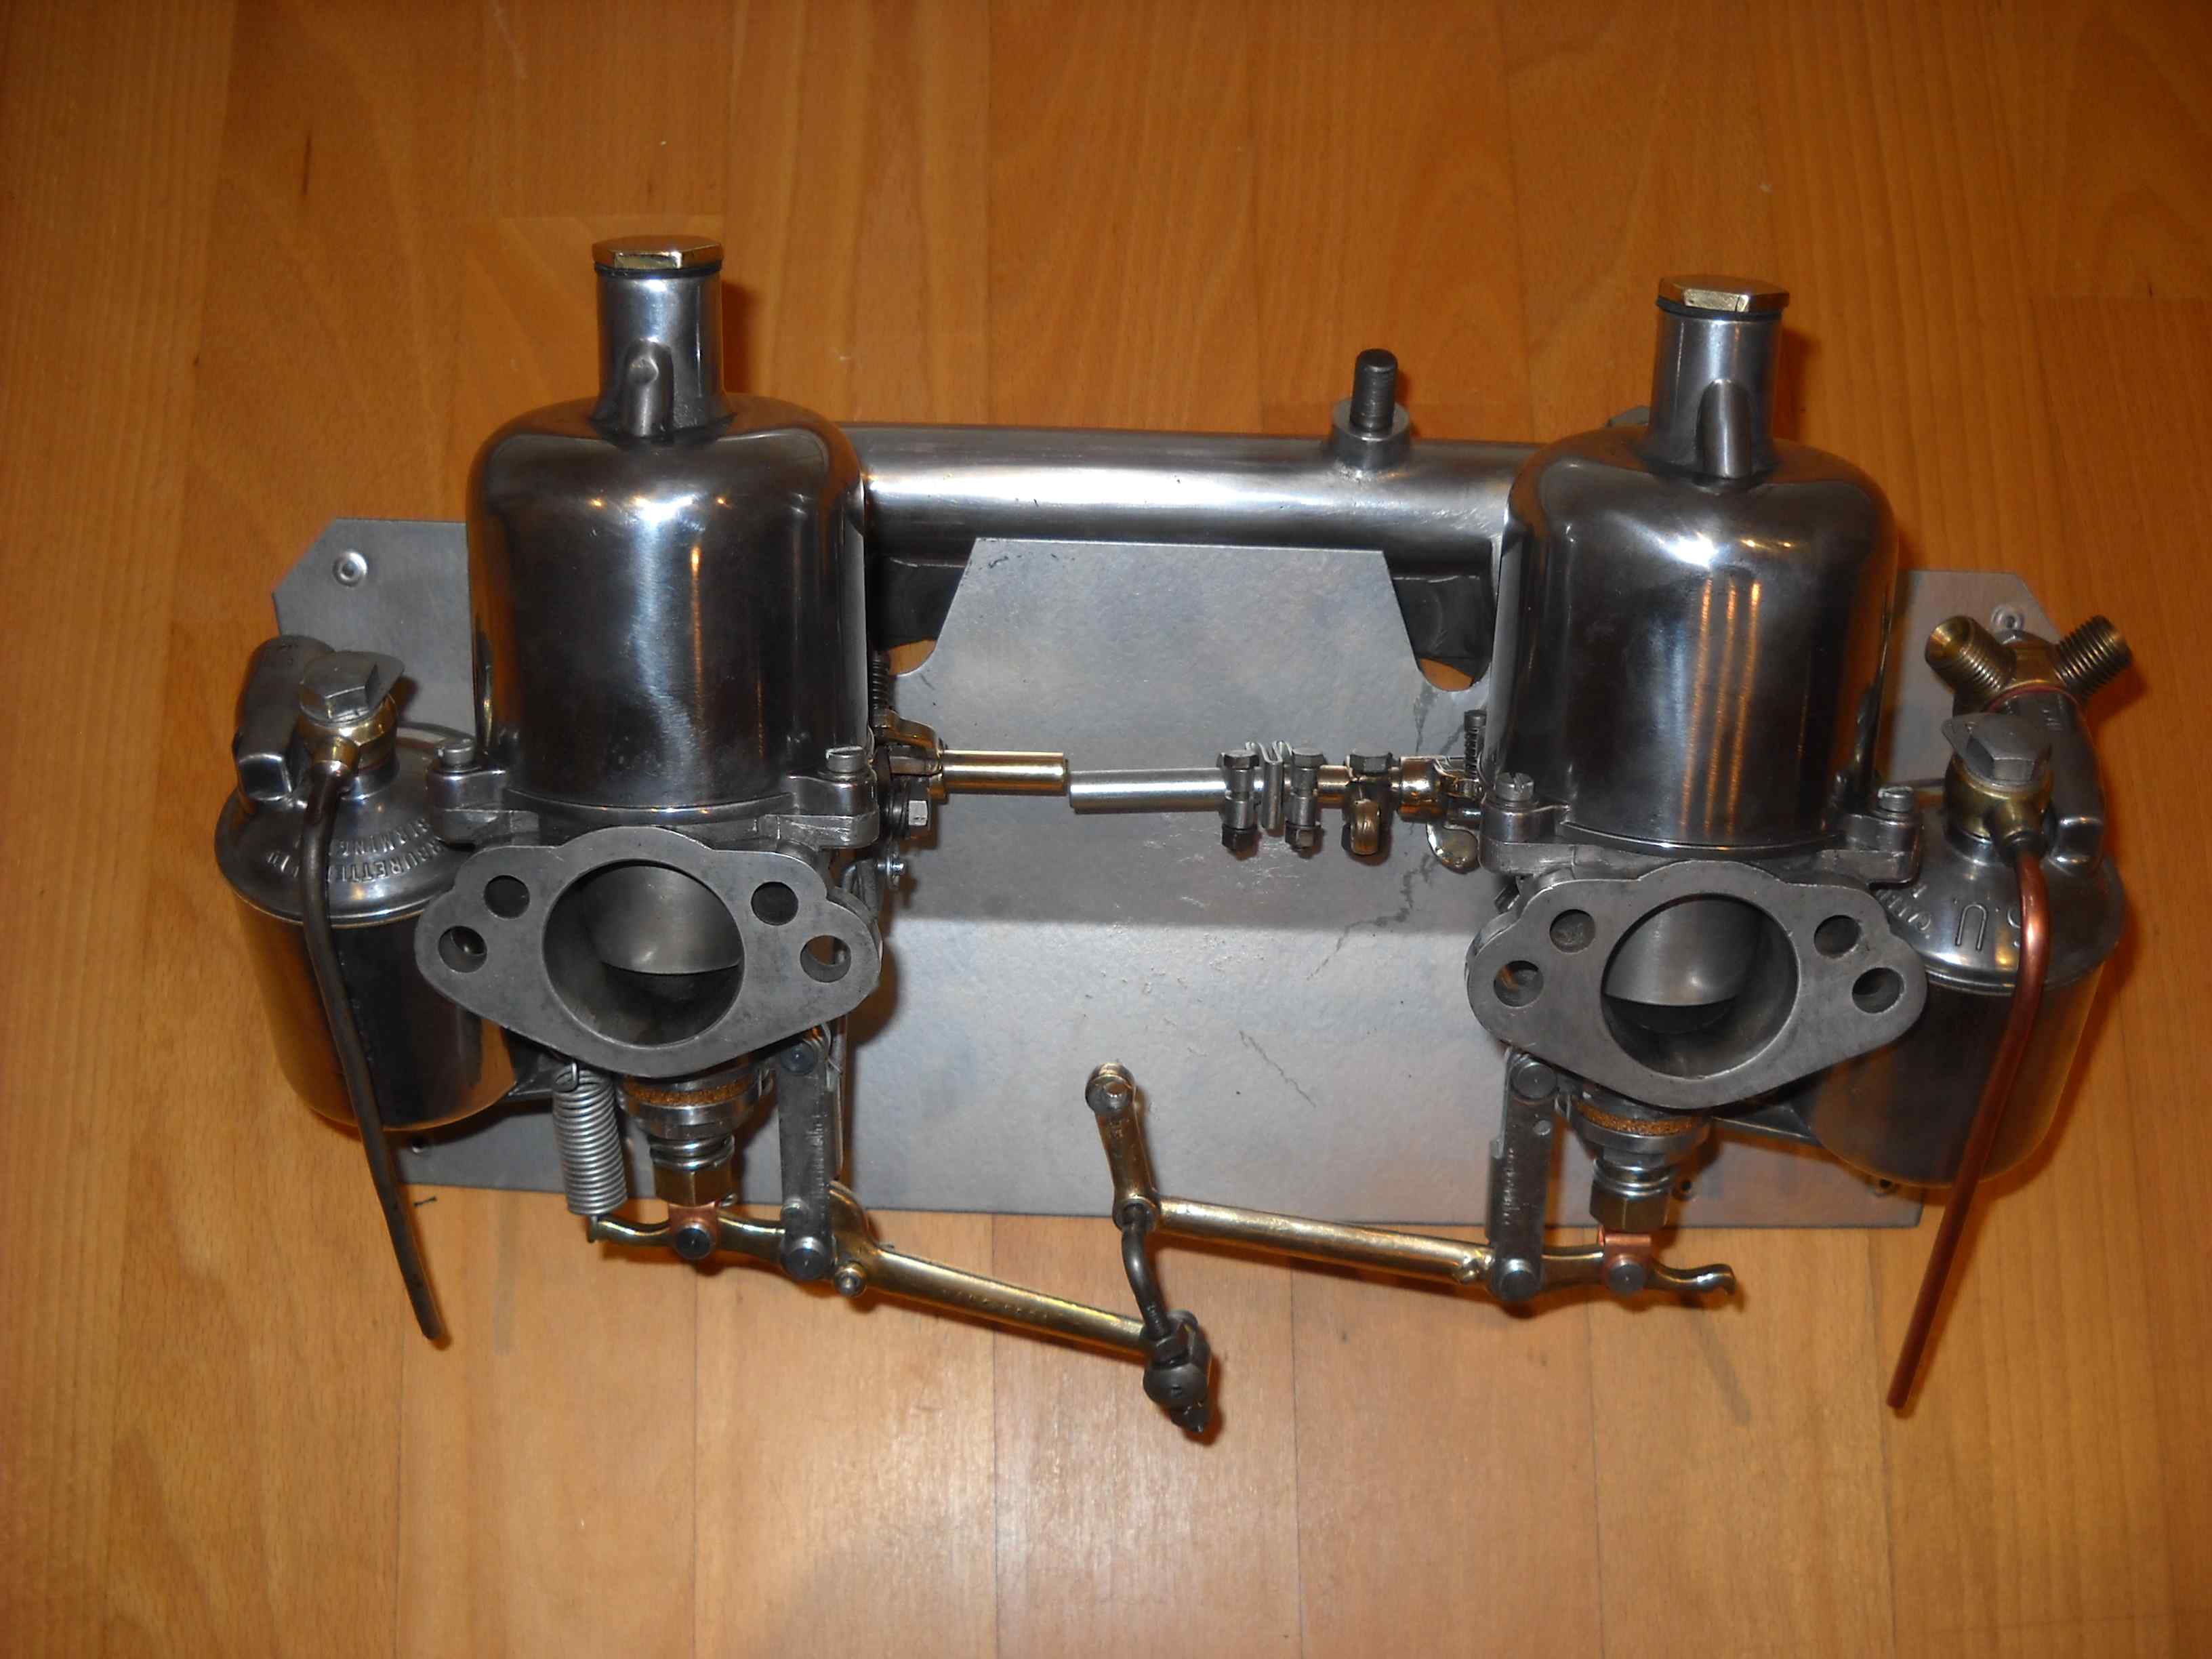
 The nicest part of all is the carburettor. We had a whole bucket of bolts and nuts re-galvanized. Among those bolts where some components of the carburettors. With a new gasket set and some other new components, it looks like new again. We had already polished some parts of the carburettors. Now we were able to put it back together again. Pretty... It is a shame this beautiful piece ends up under the bonnet. If there is a reader how knows where to get transparent MGA bonnets, then let me know....
New verb: to MG
 A couple of weeks into the New Year, it is time to pick up where we left off last year and spend some time working on the MG: to MG! It is time to check up with the engine restoration. The new pistons gave rise to a bit of discussion. There is no clear final cylinder measurement for the pistons. The brand name is 'County' and they are manufactured in Taiwan. I tried to find the values on the internet, but up to now: no answers. I guess I have to use my Taiwan connections to get these numbers. One may think why not using the original oversize value from MG? But this is not quite the same piston and it may require a different tolerance. We have some time to figure it out. If there is someone with experience, or otherwise some suggestions, let me know.
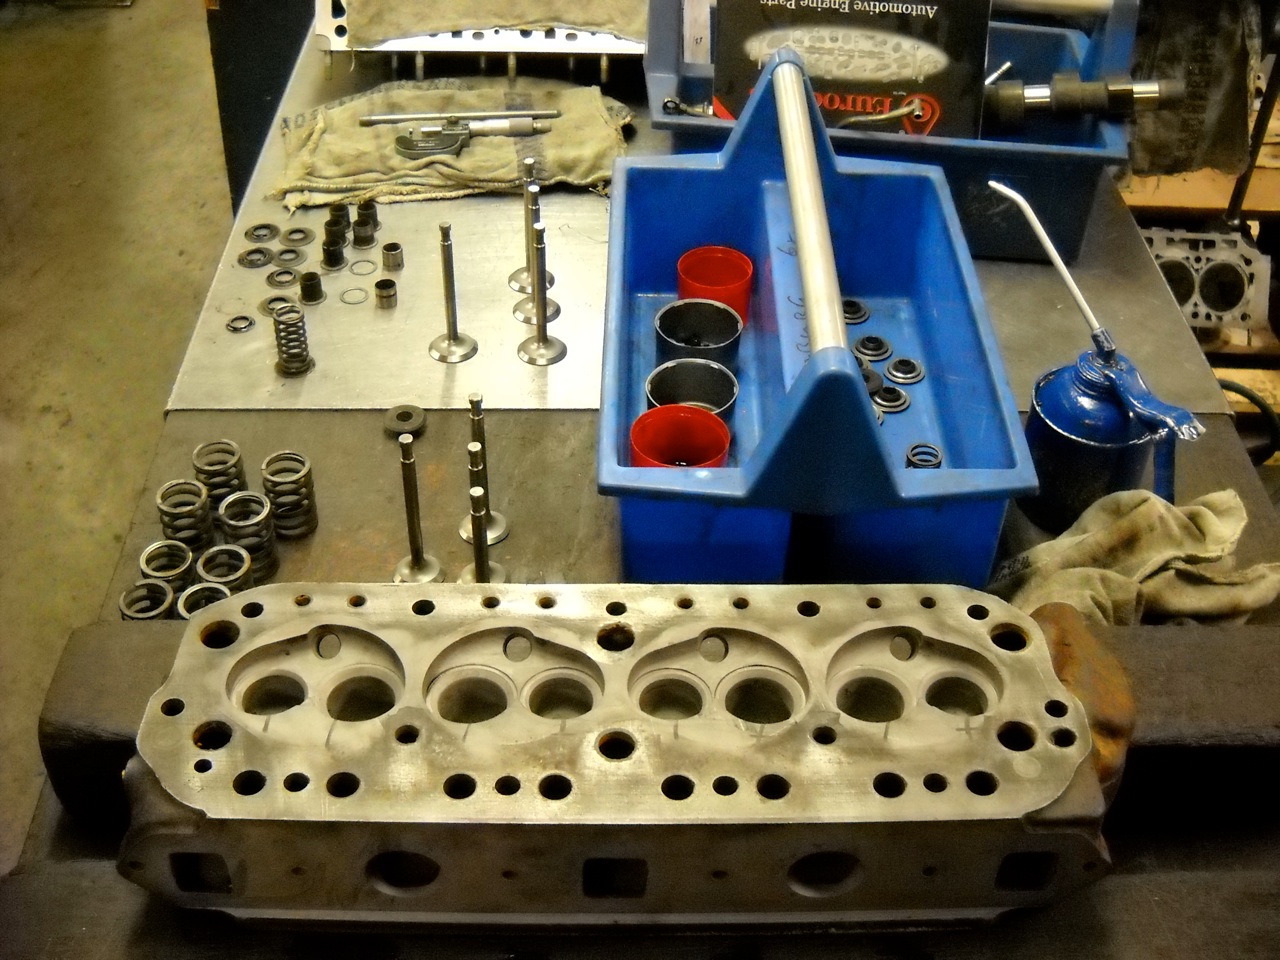
 The cylinder head requires some work. New values and value guides are needed. The play between the value and guide is too much. The value springs are not too bad, but if new ones can be found for not too much money, I'll get them new just as well. The valve rings are still ok. They are probably not for unleaded fuel, but with the few miles we do a year, it will be ok. Just keep an eye on the valve clearance...
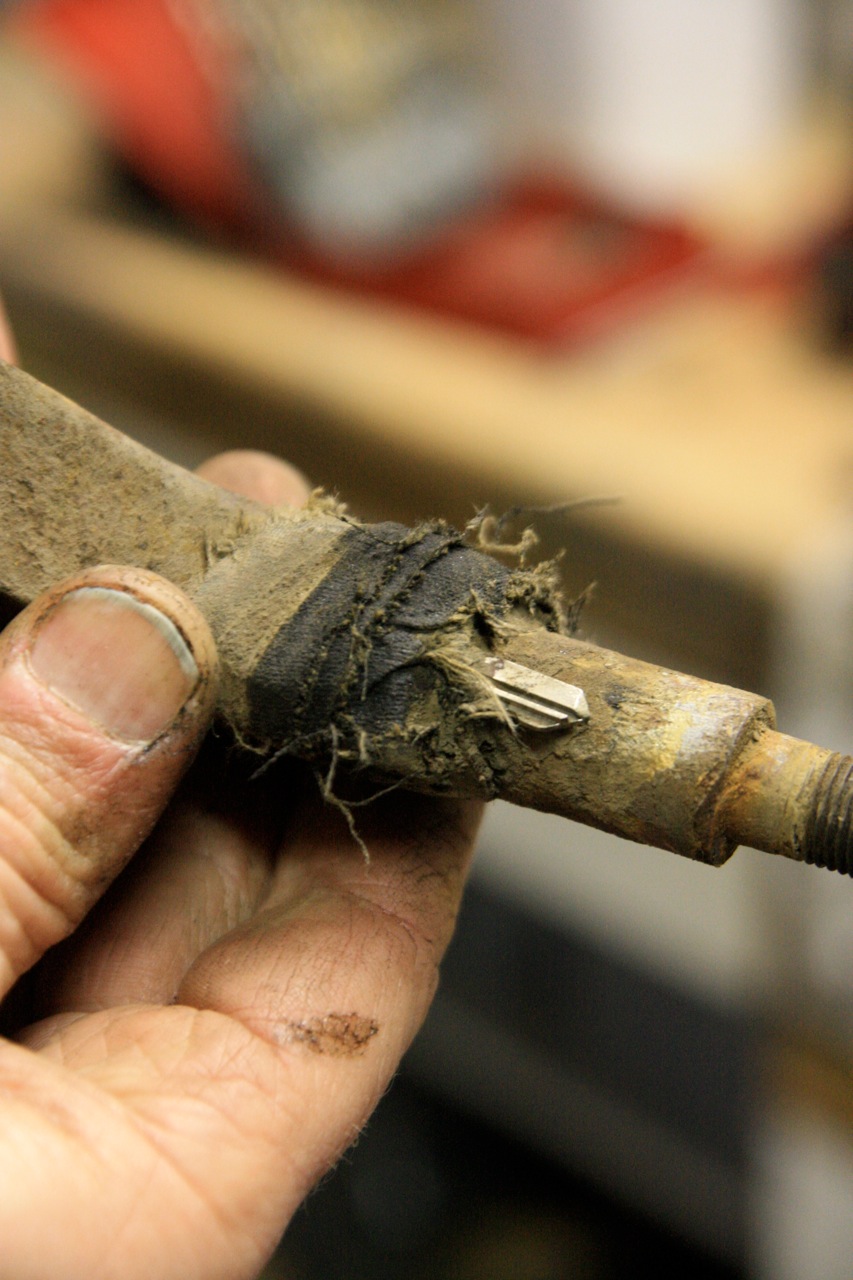
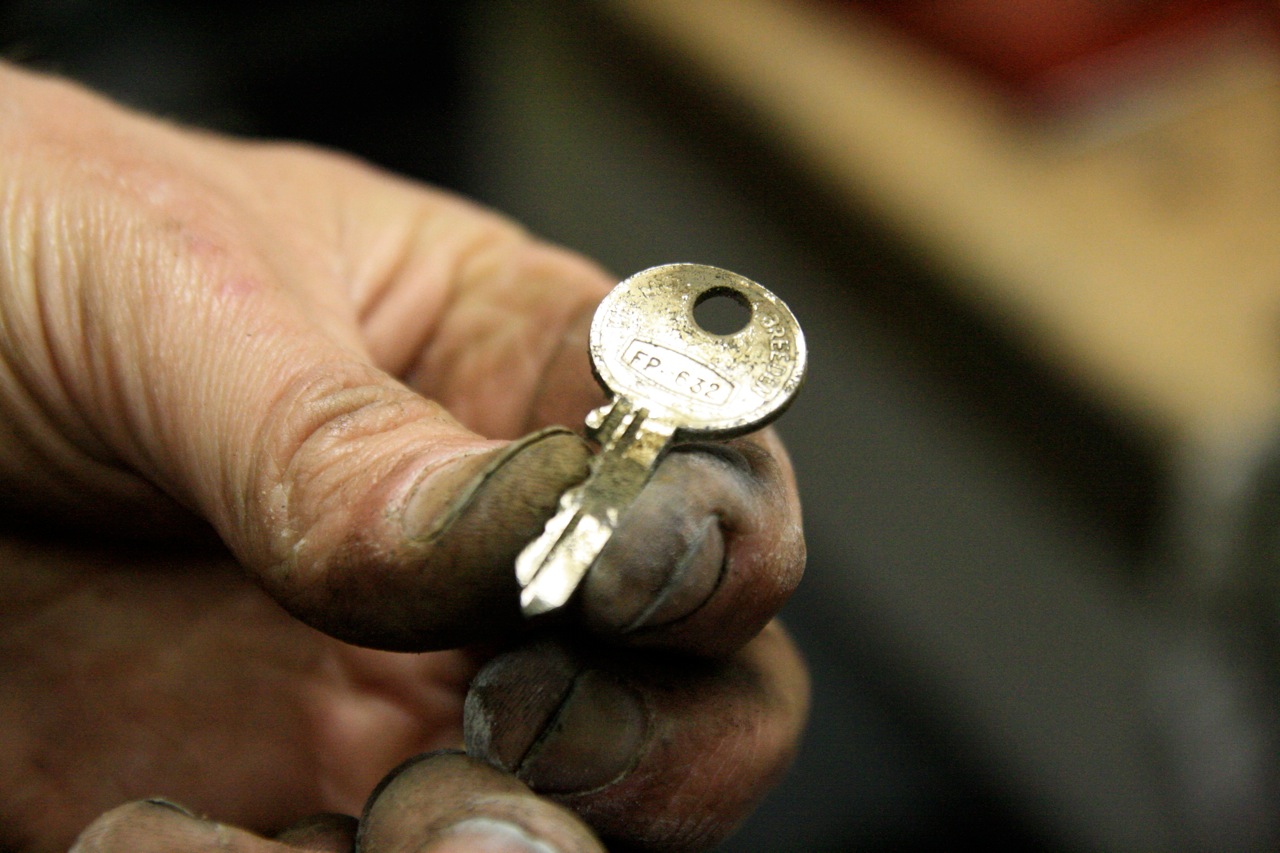 While removing the front suspension, a small piece of the chassis had to be removed. There was some tape wrapped around it. You hear those horror stories of a car taped together. So let us see what is under the tape. Out came an ignition key!! The key that was in the ignition when we bought the car was not original. But this one turns out to be much older. It looks like this is an original key!. One of the previous owners taped this to the chassis thinking to have a spare key in case he or she lost one. I bet the last owner was unaware of this, or he forgot to mention it. I will send him a note...
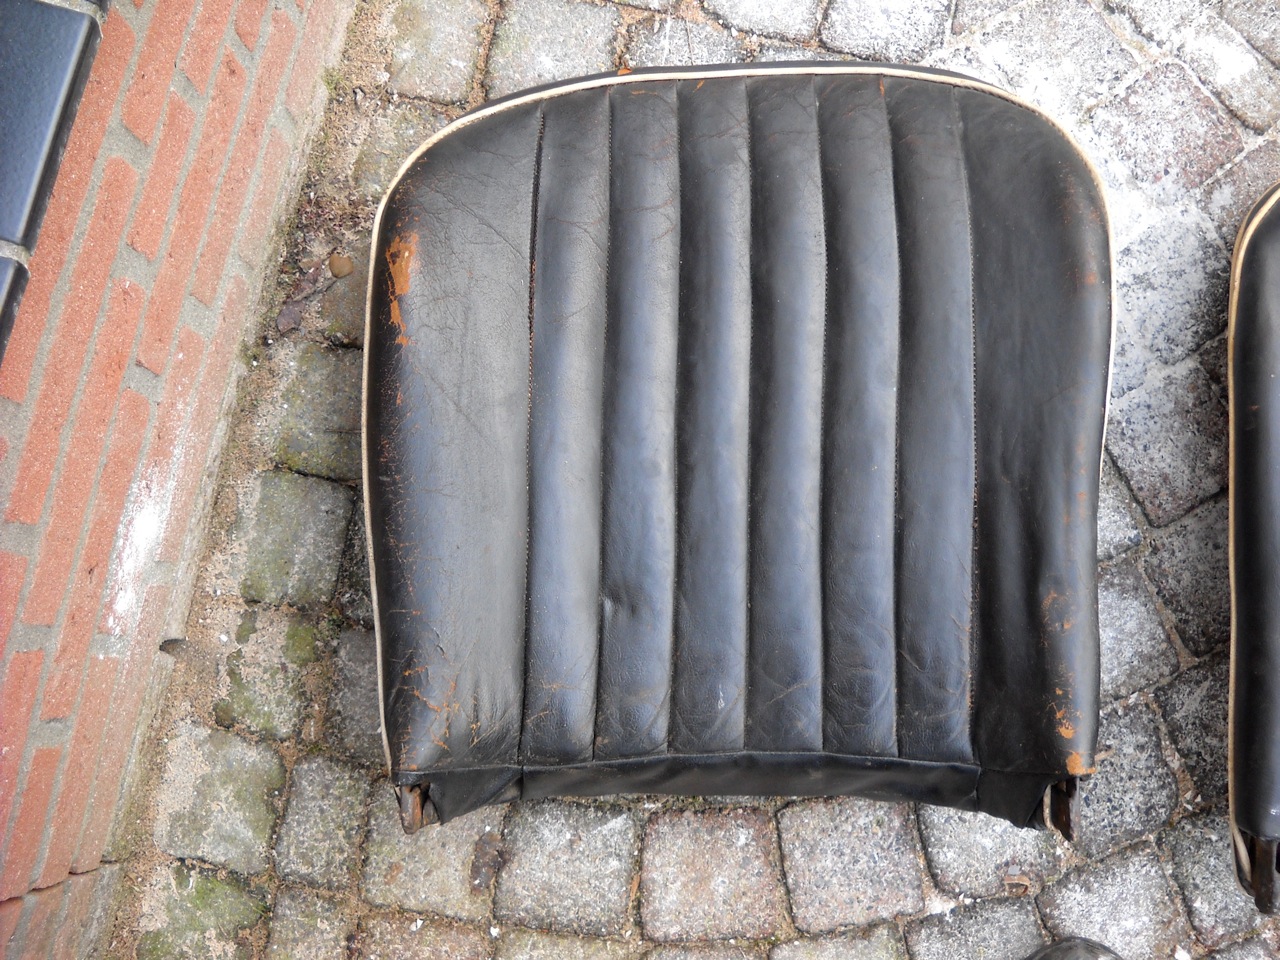
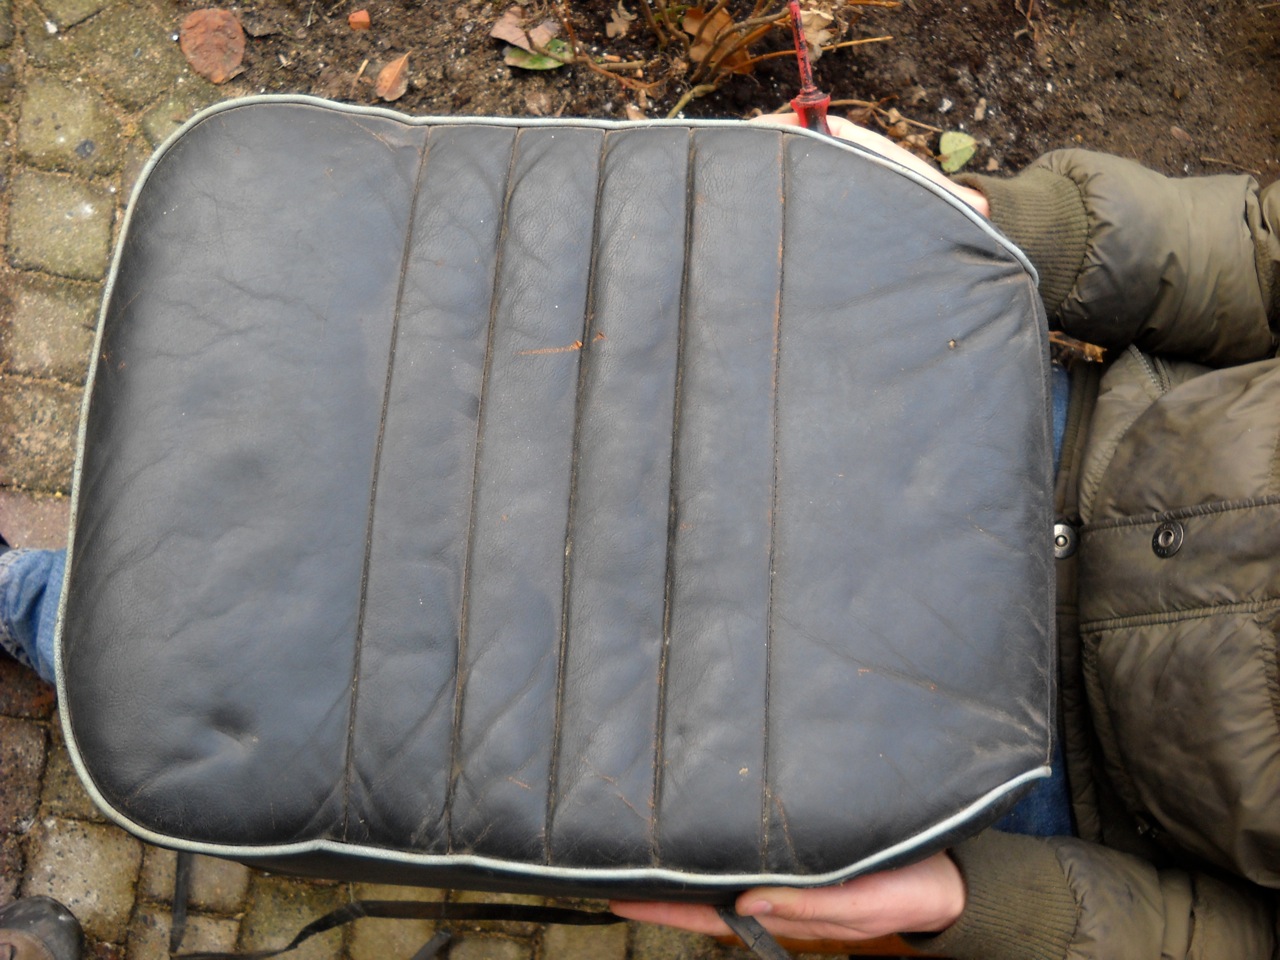 With the seats removed from the car, Daan had the honour of peeling off the leather covers and the paddings. These paddings were partly reduced to dust. Just picking them up and carrying them around leaves a nice trail. The frame was still in reasonable shape. Just sanding and paining it was sufficient. The seat frame has a plywood base. One of them was broken. Remaking it was easy: just put the original one on the new piece of plywood and saw... A fresh layer of black paint and it all looks like new. Pity they will soon be wrapped in new leather covers.
Working on the car in the Winter
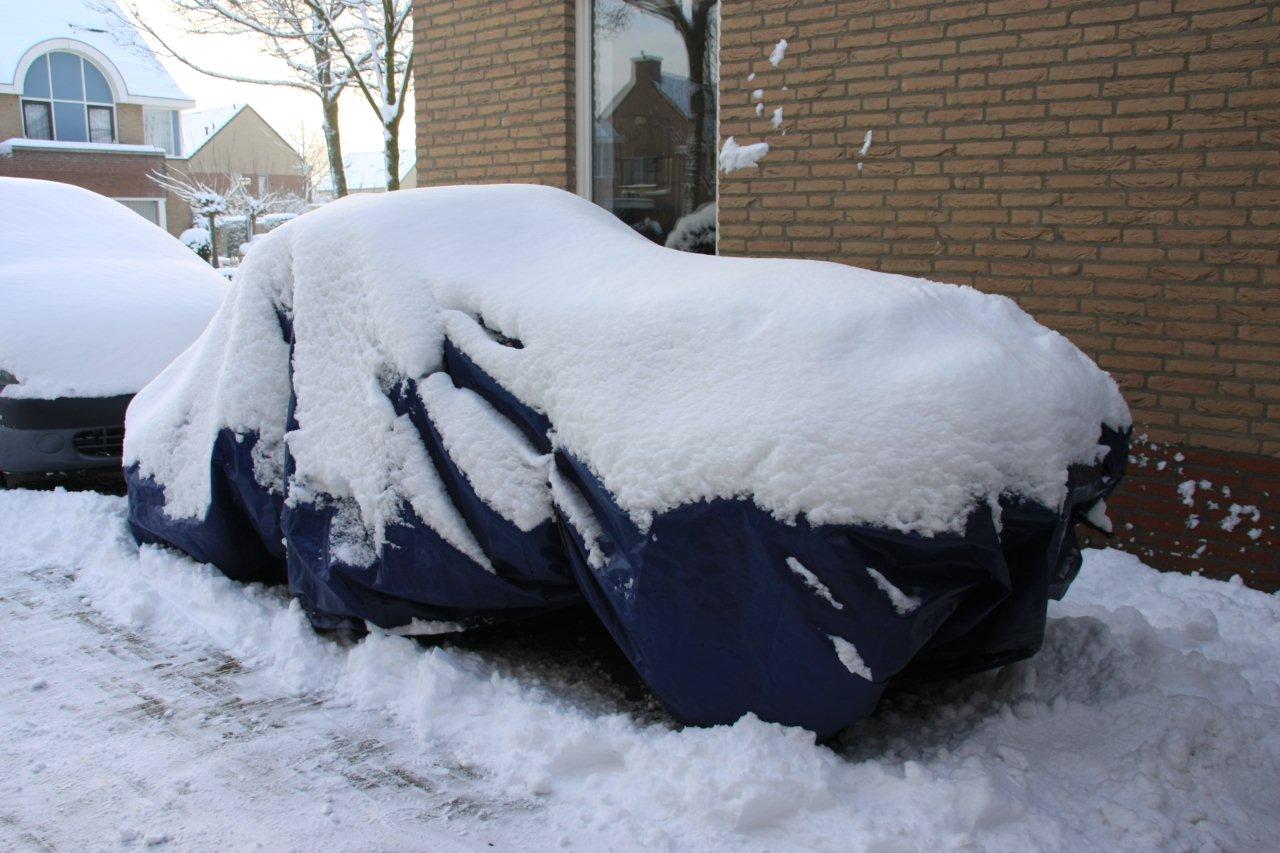 The days are getting shorter and winter is rolling in. We are heading for a Christmas with show. It is too cold to work on the car in the snow. So we have to change our plans so that work is done inside the house. The indicator switch needed attention. This is not a lever on the steering wheel, but a knob on the dashboard. You can turn it in the direction of your intended turn and escaping air from a ingenious little cylinder and piston hold the switch for a certain time. I will create a little electronics to prolong this time and make it more predictable.
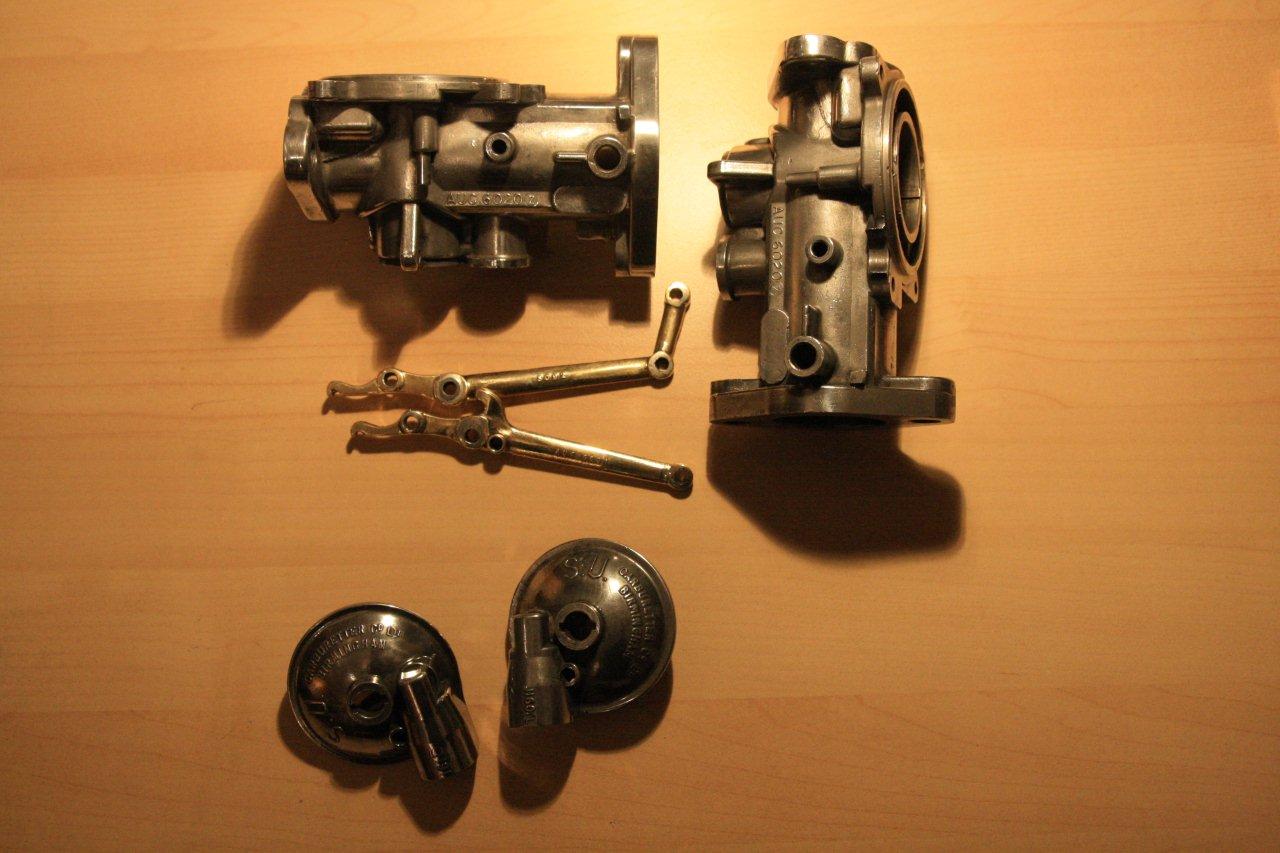
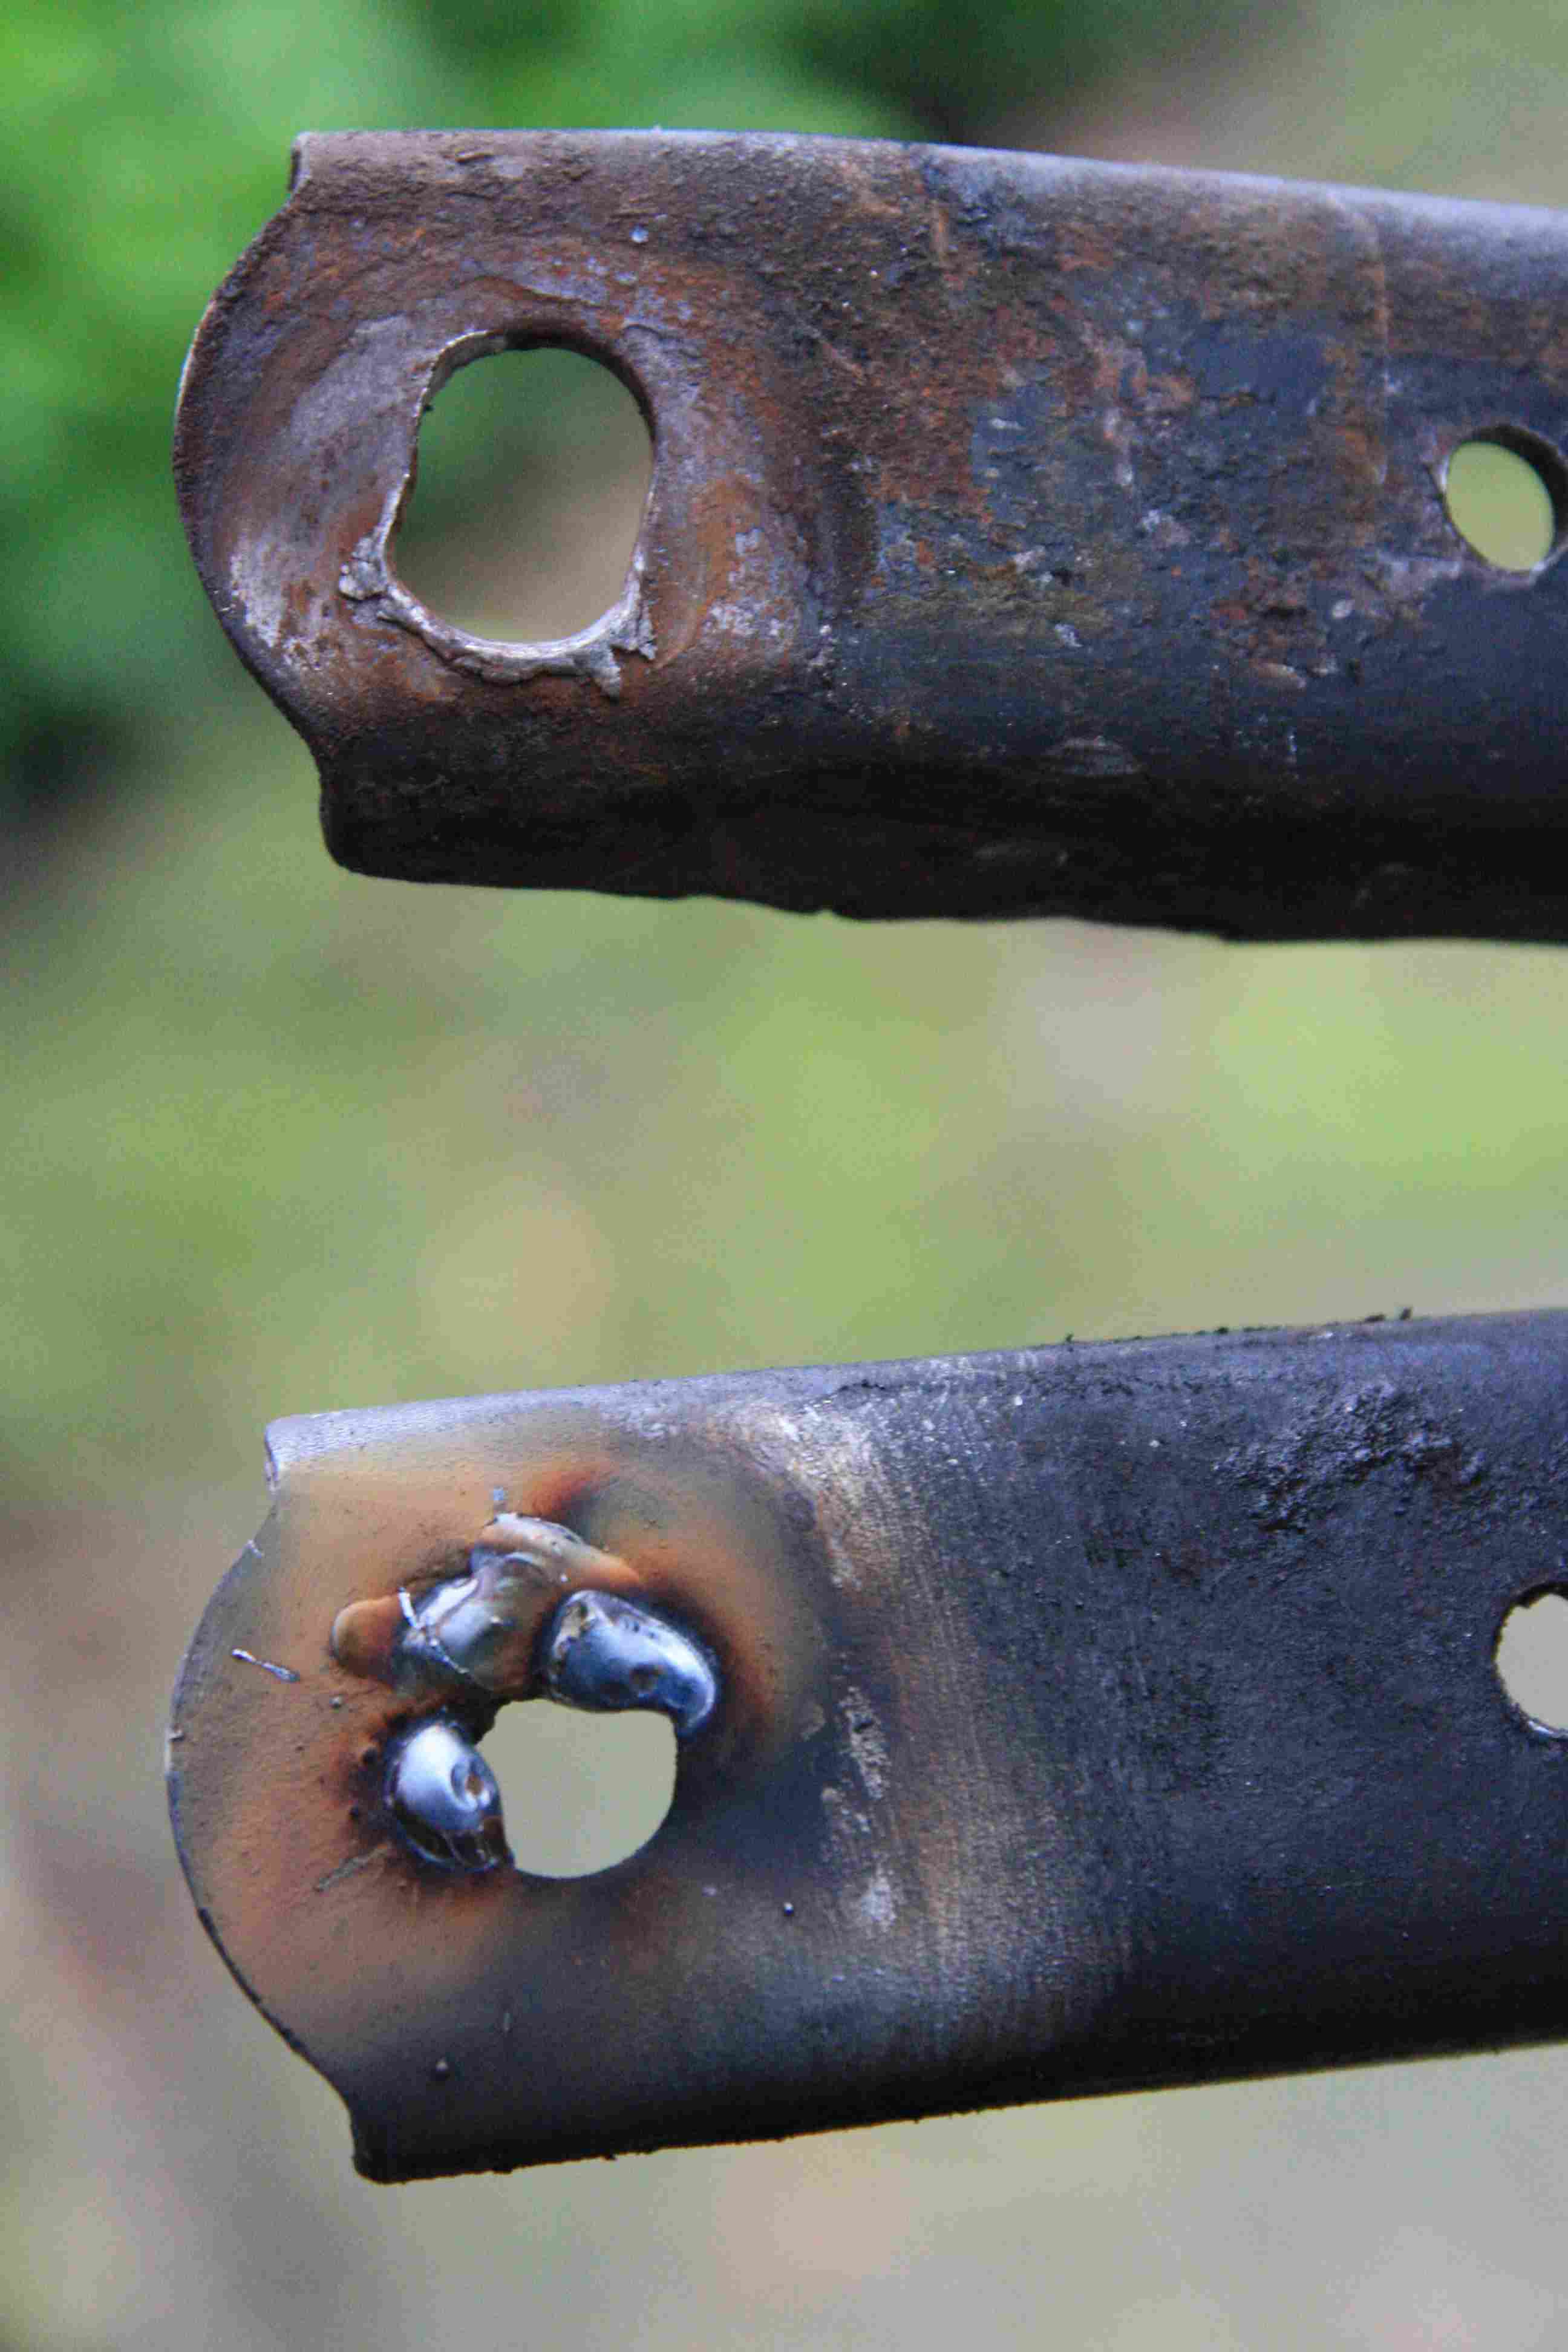
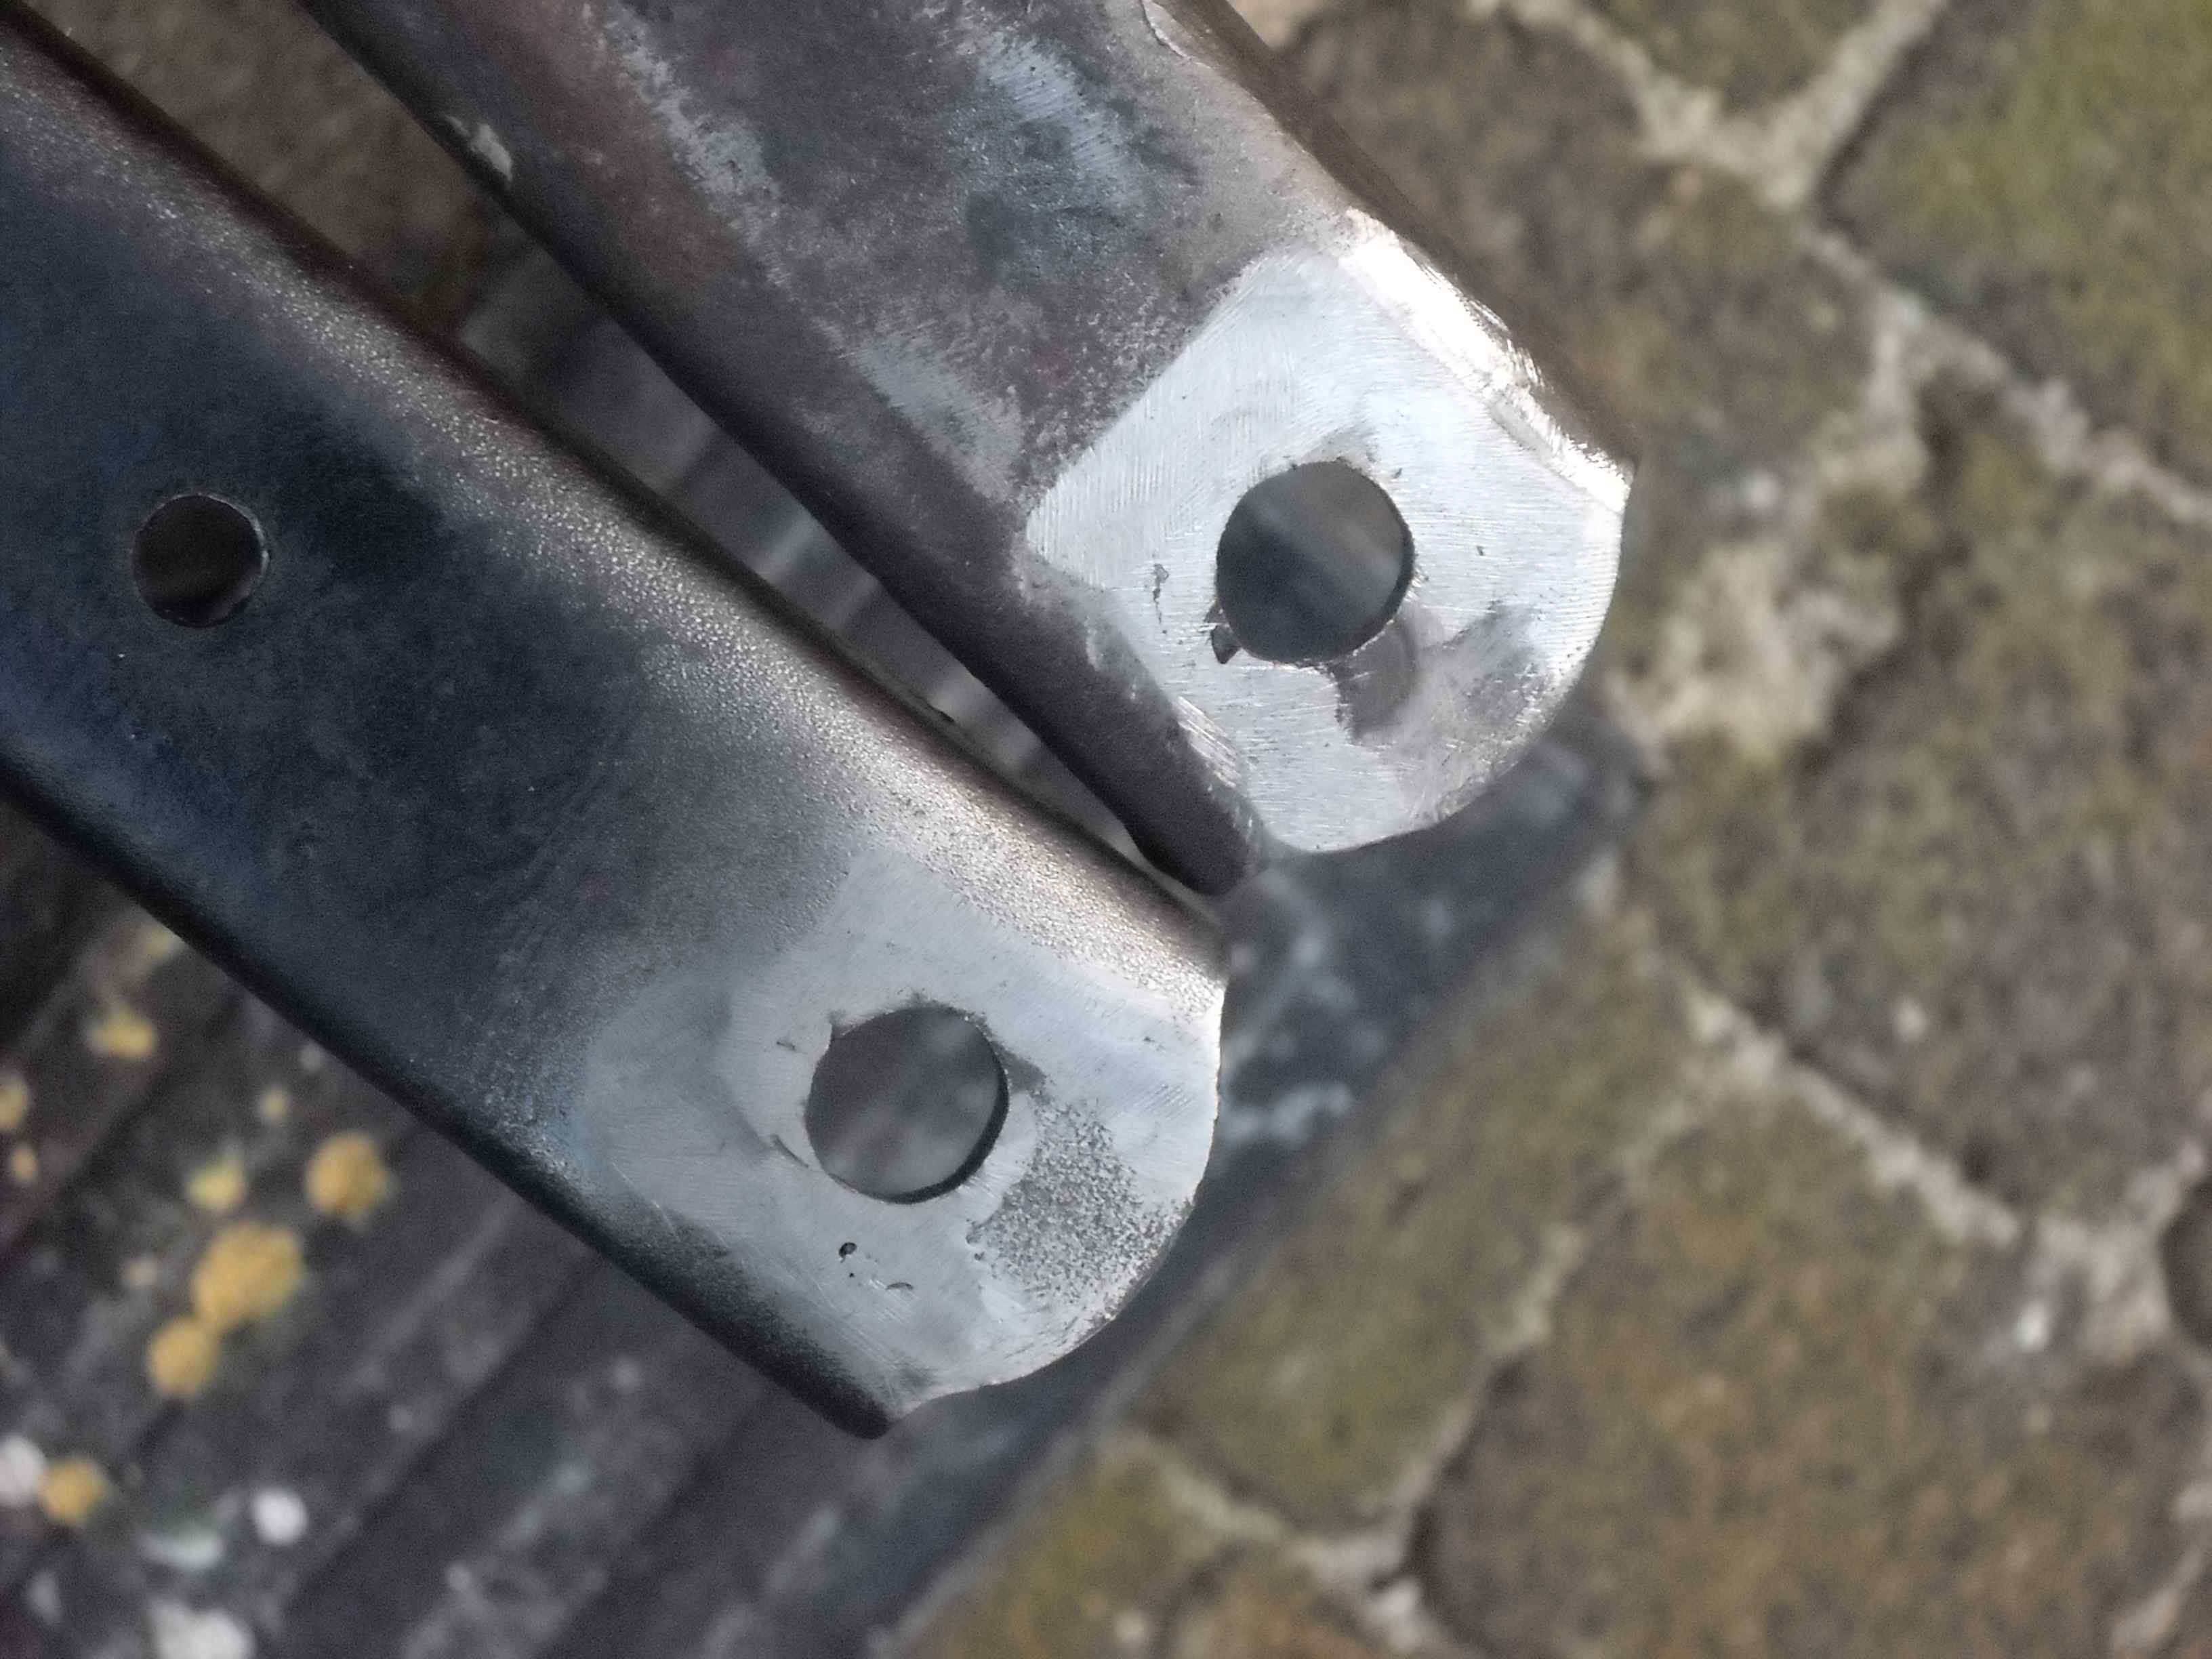
The carburettors got a serious clean and polish. We bought a rebuild kit and a book explaining how these carburettors work. All the iron parts are collected in a bucket, which is going to brought to a place where it can be galvanized. The picture shows how all the holes of the brass arms are filled up and re-bored to the original values. This will make the control much more accurate. 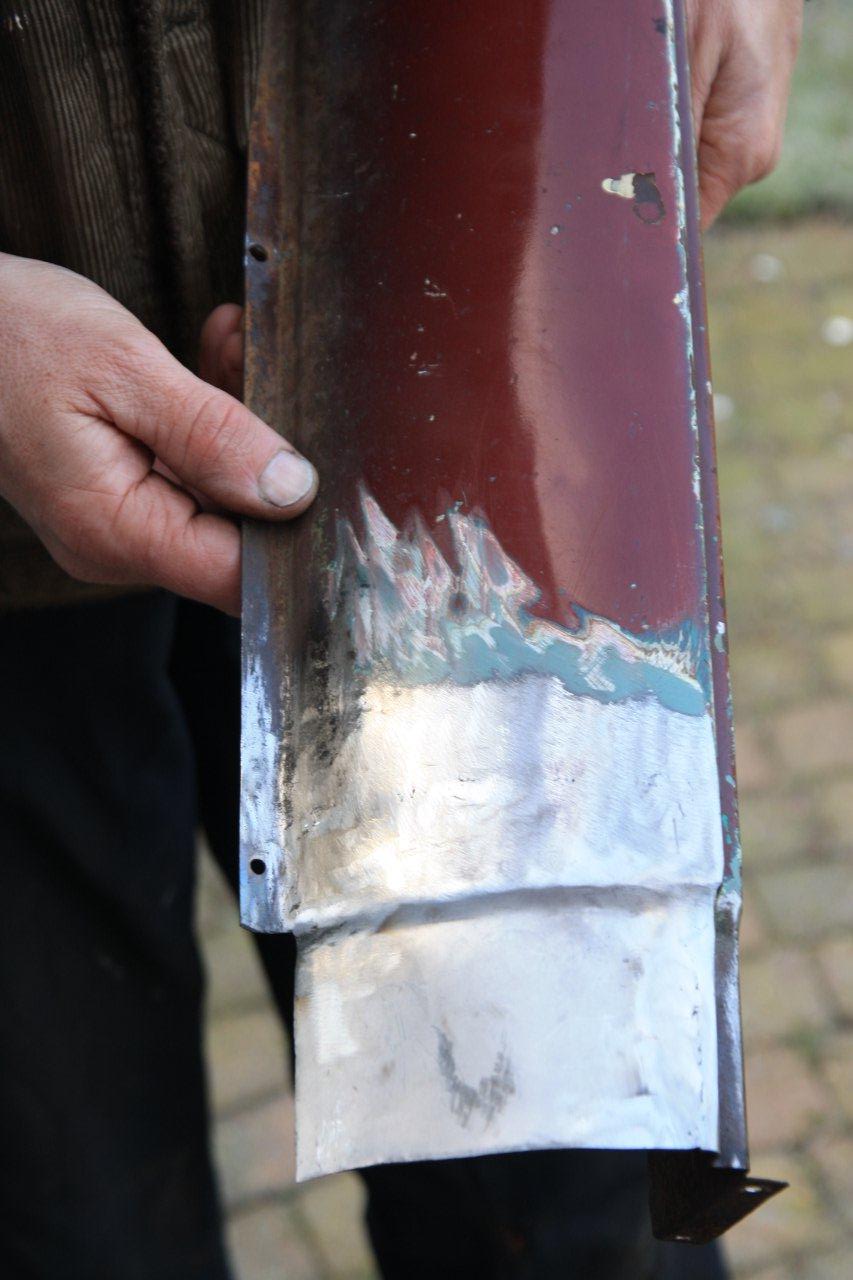
With all the panels, fenders and doors taken off, we were running out of space to store them. So we suspended all them all from the ceiling. To work on them we can take them down, cut out the bad parts and weld no parts in. The forming of new metal patches is very time consuming, but when enough time is put in make the shape right and lots of measuring and trying I'm starting master it. It is not a difficult as it seems. Take a piece of sheet metal and just start hammering. Better to do it when then neighbours are out of town. For most of the repair I use 0.8mm sheet metal. It is thin enough to form it in the right shape, and still thick enough to allow proper welding. It is fun, you should try it... I have some sheet metal pieces to get you started. I started with panels that are out of sight, next a panel that is under the door, so not quite out of sight, but not the first thing one sees either. Judge for yourself..... 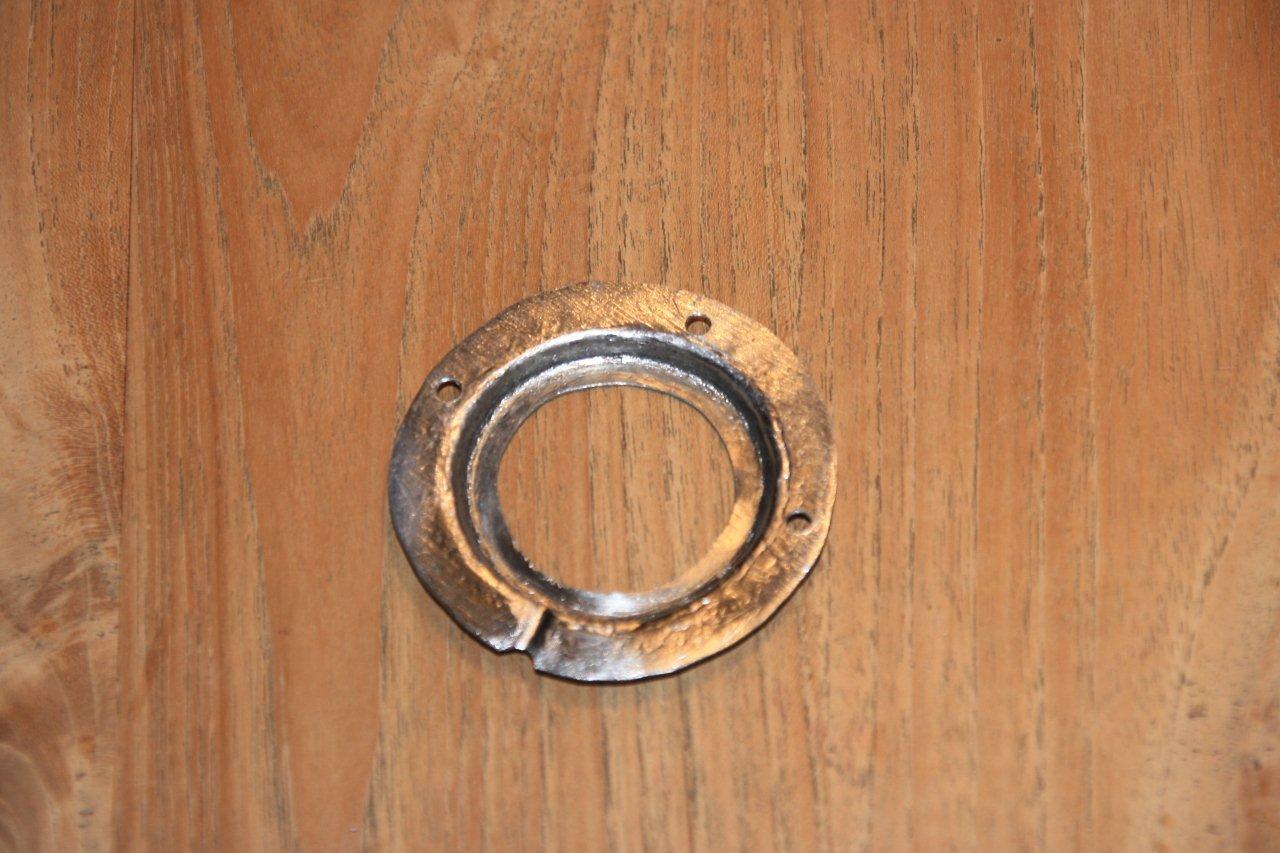
It is fun hammering shapes out of a piece of sheet metal. The oil seal holder of the camshaft drive chain cover was broken. So I started hammering for a few hours and we have a new holder. Drilled 3 holes in it and spot welded it to the cover. Let us see in 1 year time if it leaks....
Lessons in Engine restoration
 Sometimes things do not look as great as it seems. We took the engine to an expert who knows all about pistons, cylinders and cylinder heads. I was proudly showing the engine, hoping to get a 2 thumps up. He did not want to make me feel bad, so he he brought the message very careful and politically correct. But after measuring the cylinder and piston, we could see that the engine is eh “How to say … worn”. I always thought a nice smooth cylinder wall is good. But now I know that there ought to be a hone profile. A pattern of fine lines to hold the oil.
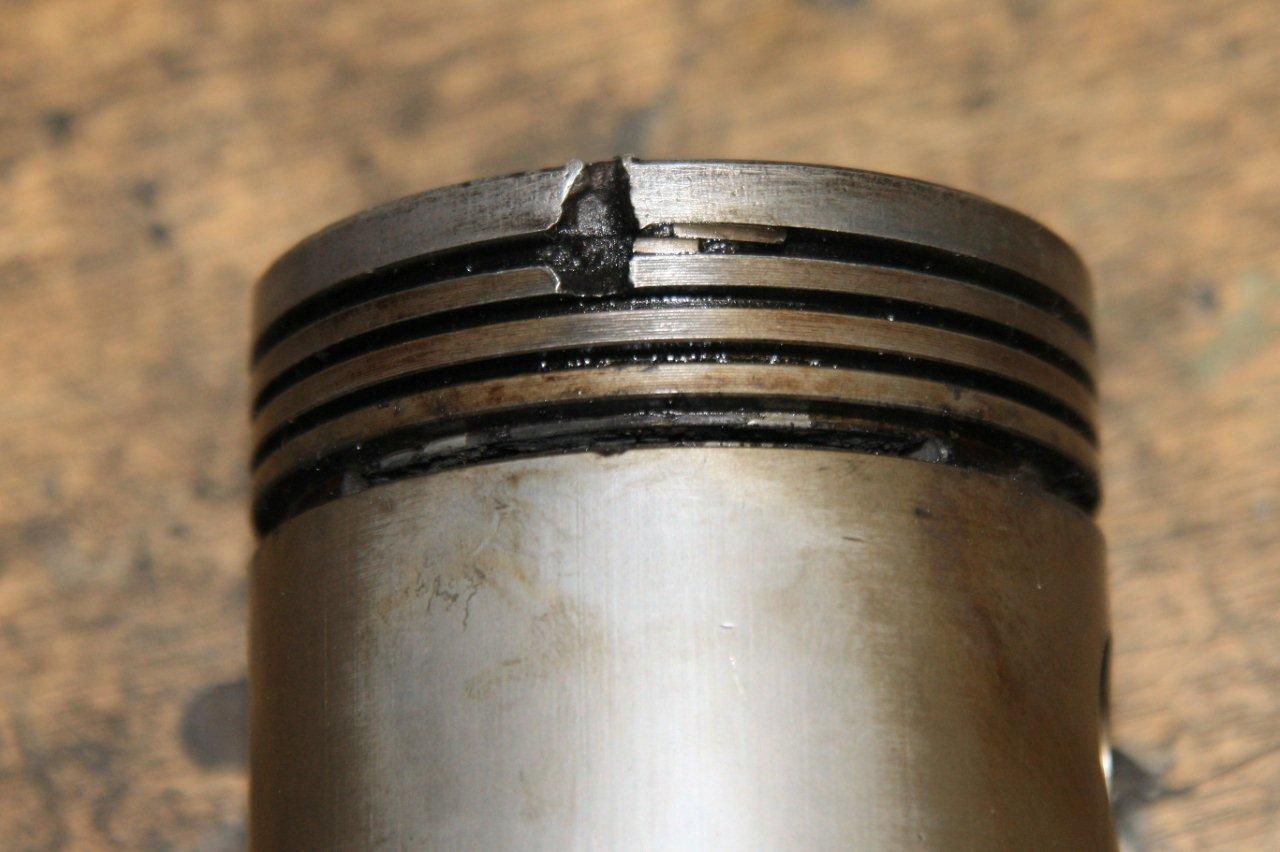
 Moreover there was even a piston with a broken ring, whereby the broken off part obviously damaged the piston itself. In the picture you can see 2 parts of the ring squeezed side by side, where only 1 ring normally fits. Needless to say there is work to be done. We decided to re-bore the cylinders to an oversized piston of 0.02". Most of the bearings show some defects, and it would be better to replace them as well.
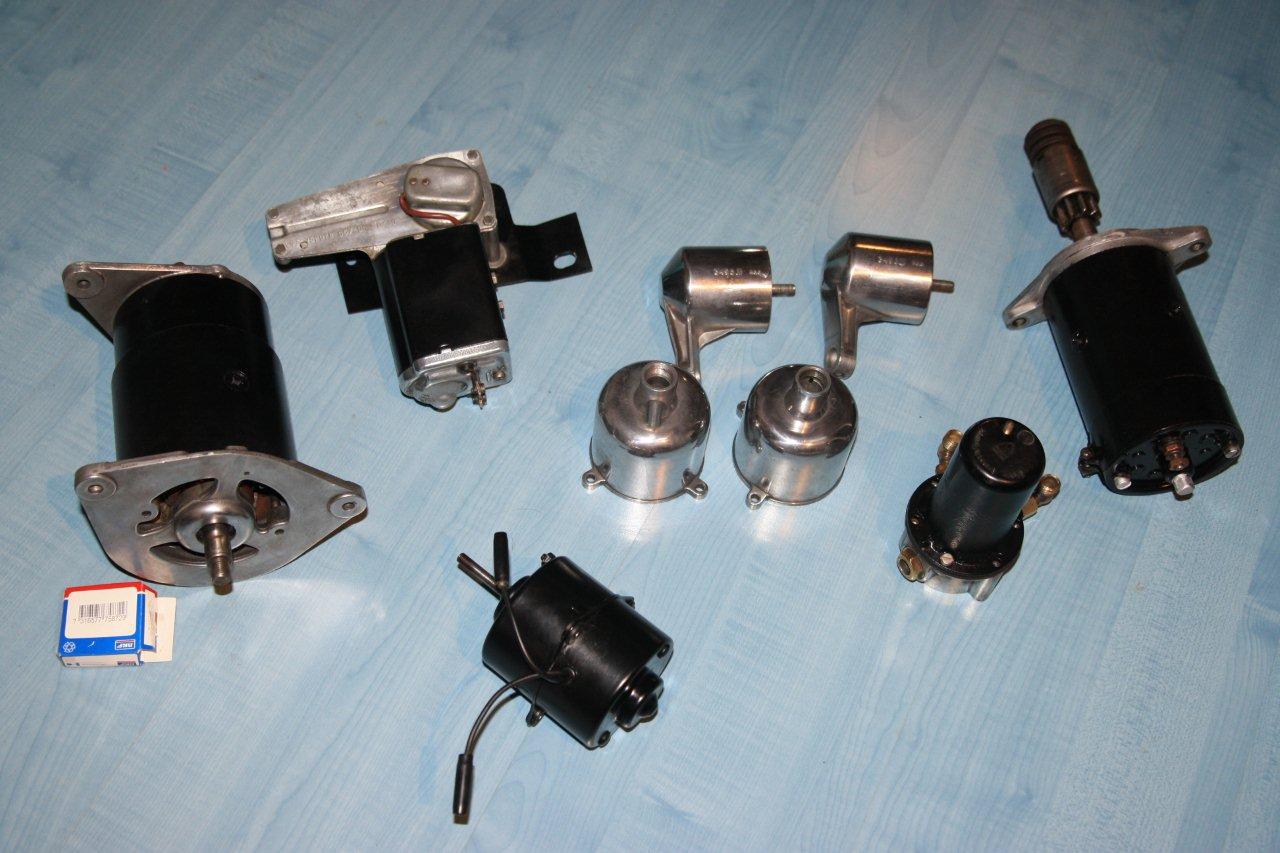
In the meantime we have been working on parts we took off in the previous weeks. The blower motor got new brushes and a new layer of paint. We welded new parts in the splash plates. Daan removed the doors and took them apart. On a rainy week-end I took the carburettors apart and polished them. 2 brass arms for the choke were seriously worn. The inner diameter of a certain hole must have been about 5mm, but measured almost 9mm now. 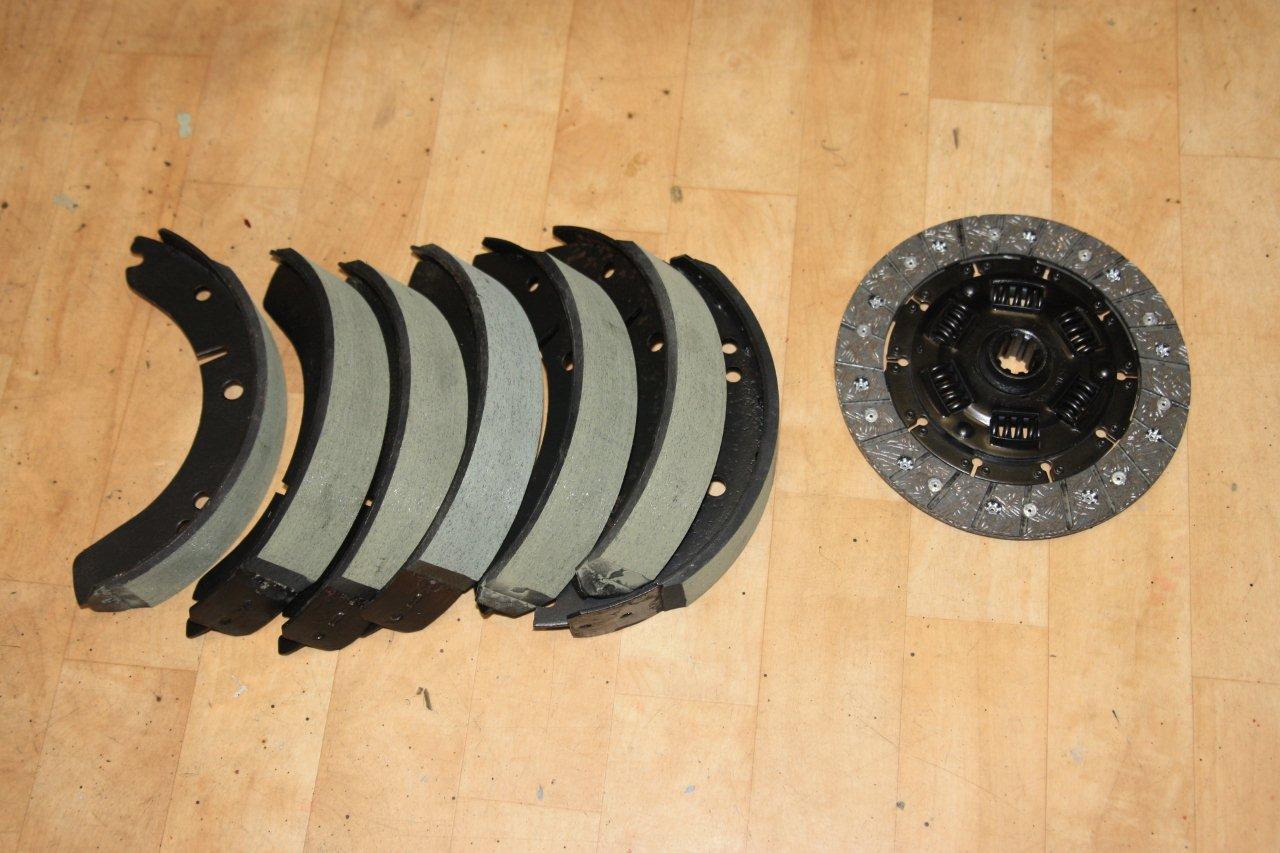 I took a bolt, and made it fit into the brass arm using a file. I filled up the spaces with solder, and drilled a new 5mm hole in the middle... and of course polished it.
The brake shoes and the clutch plate are cleaned and got new liners. I wonder when we can finally test them out...